Create automation to send reminders before and after a live event (webinar, summit, etc.)
Discover how to create complete automation for your webinar with CrocoClick: registration, tags, email reminders, sales.
Written By CrocoTeam
Last updated 4 months ago
This guide walks you through the process of setting up an automation workflow to manage a live webinar, from registration to reminders to post-event actions.
Step 1: Access Automations
Open the automation tool.
Click on "Create a workflow."
Select an automation template, for example, "Webinar registration confirmation and reminder."
Click on "Continue" to see a preview of the automation.
Step 2: Select the "Recipe - Webinar" Automation template
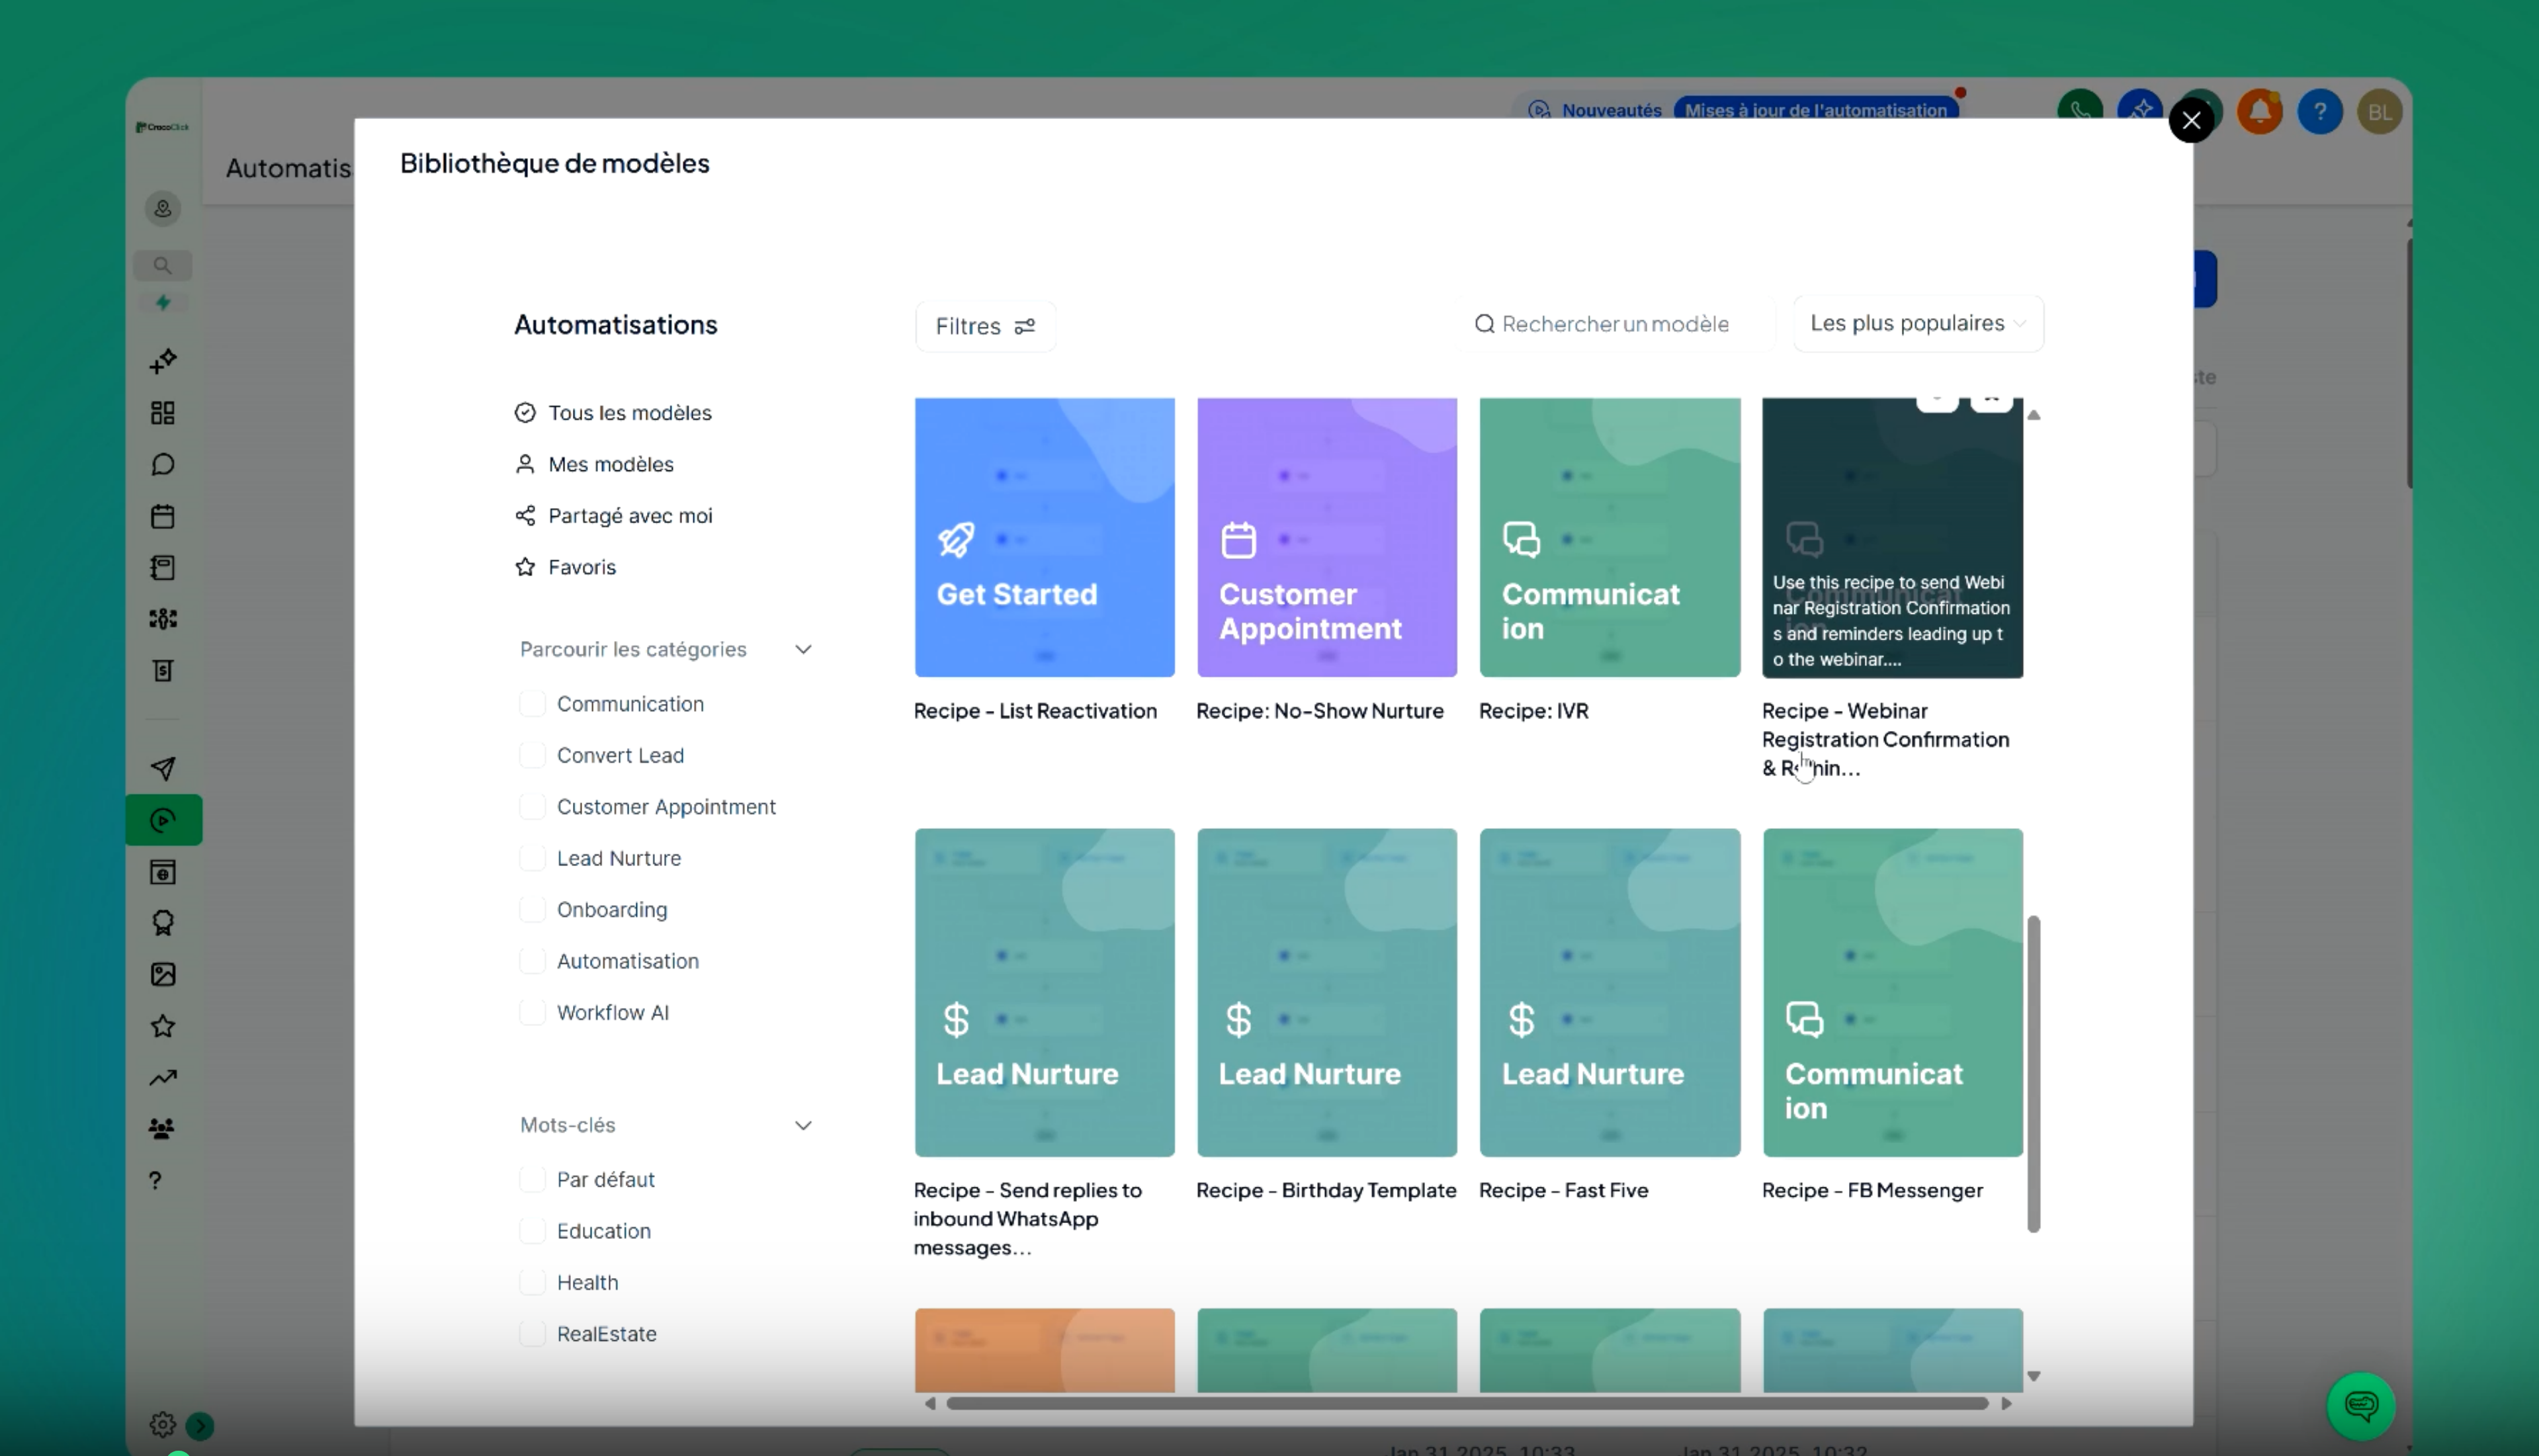
Choose an appropriate automation template, for example, "Webinar registration confirmation and reminder."
Click on the selected template.
Step 3: Configure the trigger after filling out the form
Select the registration form used for the webinar (e.g.,
formulaire webinaire).If the form does not appear, delete and reapply the filter in the trigger settings.
🔴 SPECIFICITY: If you use the CrocoLive feature...
You do not need to select a form.
In the "other" settings of your CrocoLive webinar, simply configure the addition of the contact in the automation you are building at the time of their registration.
To do this:
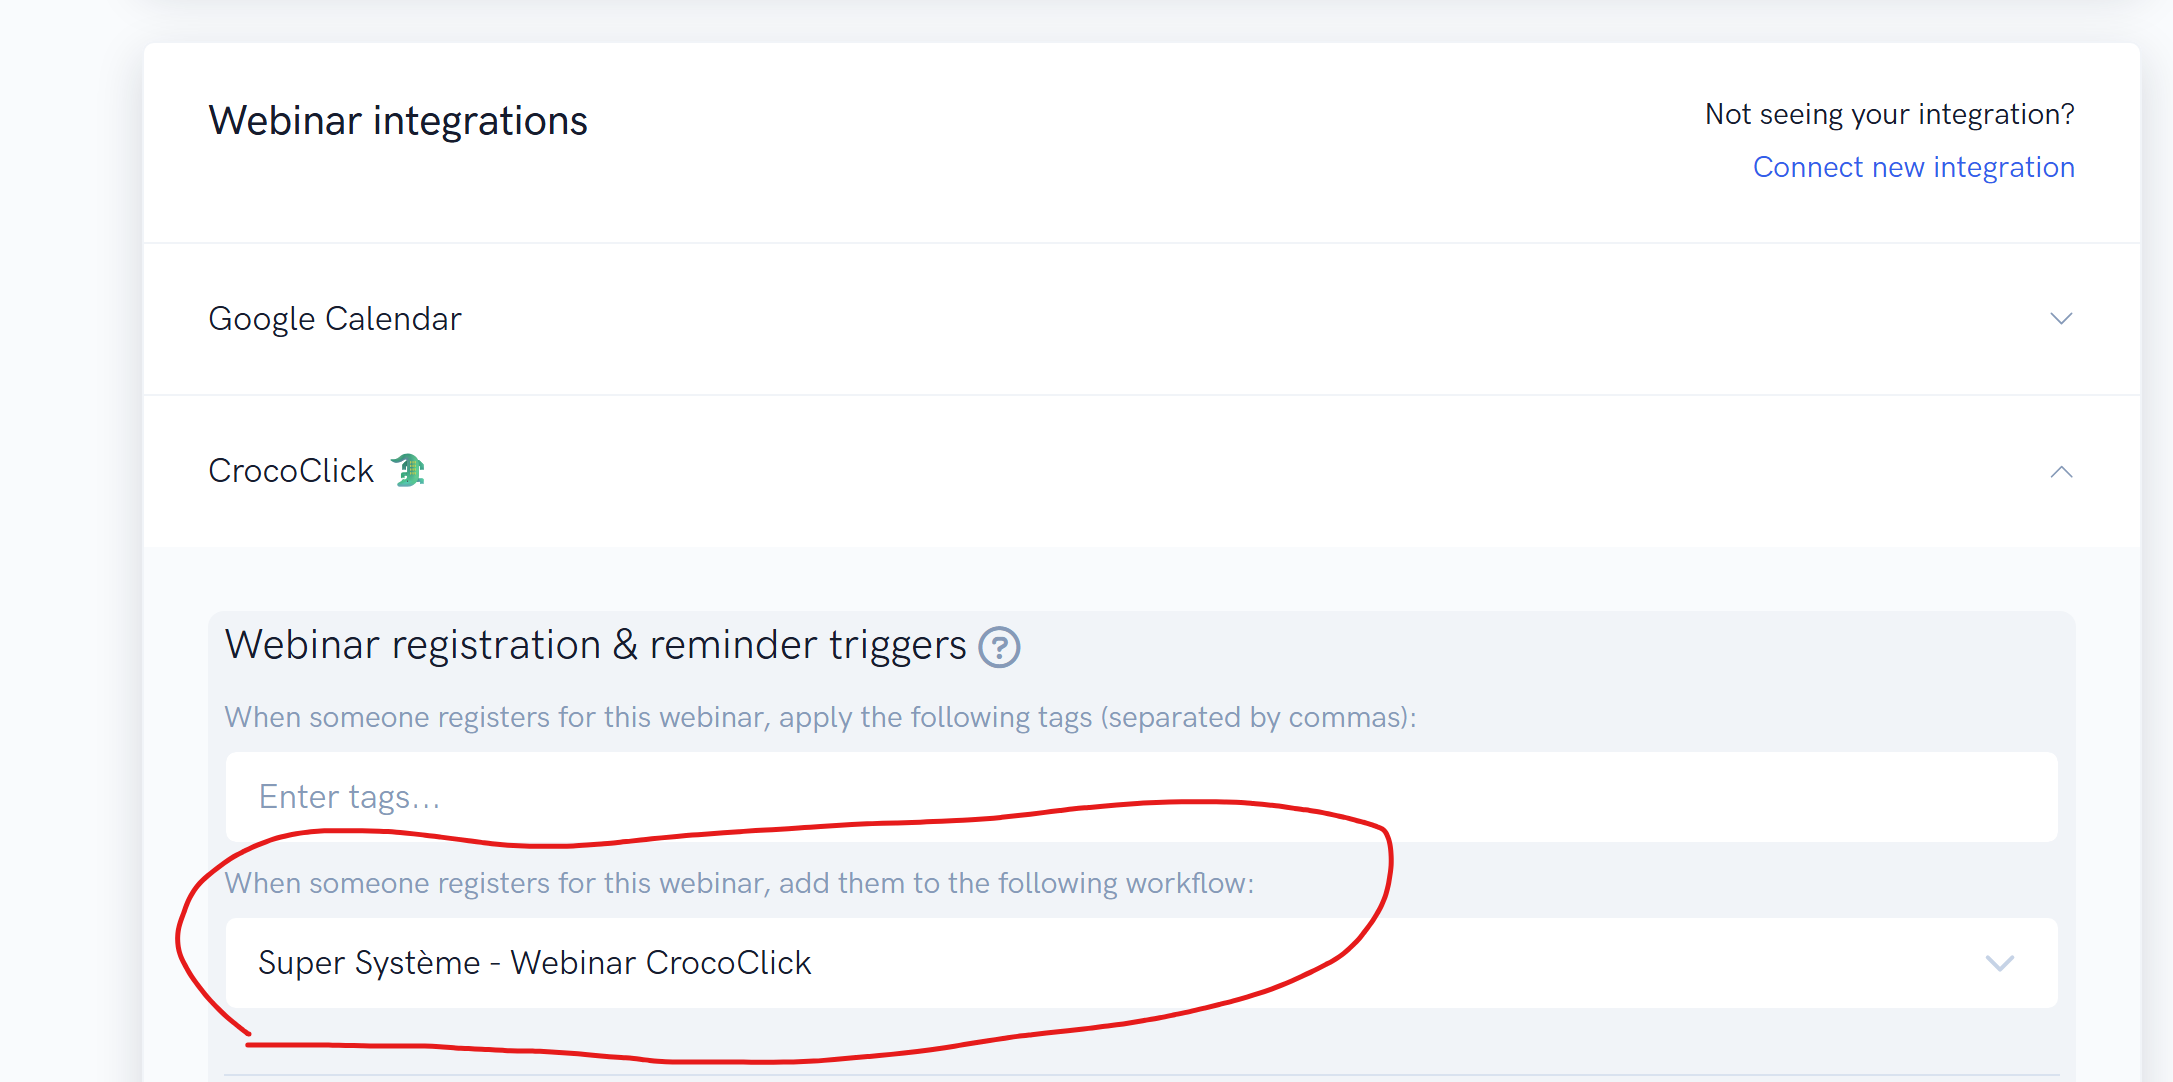
Go to the "Webinar" tab in the left side menu, then click on your Webinar.
Go to the "Other" section, then to "Webinar Integrations."
Select "CrocoClick" and then choose to add the contact to our new reminder automation when they register.
💡TIP: The automation must be created so that you can select it in your CrocoLive options.
Step 4: Add a Tag
Add a tag (e.g.,
Inscrit Webinaire Janvier) to easily track registrants.Describe this tag clearly so that you can reuse it.
🔴 SPECIFICITY: If you use the CrocoLive feature...
You can choose to add the tag in the automation, or directly in the "other" tab of your CrocoLive in the "webinar" section.
Step 5: Set the date and time of the webinar
Add an action that saves the event date in the contact file.
Example:
31 janvier 2051 à 13h30.
💡TIP: To learn more about the "Event start date" action, you can read this dedicated article
🔴 SPECIFICITY: If you use the CrocoLive feature...
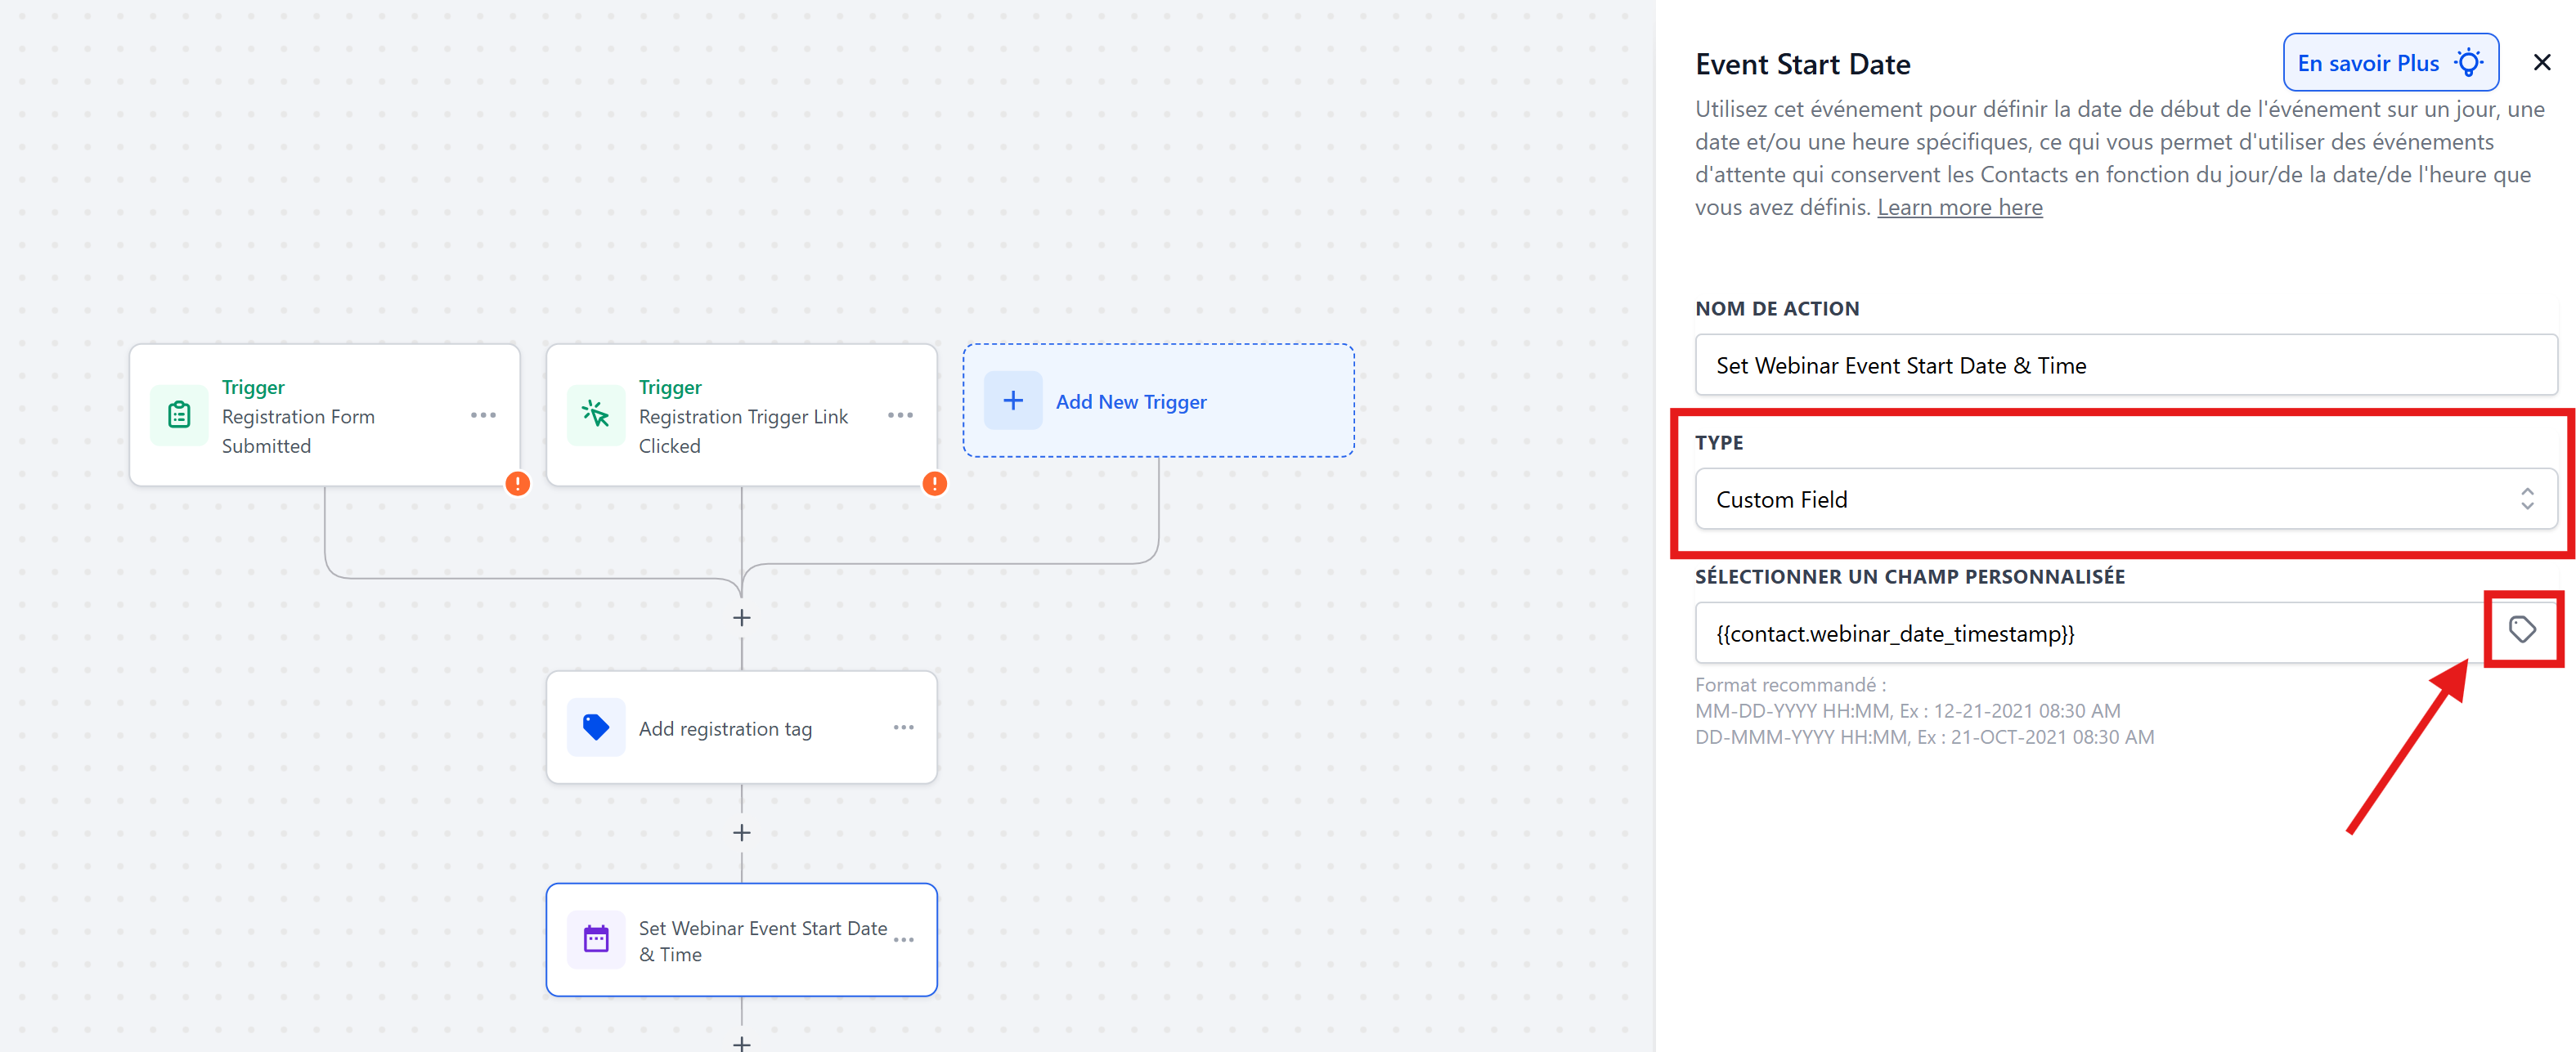
If you are using the CrocoLive feature, you can choose a "custom field" as the date, then click on the custom field icon to add "Webinar Time Stamp."
This field can be found in Contact > Custom Fields > Webinar Time Stamp.
This is the date and time when the contact registered, in "Machine" format.
Step 6: Create follow-up emails and "wait" actions
Add a confirmation email immediately after registration.
Add "Wait" actions, configured according to the event (event - Wait until... or wait after...).
Add your emails
🔴 SPECIFICITY: If you are using the CrocoLive feature...
If you created your webinar with CrocoLive, you can use the following custom values in your emails:
Webinar Link → unique link to access the room.
Webinar Replay Link → unique replay link.
Webinar Date & Time → date and time displayed to the user (with time zone).
Webinar Date Timestamp → technical timestamp to synchronize your reminders and workflows.
💡TIP: Read our article on the integration of CrocoLive into the CrocoClick ecosystem to learn more
Step 7: Manage cases where the date has passed
Use the "Skip if date has passed" conditions in your wait actions to avoid sending reminders after the webinar.
This ensures a clean and relevant experience.
Step 8: Add post-event actions
For registrants after the webinar date, redirect them to a replay or a waiting list.
You can also add a tag or send a personalized email.
Step 9: Check & Publish the automation
Check that the following options are enabled according to your needs:
Allow multiple entries
Allow re-entry into automation
Click Publish once you are satisfied with the scenario.
⚠️ Precautions to take
The form must be 100% functional before connecting the automation.
Your emails must contain essential practical information: Zoom link, date/time, replay, contact details in case of problems.
⚡ Efficiency tips
Use customizable email templates so you don't have to start from scratch.
Test the automation by signing up yourself before the official launch.
Clone this workflow for your future events: guaranteed time savings!