Use the "Event start date" action to automate your events based on a specific date with CrocoClick
Use the Event Start Date action in your CrocoClick automations for webinars, renewals, promotions, etc.
Written By CrocoTeam
Last updated 3 months ago
The Event Start Date action is a powerful tool within your automations.
It allows you to schedule and automatically launch actions (reminders, follow-ups, emails) based on a specific date and time.
Whether you're organizing a webinar, managing renewals, or launching a promotion, this feature helps you orchestrate your communications in the best possible way.
1. What is the "Event Start Date" action?
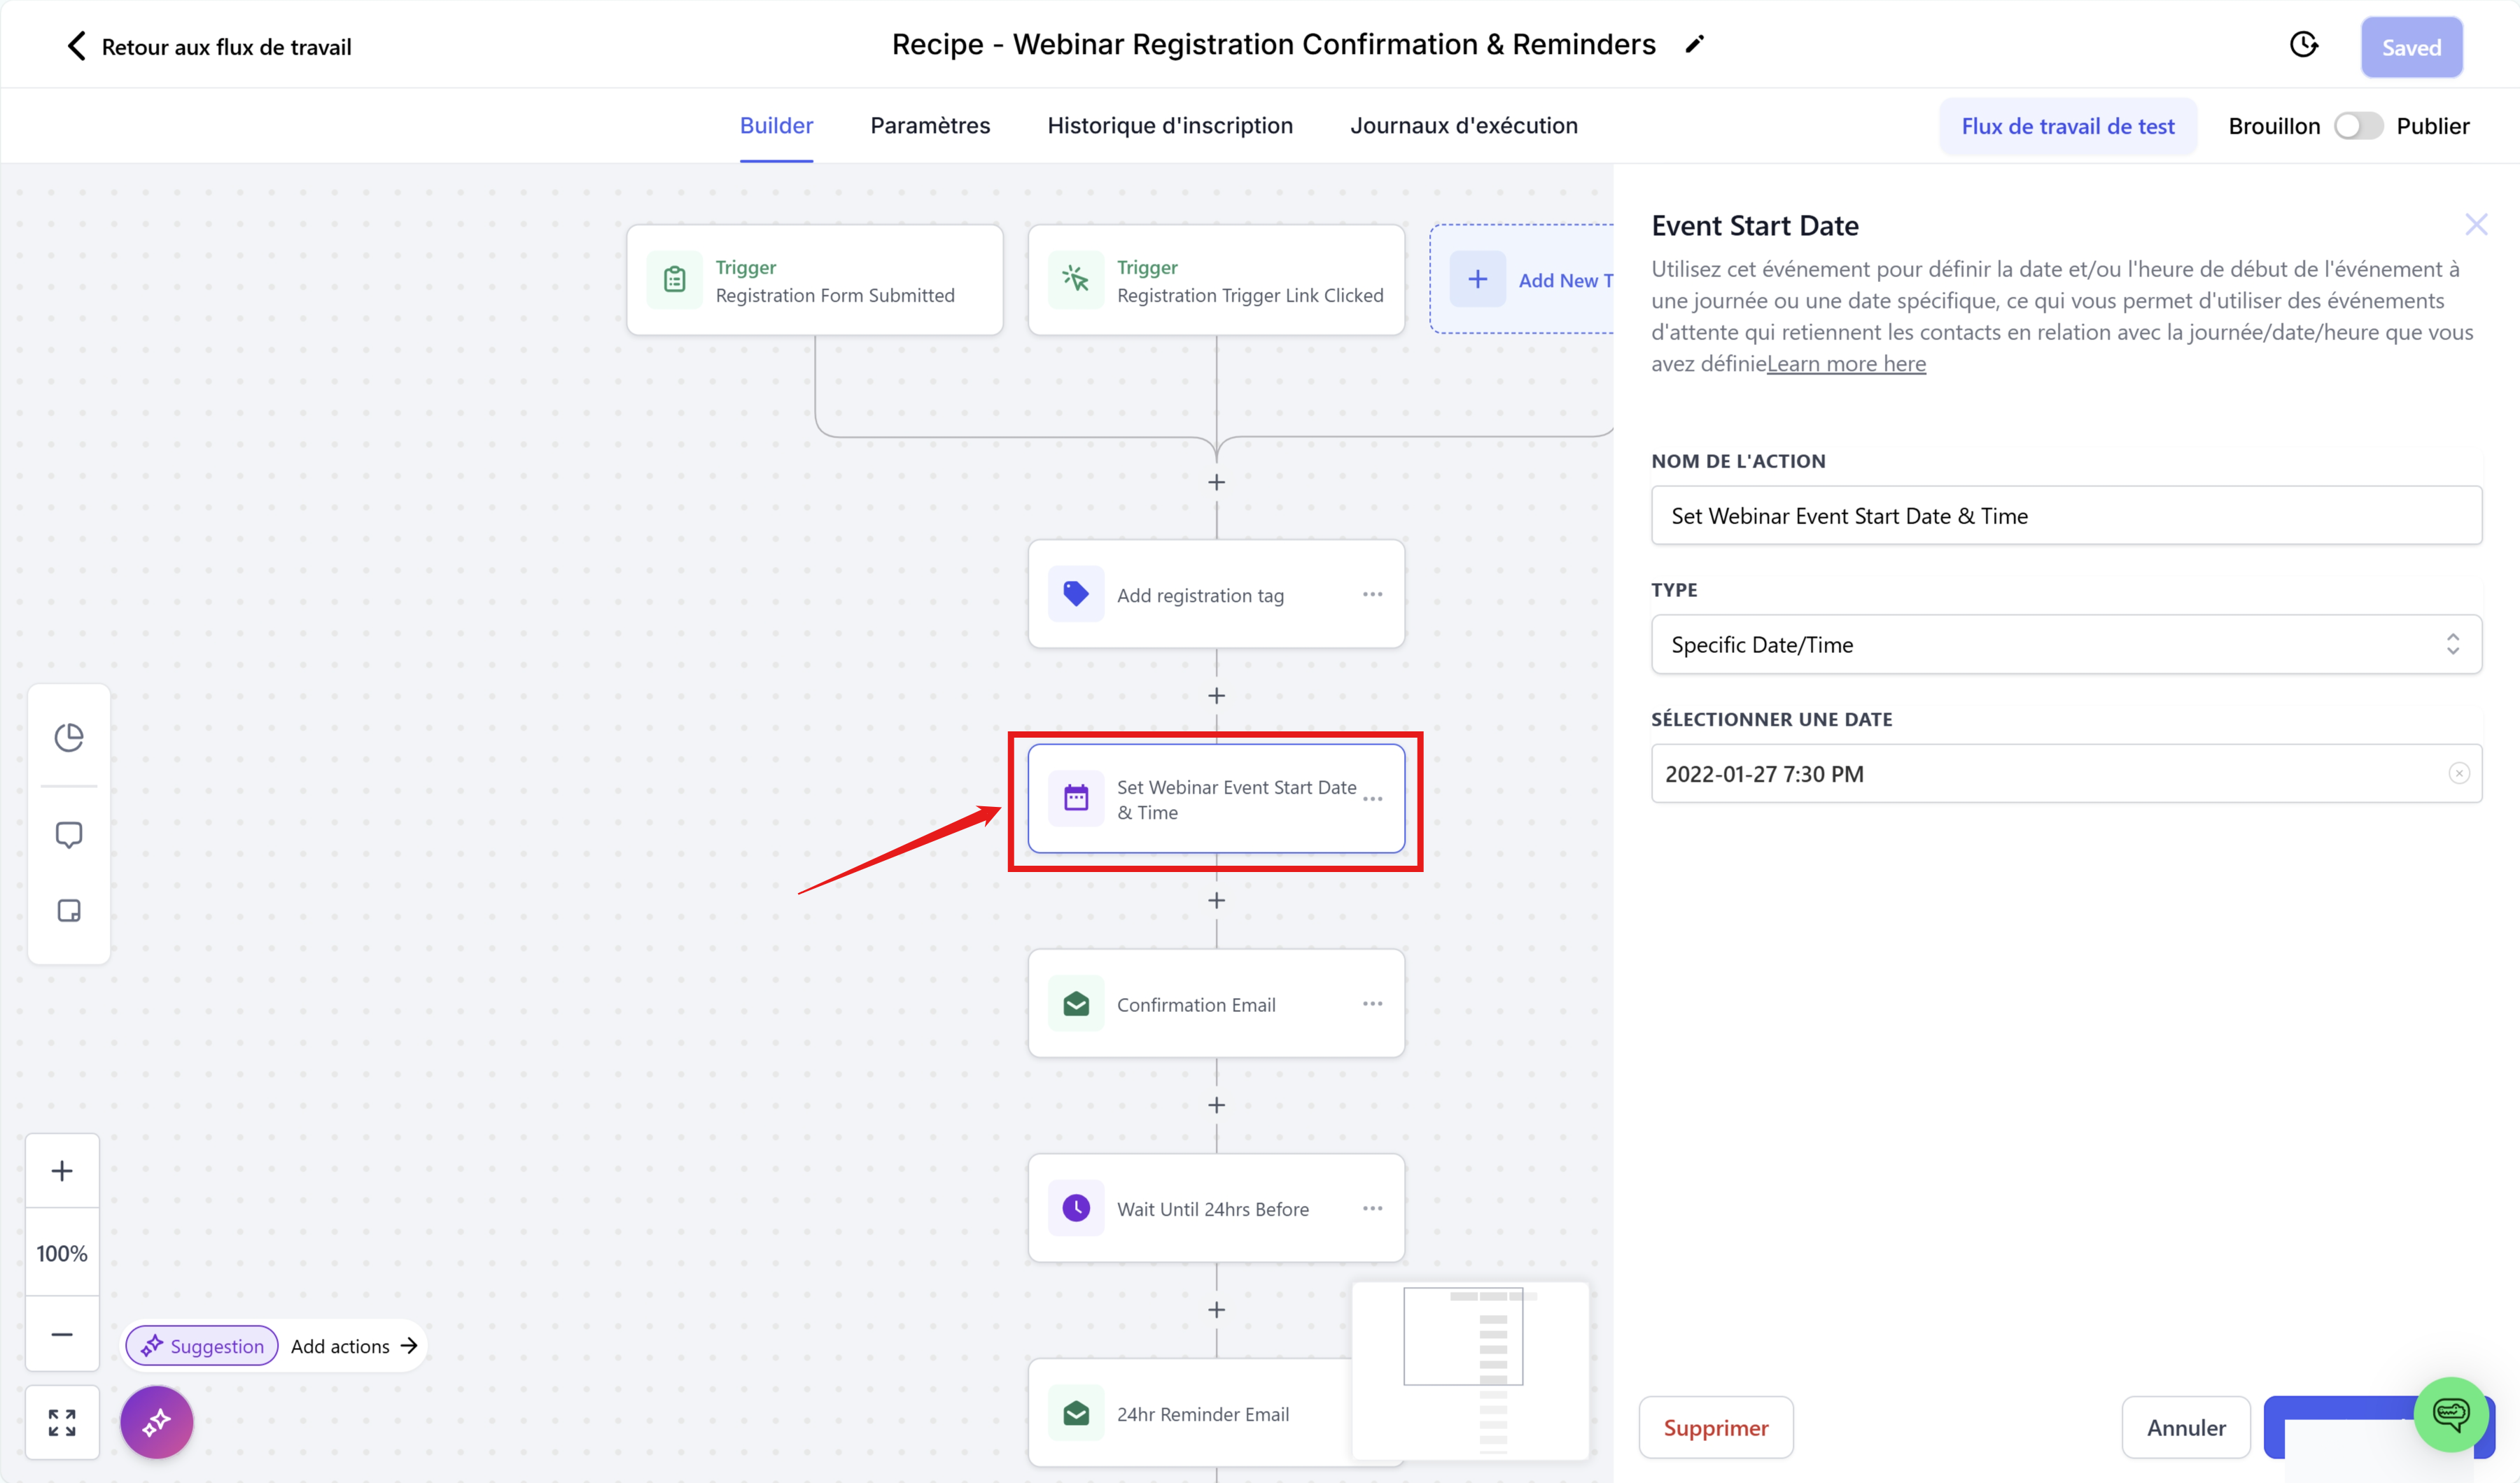
The Event Start Date action defines a time reference point in your automation.
Once this date is set, you can schedule other actions—such as wait times—that will trigger before or after the event.
For example, you can send a reminder a few days before a webinar or start a follow-up sequence after an event.
💡TIP: The "Event Start Date" action alone does nothing. It is only used to set a date as a reference for other actions but has no effect on its own.
Key benefits:
Smart automation: Schedule your reminders and follow-ups without manual intervention.
Adaptability: Use this action for various use cases (webinars, renewals, promotions, etc.).
Time zone management: If you have chosen to adapt to the contact's time zone in your automation settings, the event time will automatically adjust to the contact's time zone.
2. How to configure the "Event start date" action in your automations
Step 1: Add the "Event start date" action

Access your automation
Open the automation you want to modify in CrocoClick.Insert the "Event Start Date" action
Click on the "+" button to add a new action, then select Event Start Date (or "Start Event Date").
Step 2: Customize the action
You have several options for setting the start date according to your needs:
Specific Date/Time:
Set a specific date and time (example: 09/14/2024 10:30).
Use the calendar selector to avoid format errors.Custom Field:
Use this option if the event date is already entered in a custom field (e.g., "Event Registration Date").
This way, the automation will adapt to each contact.Specific Day:
Ideal for recurring actions based on a fixed day (e.g., every first of the month or every Monday).
Be sure to name the action clearly (e.g., "Webinar Start") to make it easier to manage your automations.
Step 3: Set up a "Wait for Event/Appointment Time" action
After setting the event date, add a wait action that will synchronize the following actions:
Insert the "Wait" action: Click on "+" and select the "Wait" action
.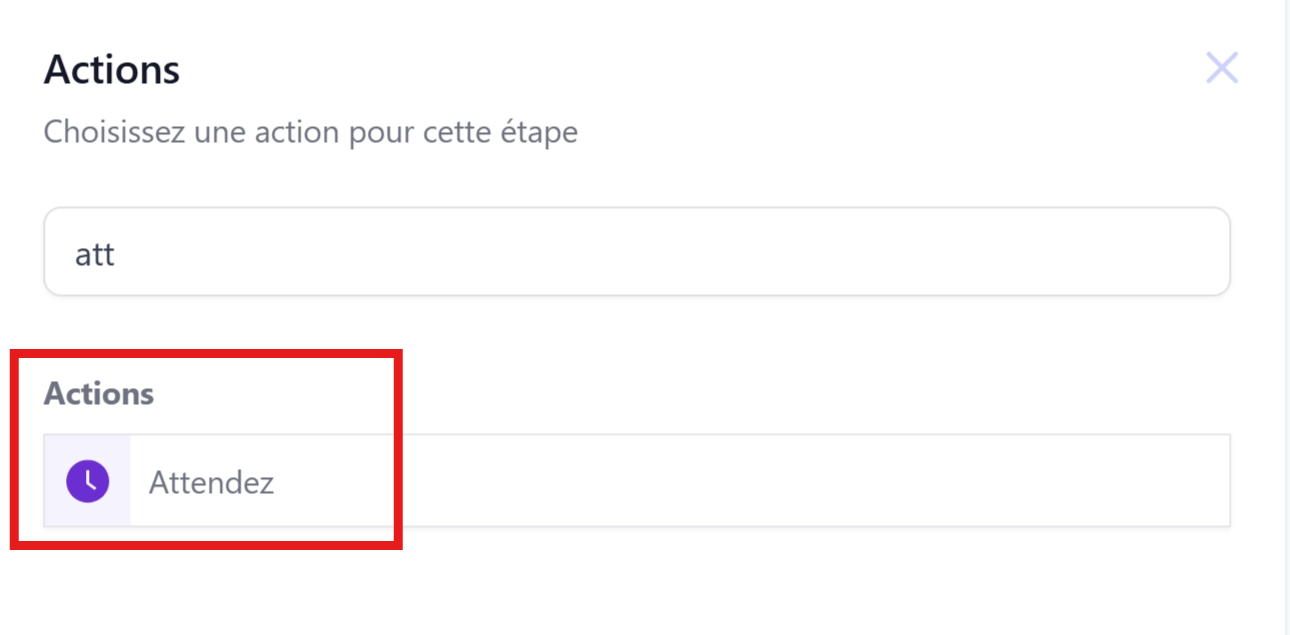
Select "Event/Appointment": this way, the wait will be related to your event
start date.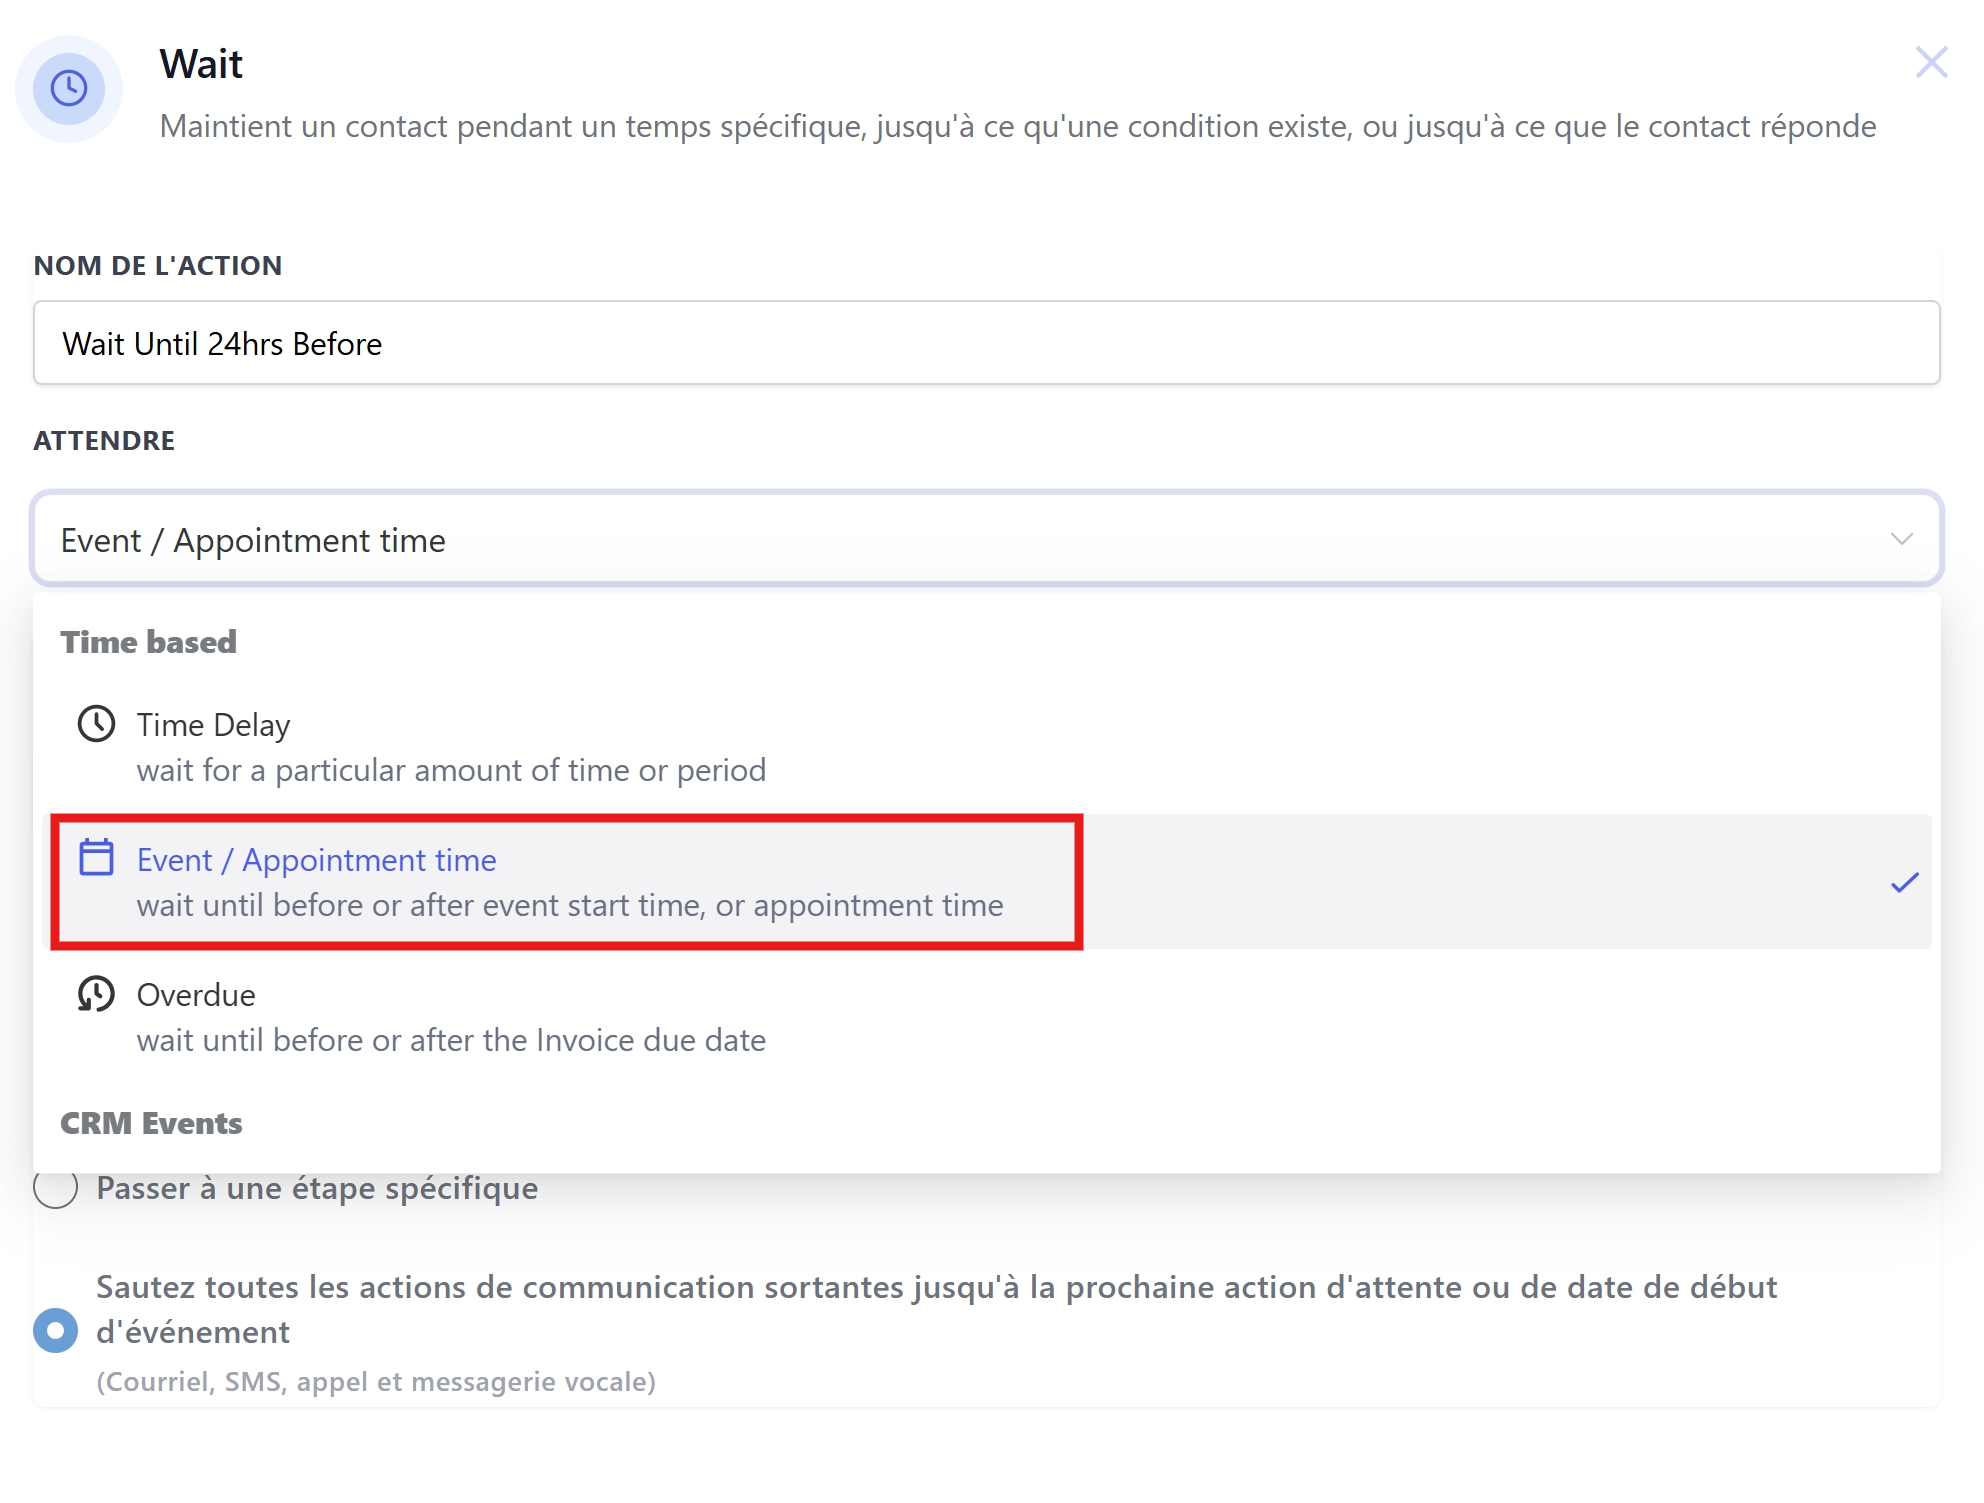
Set the wait time: Schedule the action to trigger a certain number of days, hours, or minutes before or after the set date.
For example, to send a reminder 2 days before the event, set the wait time to "2 days before.
"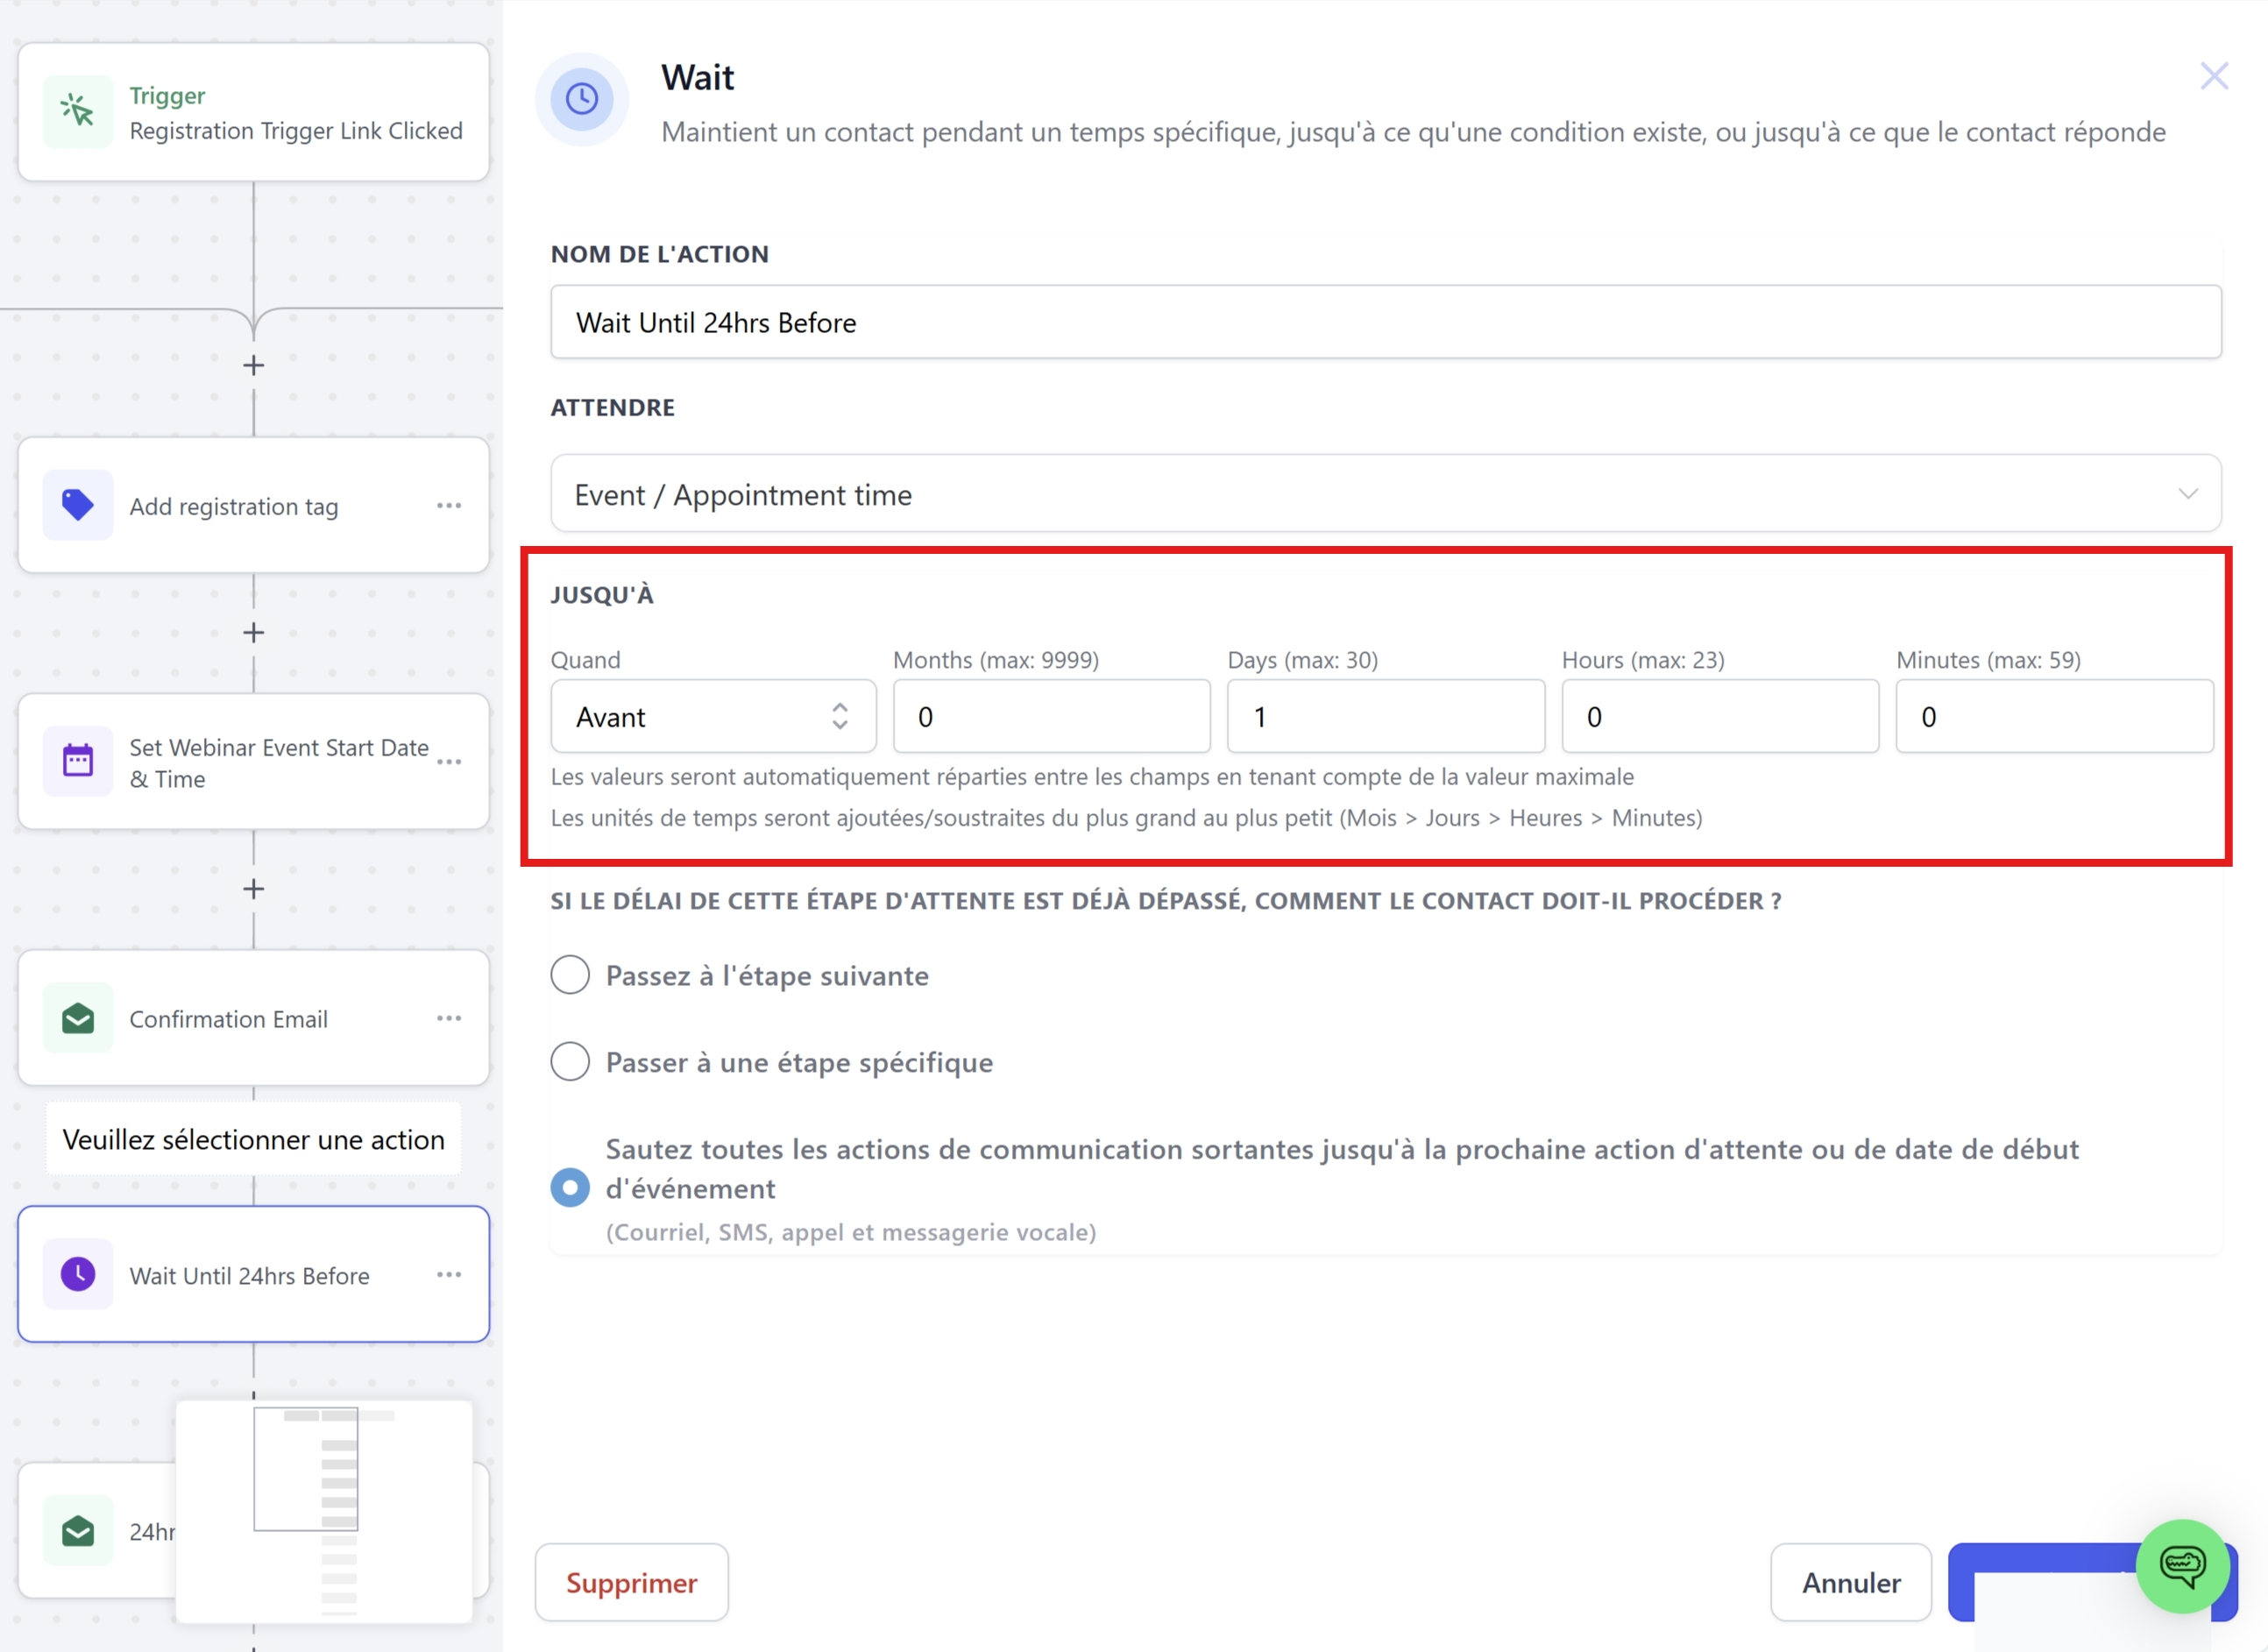
Manage cases where the time has passed
Define the procedure if the time has already passed when a contact arrives (e.g., skip directly to the next
action or redirect to a specific step).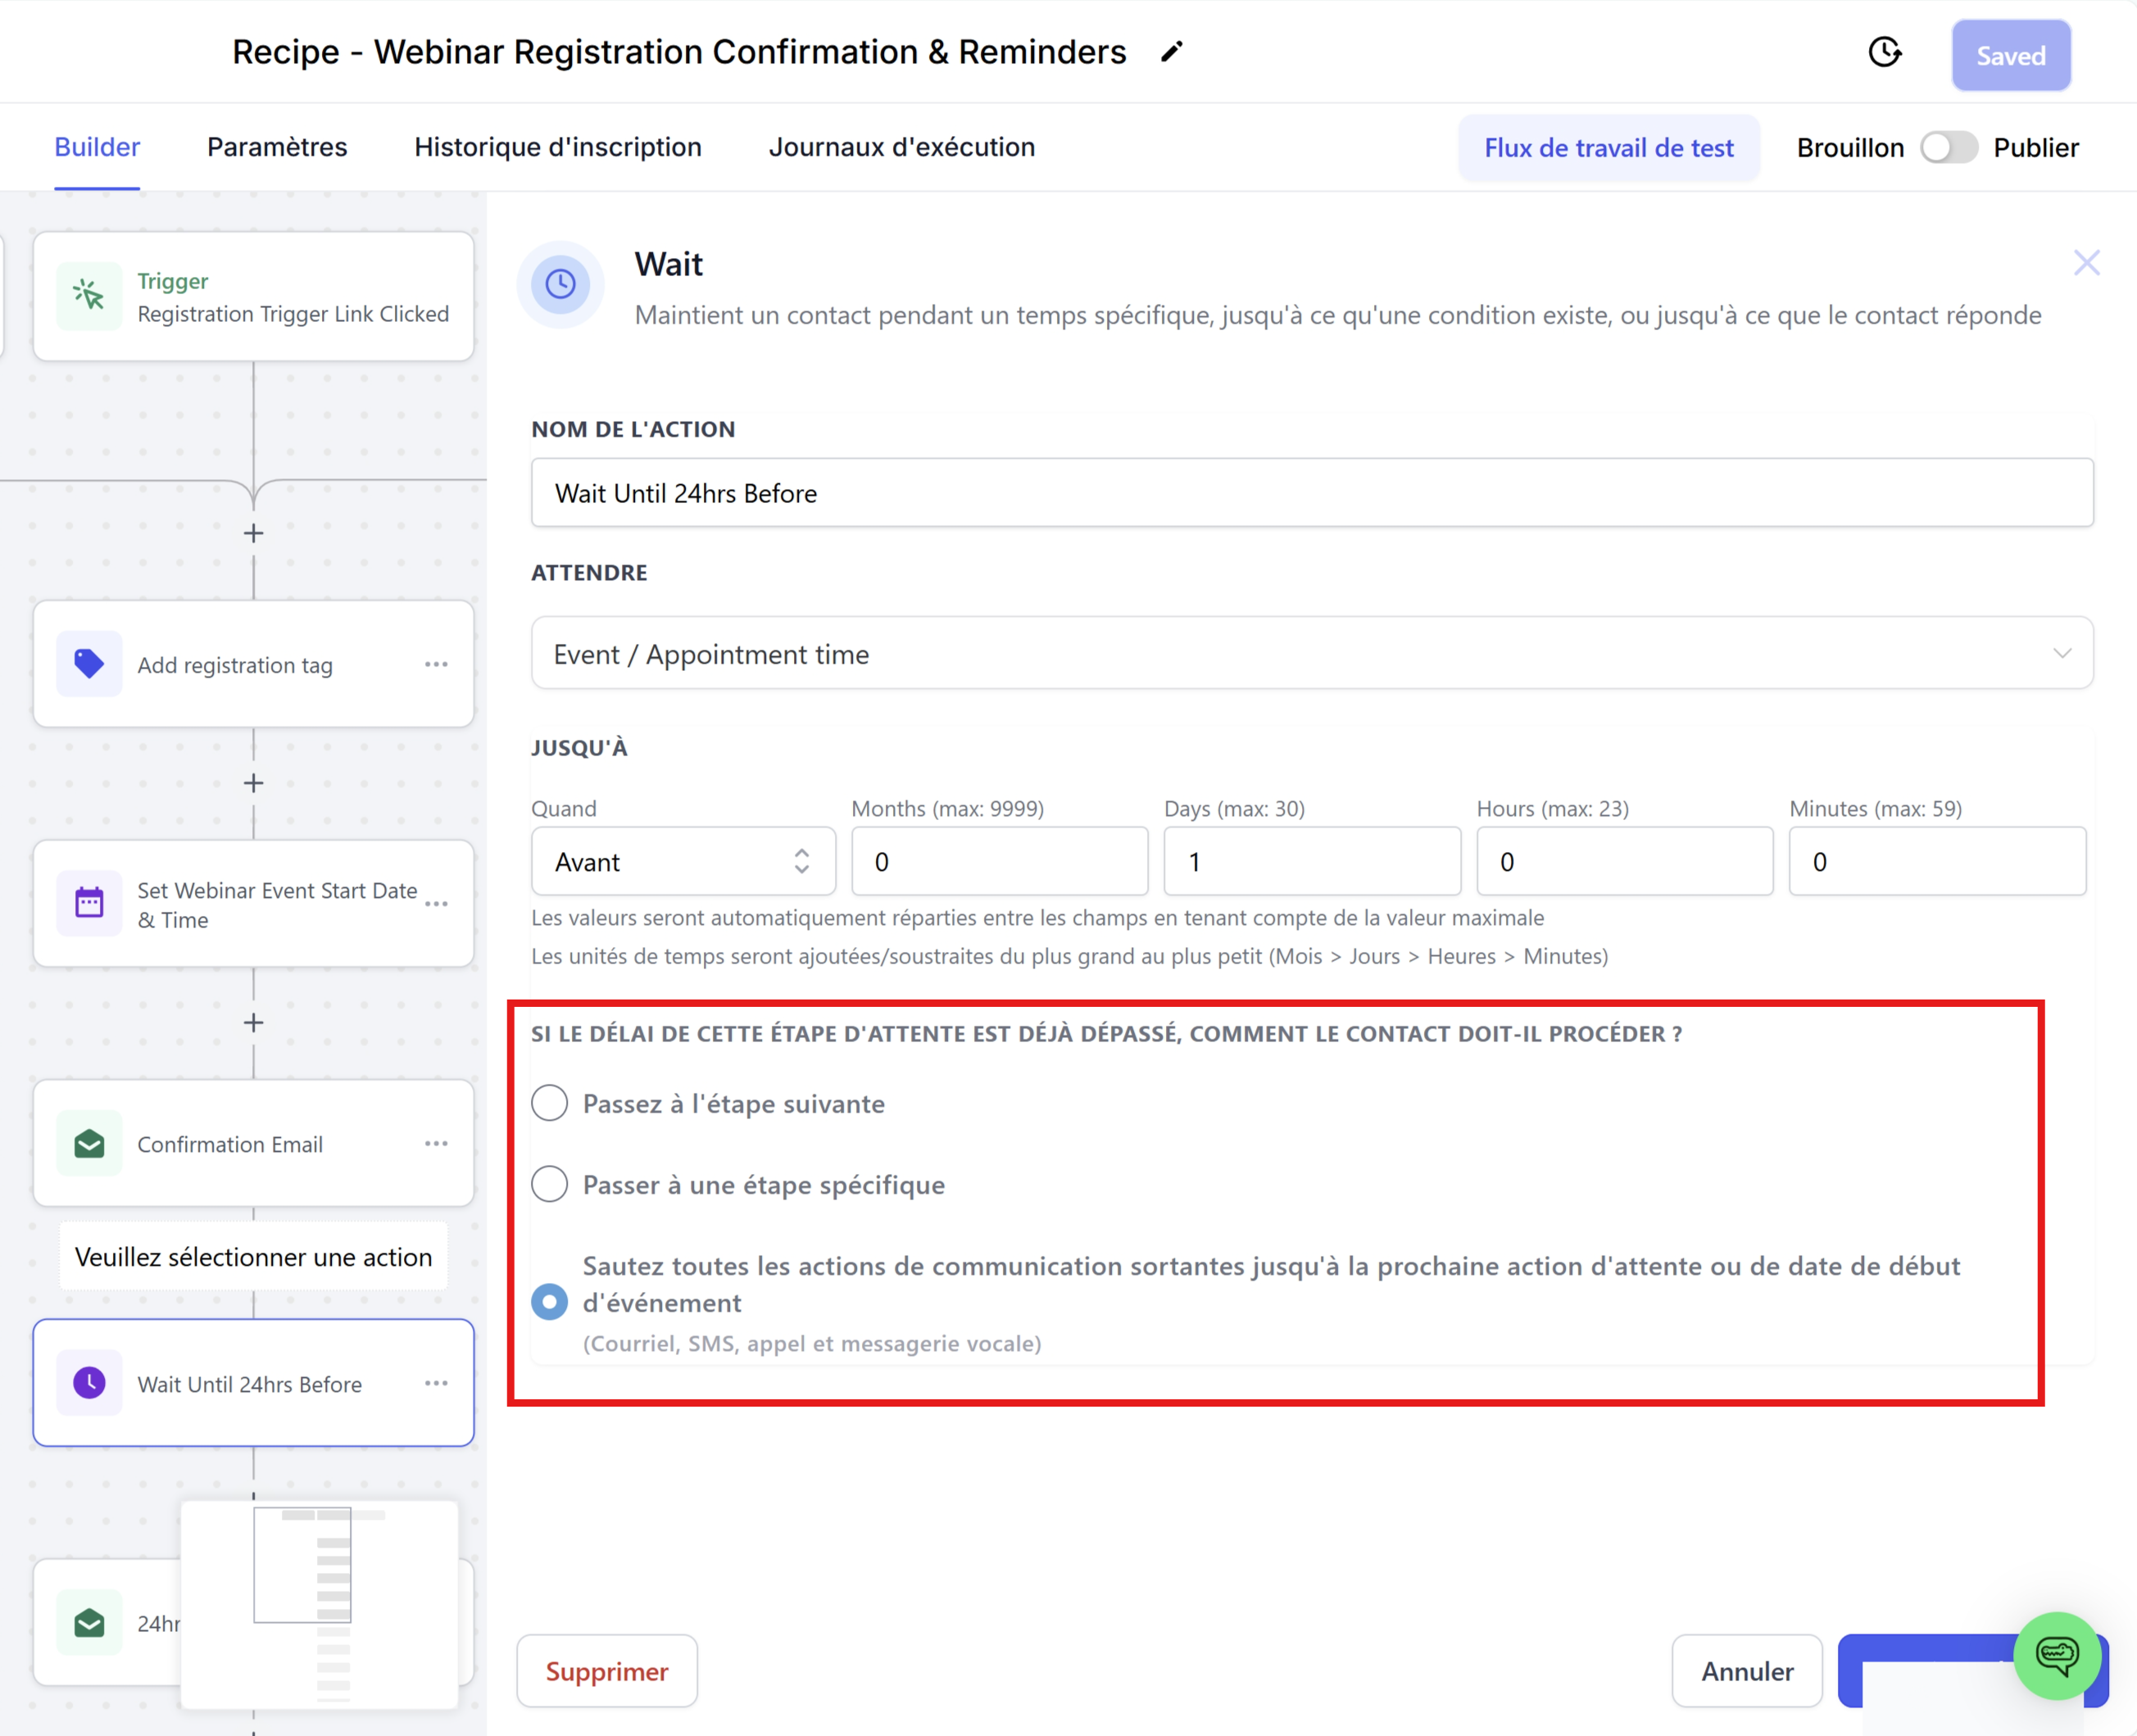
3. Practical use cases
Here are some concrete examples to inspire you:
Webinars and conferences: Set the date and time of the webinar with the "Event start date" action. Then schedule automatic reminders (7 days, 1 day, and 1 hour before the event) and launch a follow-up sequence after the webinar (1 day after the event).
Subscription renewals: Use a custom field to set the renewal date for each customer. Send progressive reminders (one month, one week, then one day before) to encourage renewal.
Promotions and flash sales: Schedule the launch of a promotion with a specific date. Trigger teasers before the start and last-minute reminders to maximize engagement.
Recurring events: Use the "Specific Day" option to automate regular reminders (e.g., every Monday or the first of every month) to maintain consistent communication.
4. Frequently asked questions
Q1: Can I use the "Event Start Date" action for recurring events?
A: Yes. You can set the date for the first occurrence and set up a loop to manage subsequent events.
Q2: Is it possible to add multiple event dates to the same automation?
A: Absolutely. Add multiple "Event Start Date" actions and
configure their associated "Wait" actions to manage different events.
Q3: What happens if a contact joins the automation after the event date has passed?
A: Depending on how the "Wait" action is configured, the contact can move directly to the next step or follow another predefined procedure.
Q4: Can the "Event start date" action be used without the "Wait" action?
A: Technically yes, but the main purpose of this action is to serve as a reference for automatically triggering other scheduled actions. Without the "Wait" action, the "Event Start Date" action has no effect.
Q5: How do time zones affect the "Event Start Date" action?
A: If you have enabled adapting the automation to the contact's time zone, the event time will be adjusted according to each contact's time zone. Otherwise, your account's default time will be used.
Q6: I set the "Event Start Date" action, but it's not working...
A: Check that you have set the "Event Start Date" action at the beginning of your automation. This is because the date is set for each contact when they go through this action. The action must therefore be at the beginning and not at the end of your automation so that the "Wait" actions can use this date.
Conclusion
The Event Start Date action offers you the flexibility and automation power you need to orchestrate your communications around key events. By precisely defining a reference date and programming appropriate wait times, you can ensure that your reminders and follow-ups are triggered at the ideal moment. Take advantage of this feature to improve the effectiveness of your campaigns and maximize the engagement of your contacts on CrocoClick.
Happy automating!