Creating a Brand Board in CrocoClick
Create a Graphic Charter in CrocoClick to centralize your logos, colors and typography, and ensure a consistent visual identity across your emails, funnels and sites.
Written By Baptiste Lorreyte
Last updated 8 months ago
You want your branding to stop looking like a 2009 PowerPoint patchwork.
Good news: the Brand Board lets you centralize logos, colors, and fonts in one place… and reuse them across all CrocoClick modules 😎
What is a Brand Board?
A Brand Board in CrocoClick is a centralized space where you define your company’s visual identity. It contains:
Your logos (primary and secondary)
Your color palette
Your fonts
Once configured, you can apply these elements everywhere:
Emails
Funnels
Web pages
Websites
Templates
The result: a consistent brand rather than a visual circus.
Key benefits
🎯 1. Brand consistency
All your visual elements are stored in one place.
You use the same colors, logos, and fonts everywhere.
Your brand becomes recognizable.
⏱ 2. Time savings
No more searching for your logo on your desktop.
No more digging through old Google Docs for your HEX code.
Everything is accessible in just a few clicks.
🛠 3. Simplified management
You make a change to an element in your Brand Guidelines.
Use it immediately in your new projects.
Clear. Organized. Efficient.
How to create a Brand Guidelines
🥇 Step 1: Create a new brand guide
In the left-hand menu, go to Marketing
At the top, click on Branding
Click the blue + Add a Brand Guide button
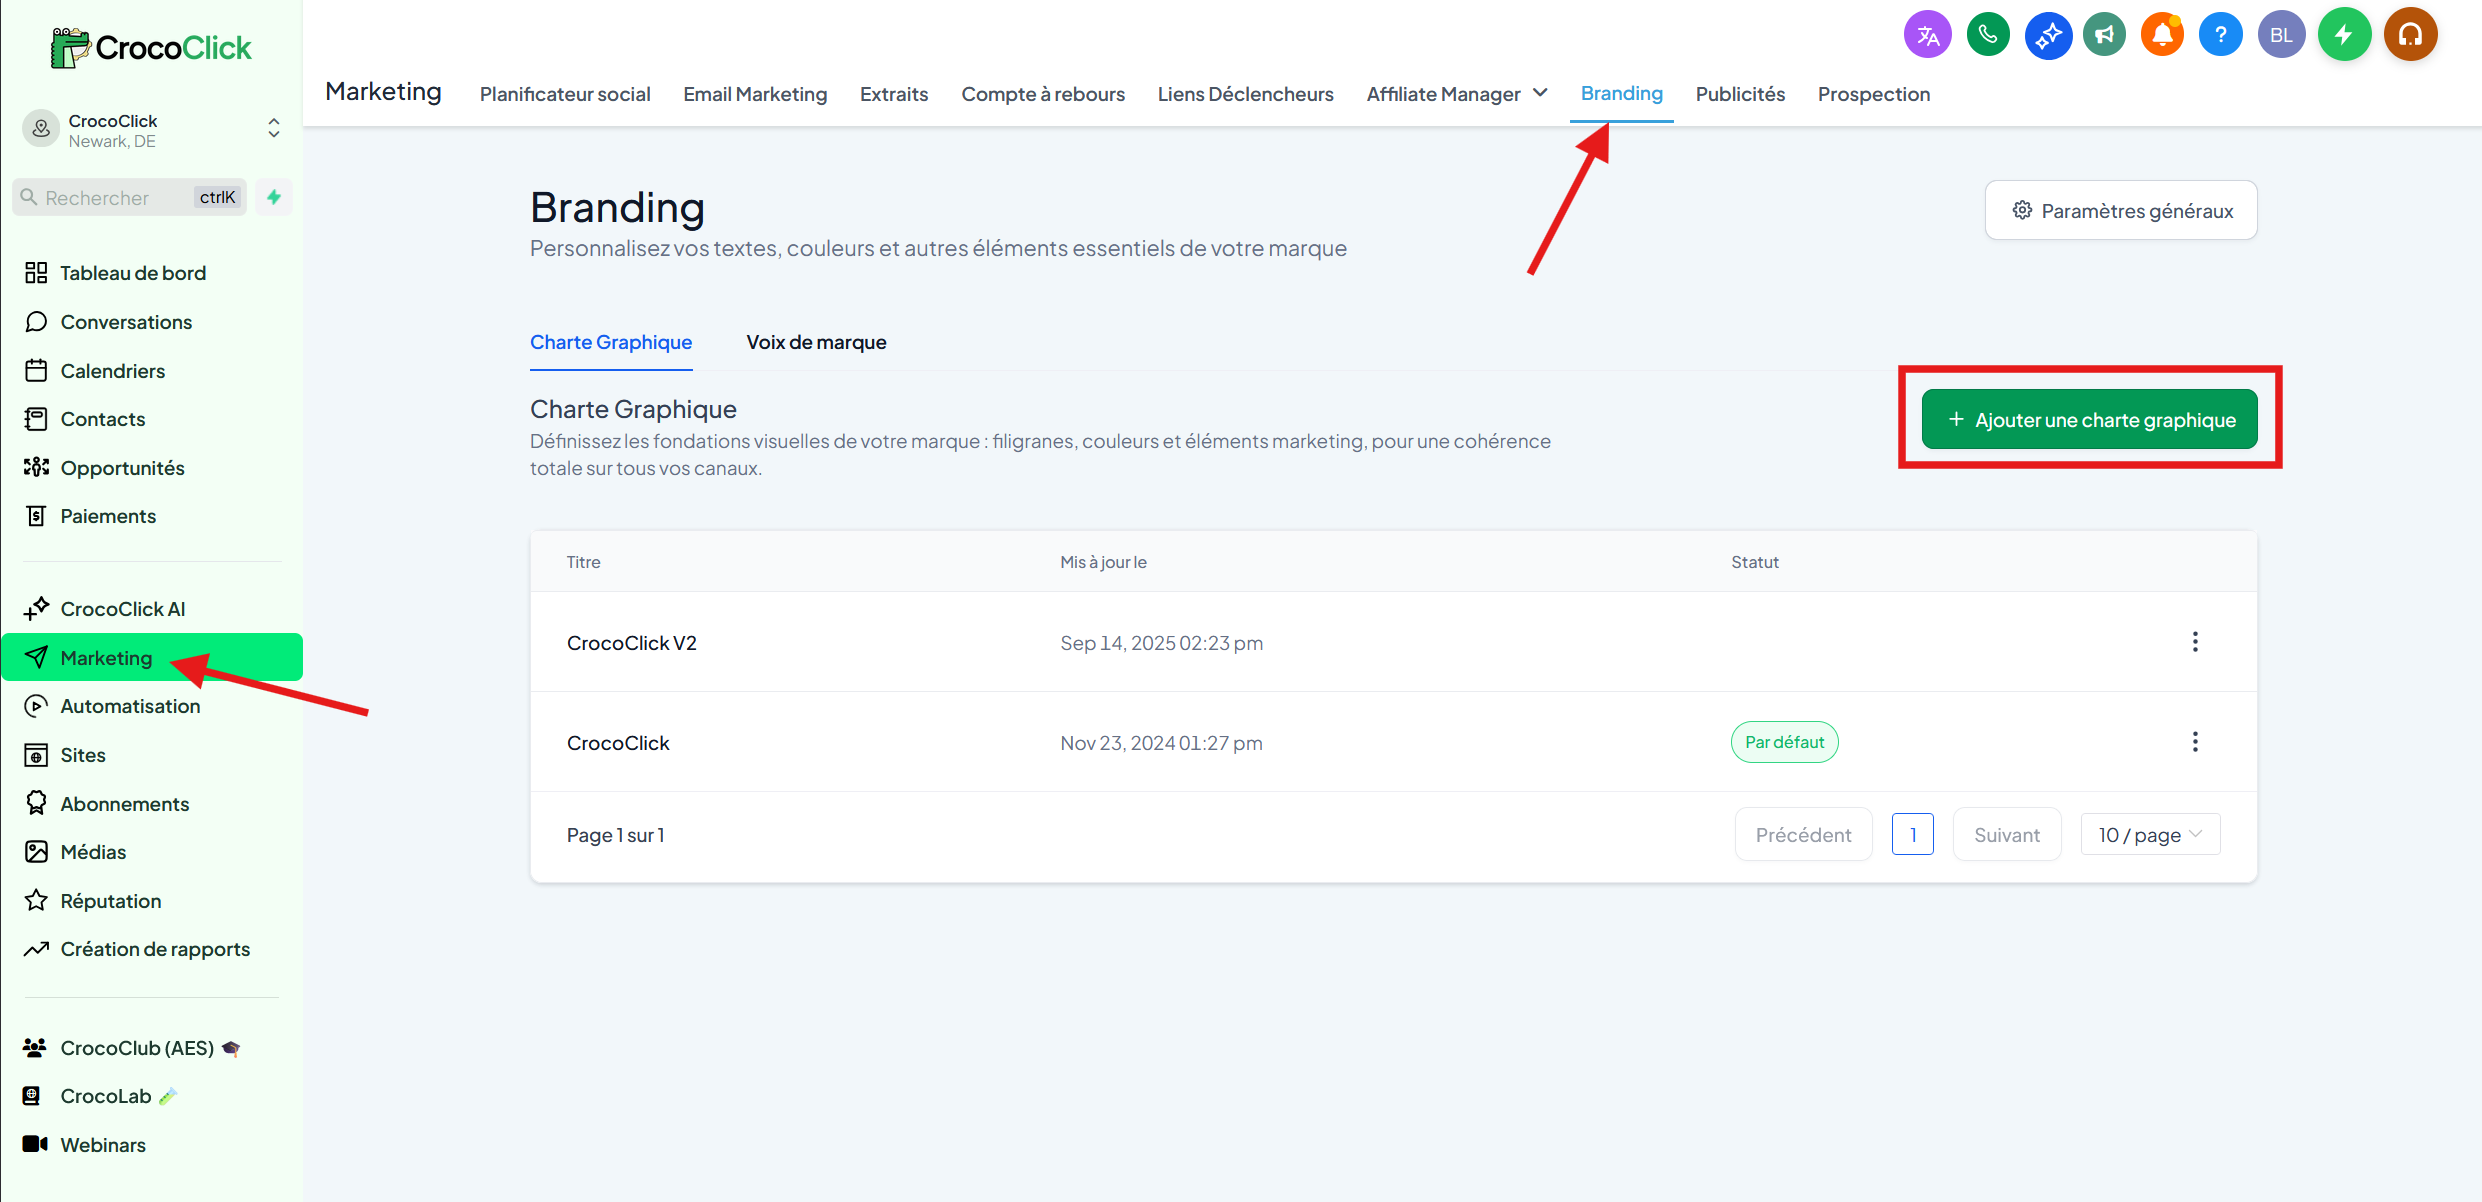
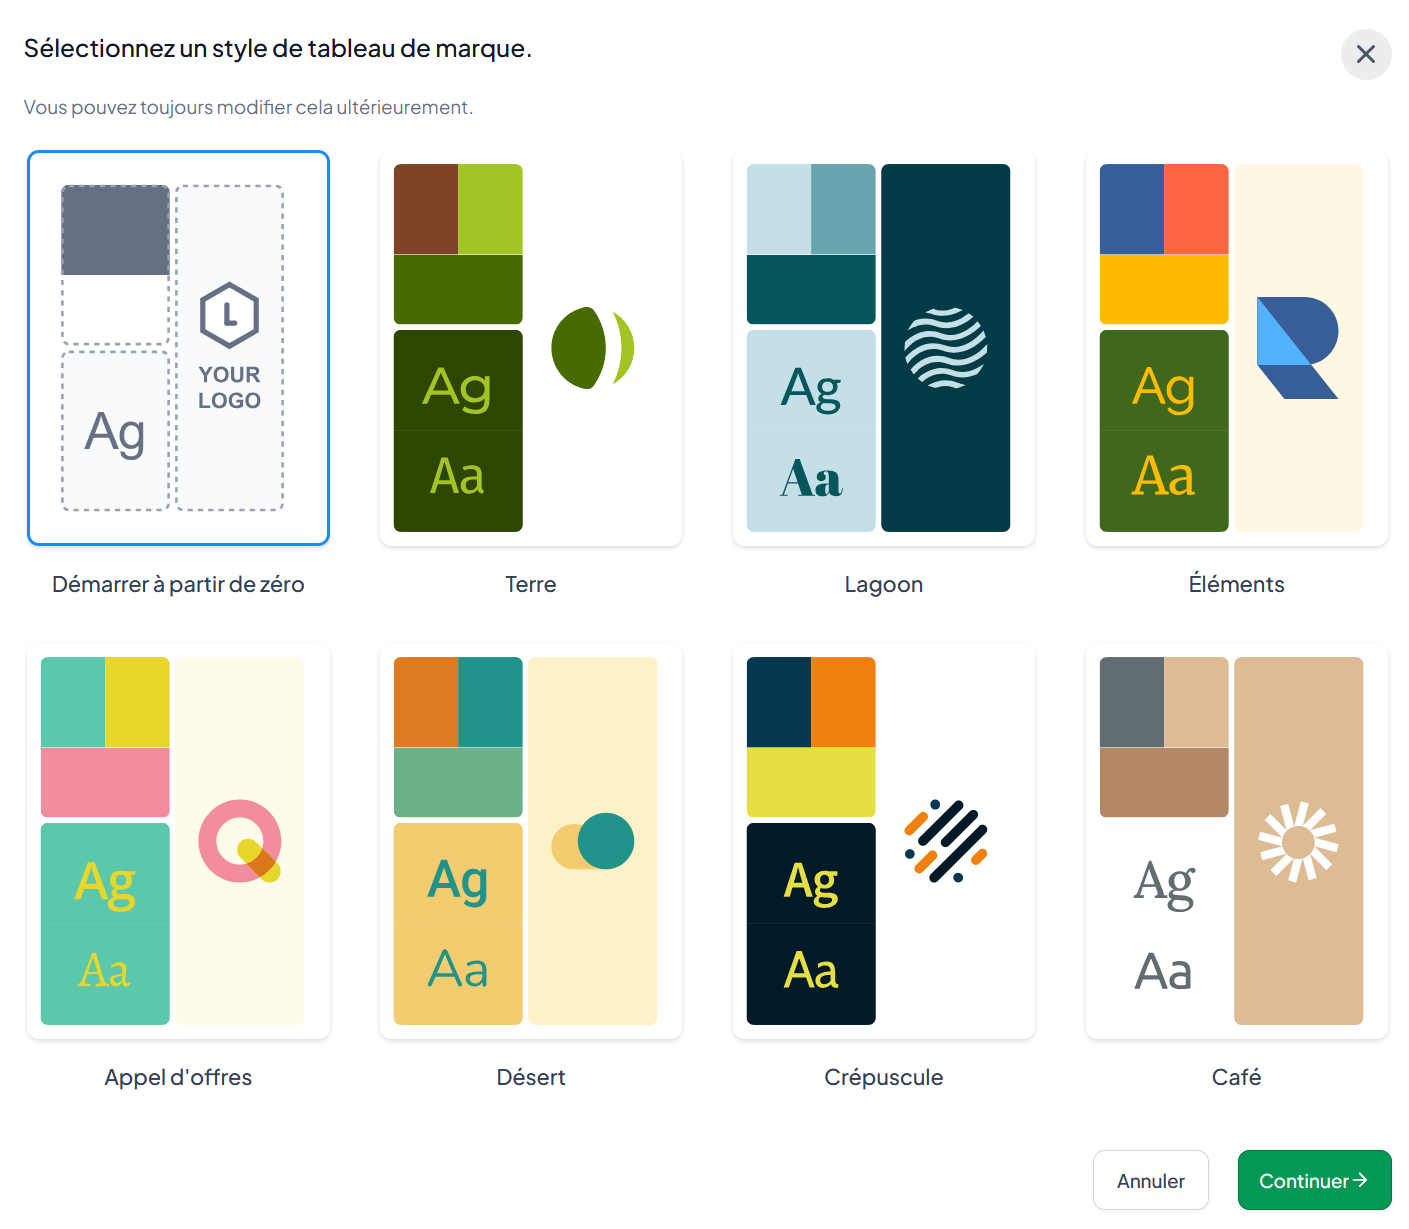
🥈 Step 2: Choose a template or start from scratch
Select Start from scratch to configure everything manually
or
Choose a Template to start with a pre-configured style
Then click Continue.
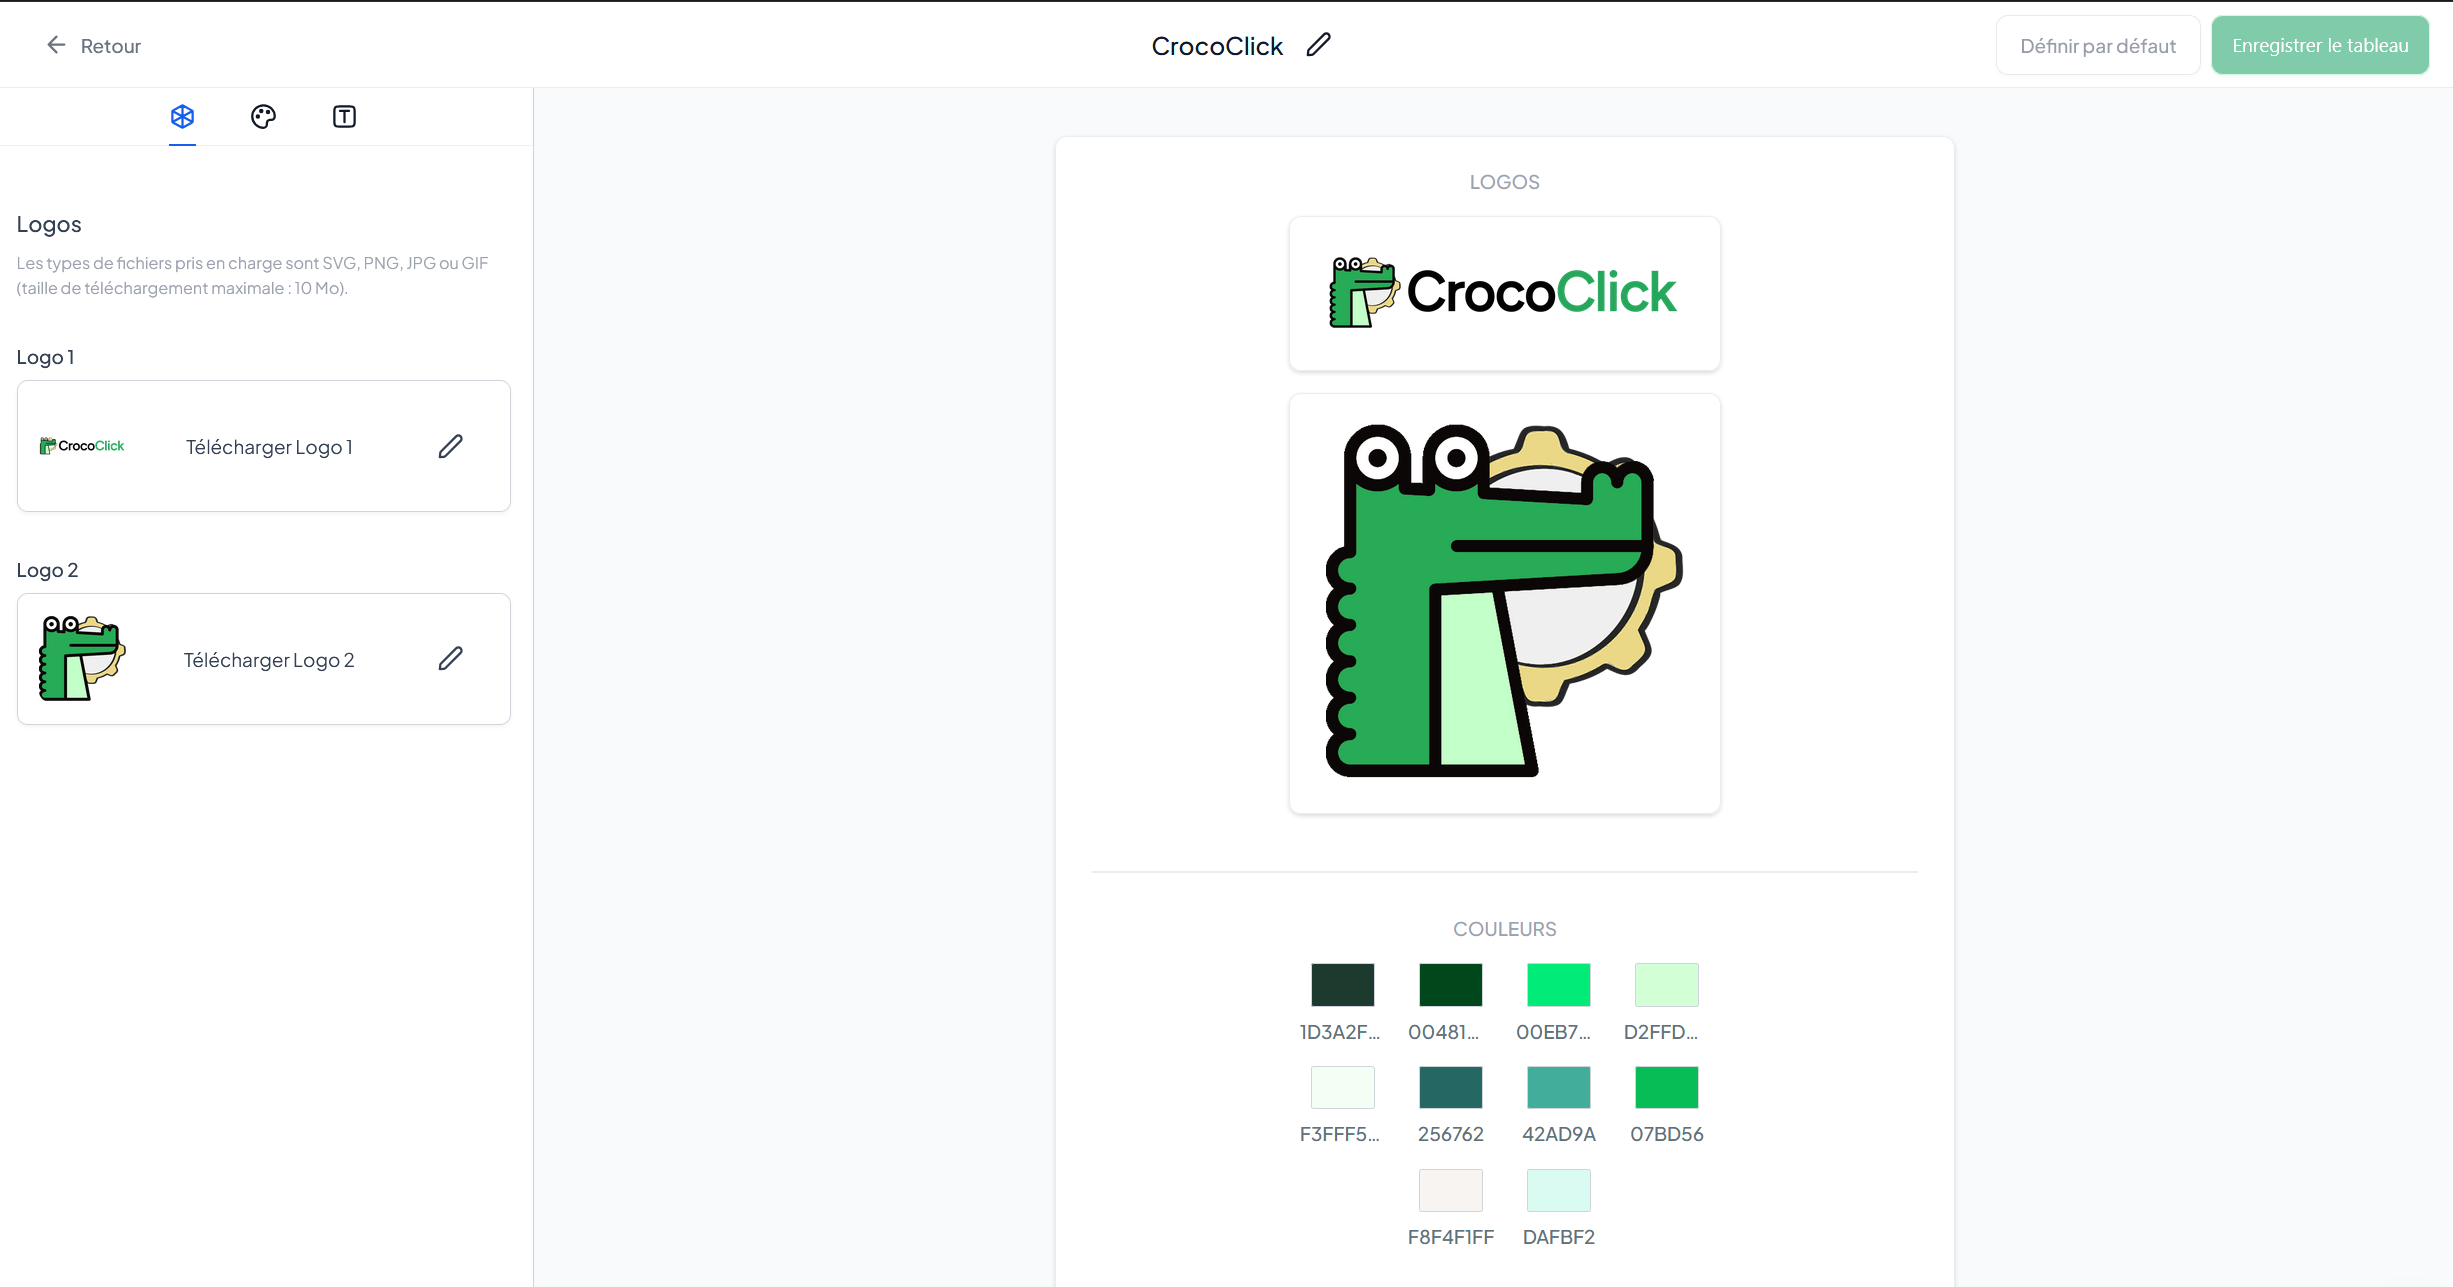
🥉 Step 3: Add your logos
Click the Logos tab
Import:
Your main logo
Your secondary logo
🎨 Step 4: Add your colors
Click on the Colors tab
Add your colors using the HEX or RGB selector
Rename each color (e.g., Primary, Accent, Background)
🔹 Minimum: 2 colors
🔹 Maximum: 10 colors
🔤 Step 5: Configure your fonts
Click on the Typography tab
Select your fonts using the dropdown menus
🔹 Minimum: 1 font
🔹 Maximum: 5 fonts
And there you go.
Your Brand Guidelines are ready, and your branding is no longer a rough draft
Frequently Asked Questions
Do color changes update old emails or funnels?
Do color changes update old emails or funnels?
No.
Changing colors in the Guide does not retroactively affect your existing designs.
The new colors will simply be available in the color picker for future projects.
How do I set a default Color Palette?
How do I set a default Color Palette?
Click the three-dot menu (⋯)
Then select Set as Default.
Can I change my Color Palette later?
Can I change my Color Palette later?
Yes.
Click the three dots (⋯) next to your color scheme and select Edit.
Can I delete a theme?
Can I delete a theme?
Yes.
Menu (⋯) → Delete
Warning: This action cannot be undone.
What are the limitations?
What are the limitations?
In a Style Guide, you can add:
Up to 5 fonts
Up to 10 colors
Up to 2 logos
Where can I find the imported logos?
Where can I find the imported logos?
A folder is automatically created in your Media Library with the name of the Style Guide.
You can also delete old logos if necessary.
A strong brand isn’t complicated.
It’s consistent.
And now, yours is too :)
Was this helpful?
Still need help? Ask the team