Create your first Pipeline to track prospects
Structure your sales tunnel by creating and customizing a pipeline in the Prospect tool.
Written By CrocoTeam
Last updated 5 months ago
Are you new to Pipelines in CrocoClick? It's the ideal tool for visualizing your prospects, tracking their progress through your sales funnel, and ensuring you don't miss any opportunities.
1. Create a sales pipeline
A pipeline is a column view (kanban) that represents the different stages your prospects go through.
Here's how to create one:
Go to Prospects
Click on Pipelines at the top of the page
Click Create Pipeline
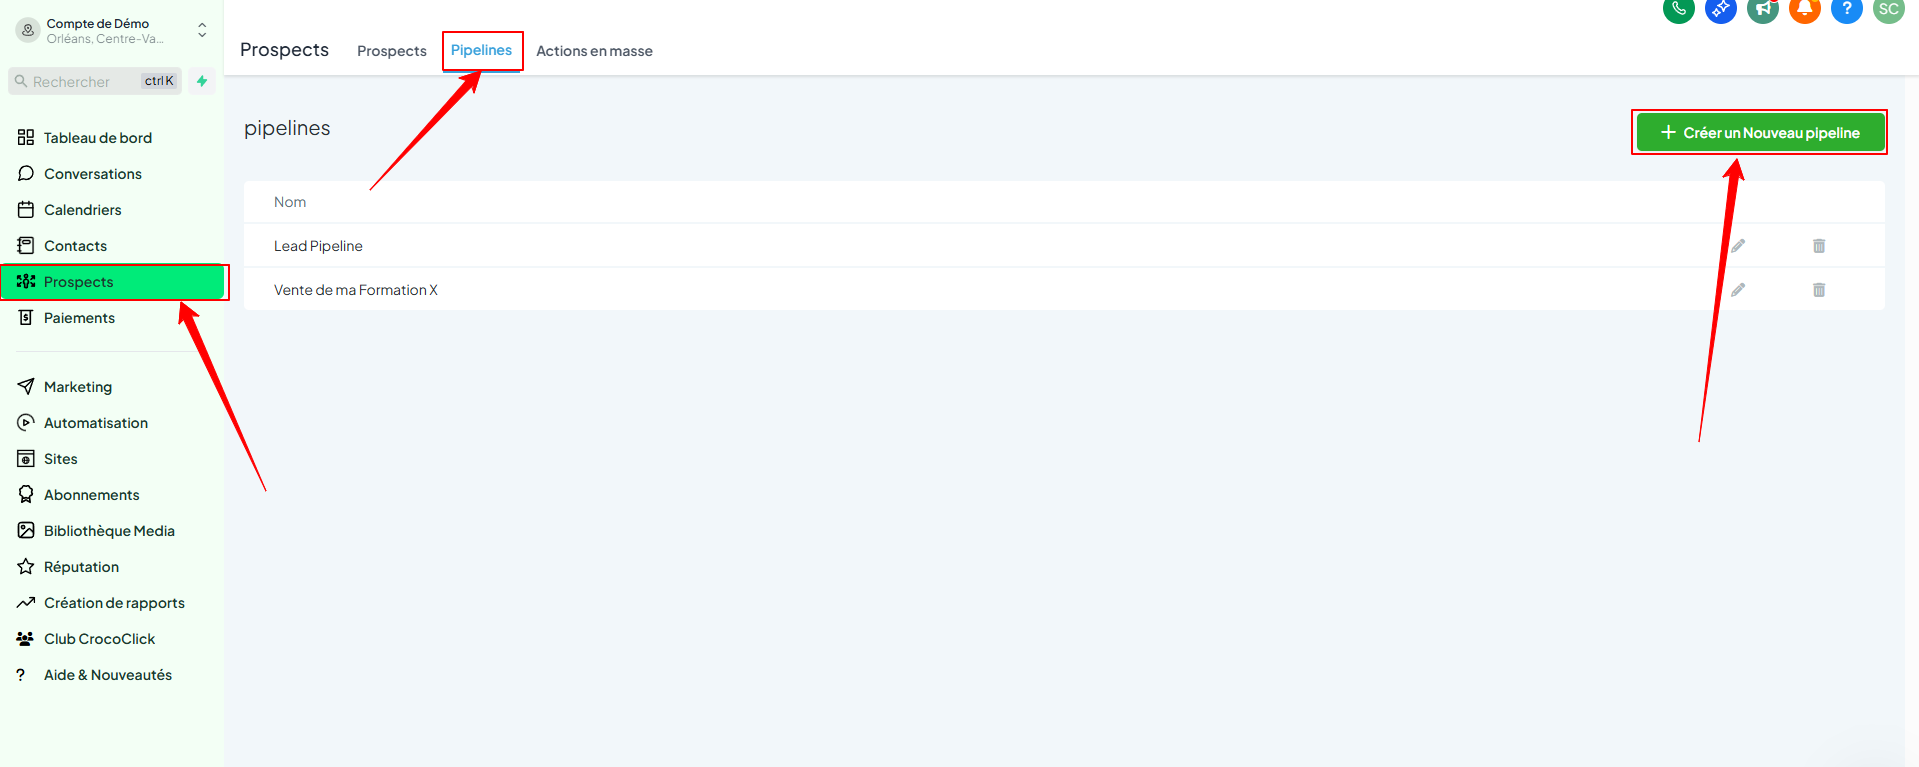
Name your pipeline
Add your custom stages (e.g., New Lead, Scheduled Call, Missed Appointment, Converted, etc.)
Click Save
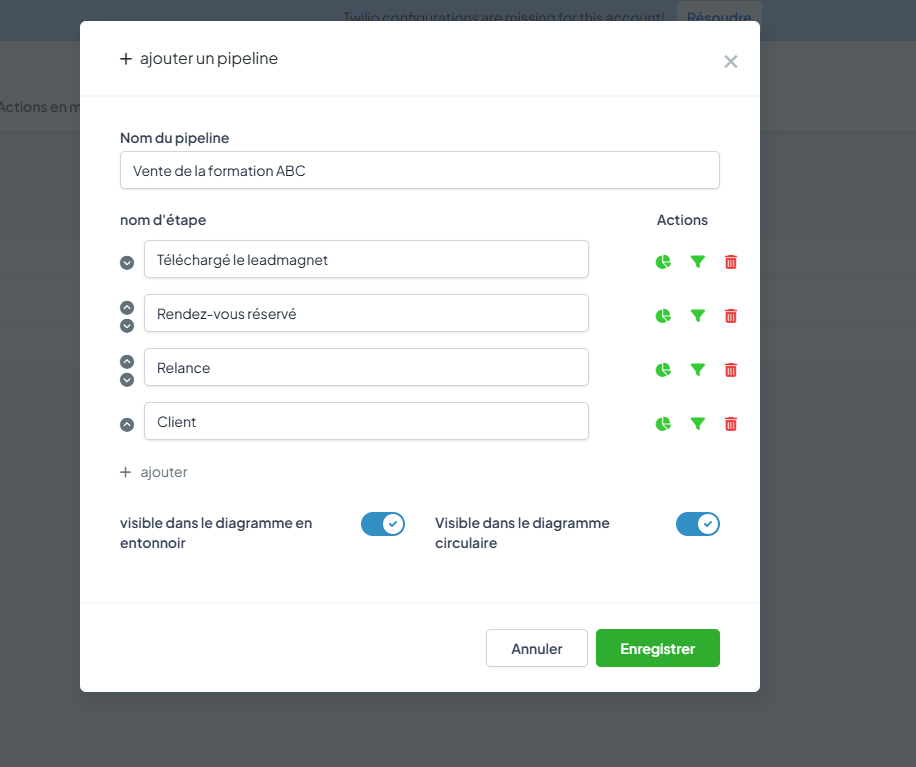
💡 TIP: Tailor your stages to your actual sales method: this pipeline should reflect the reality of your field.
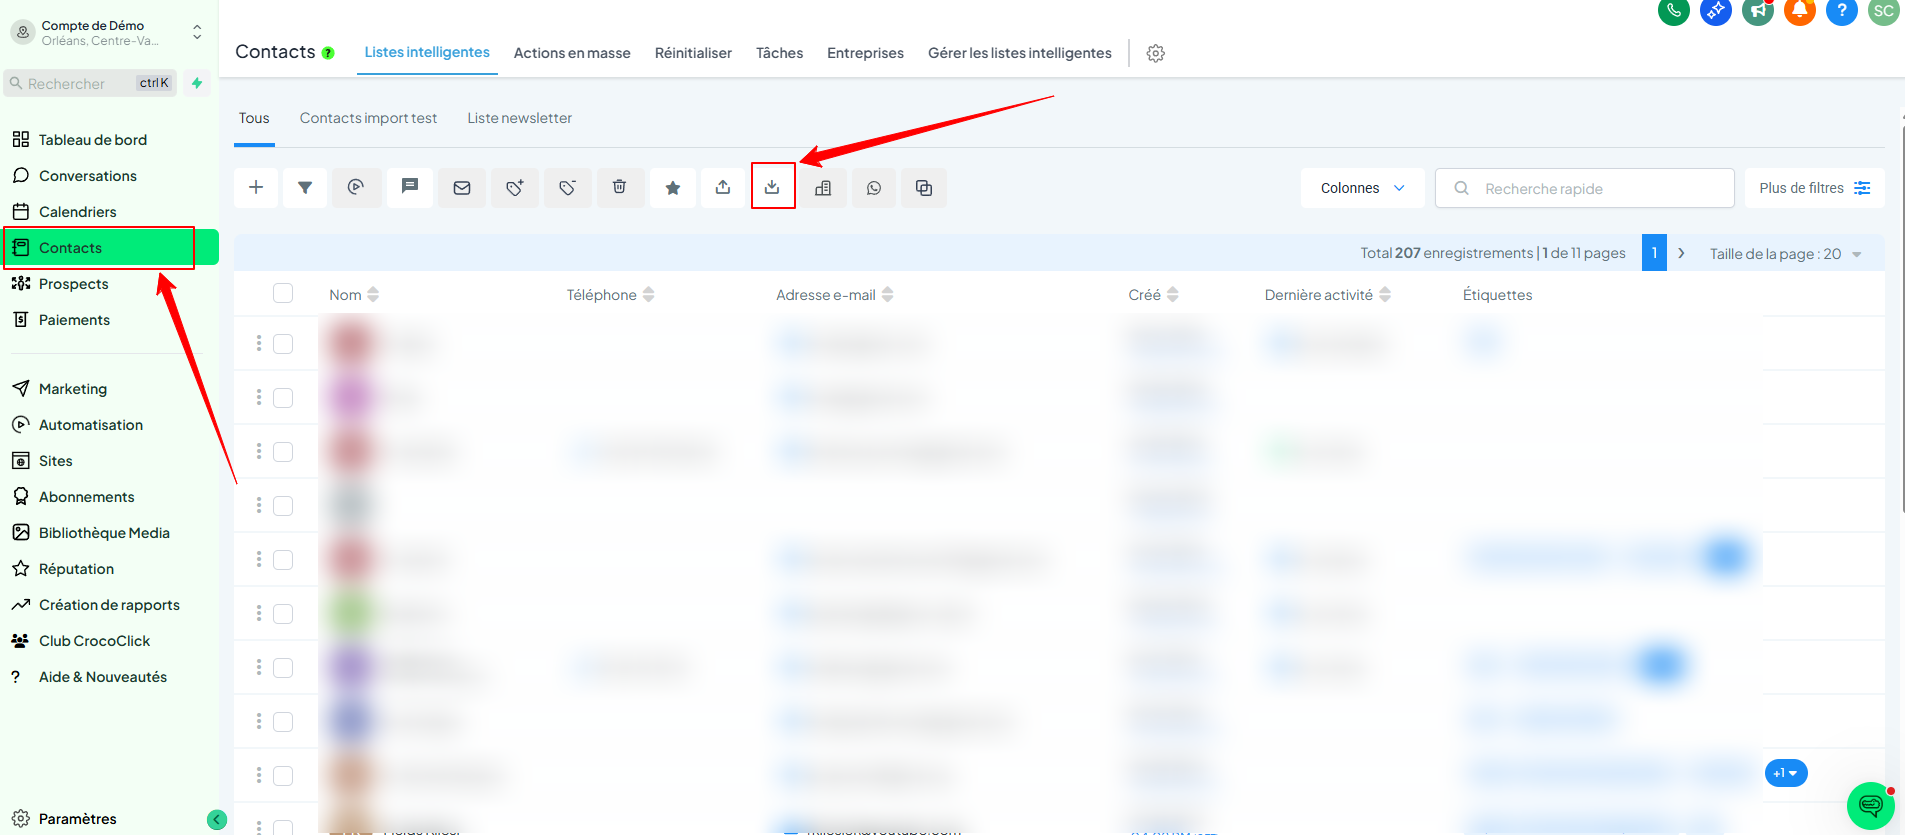
2. Import contacts into the pipeline
You can import your contacts directly as opportunities:
Go to Contacts
Click on the Import icon
In the first step, check the Prospects box.
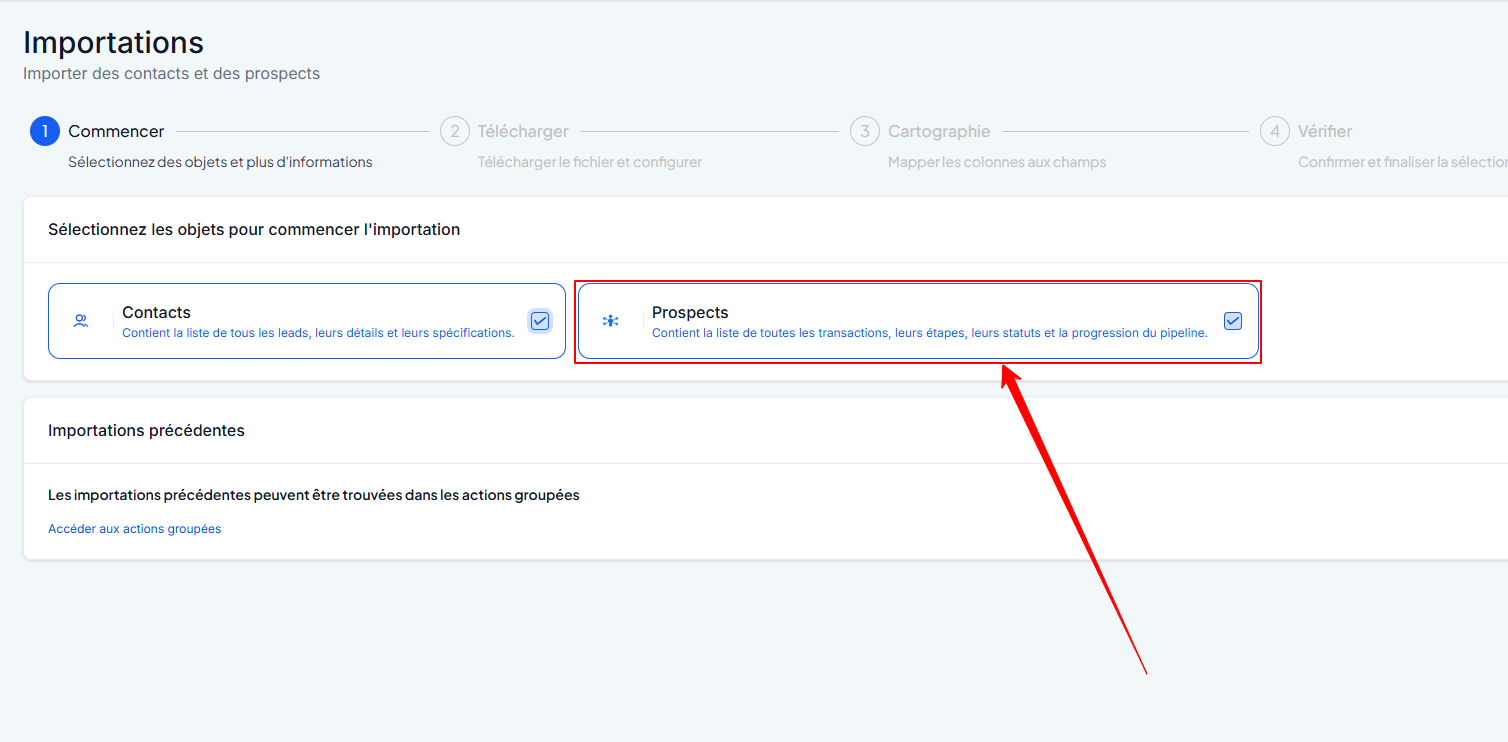
Import your CSV file (name, email, etc.)
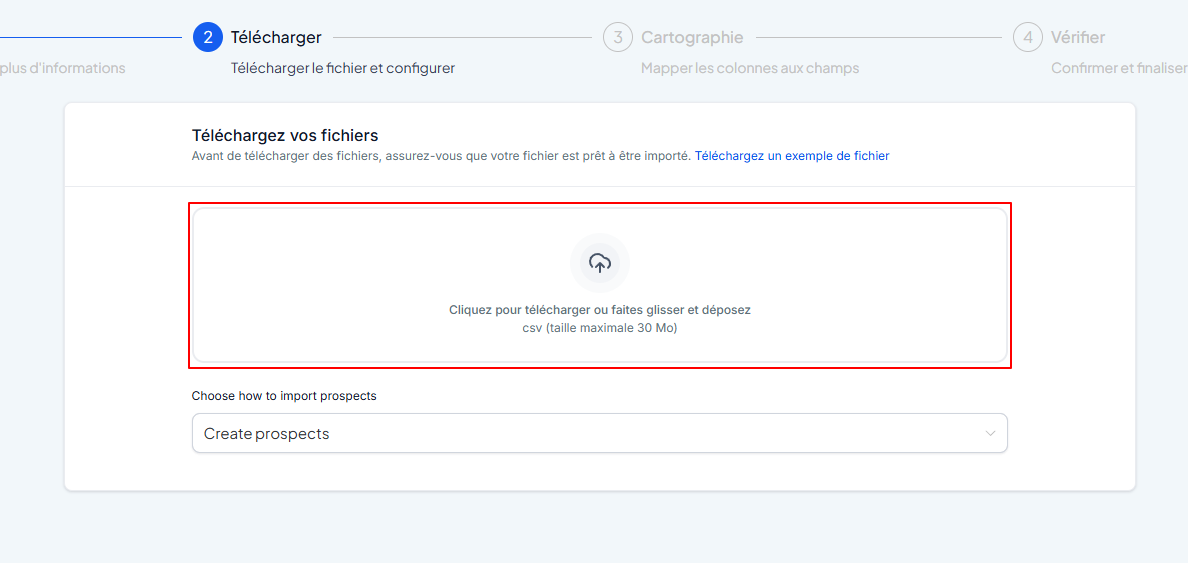
Match the columns in your file with the CrocoClick fields
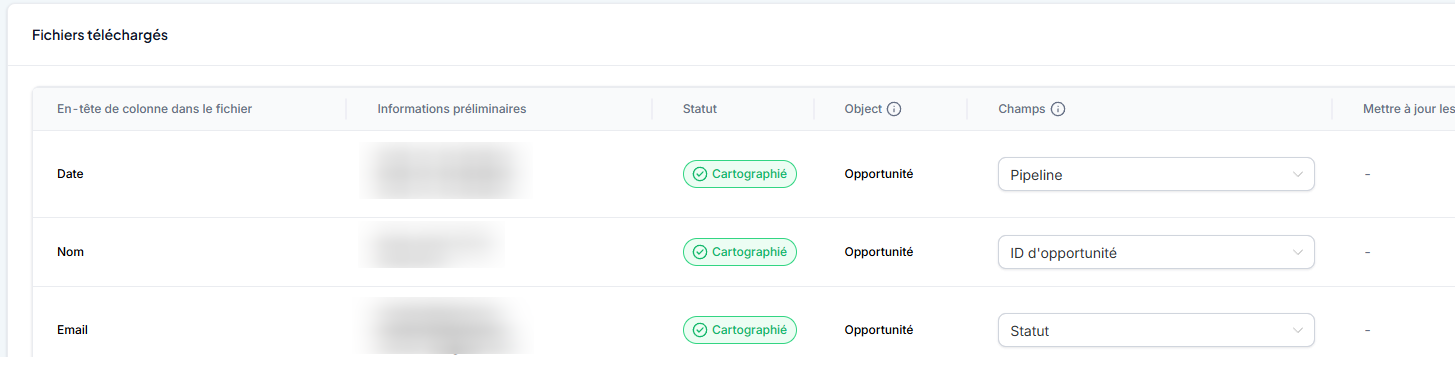
Click Next, check everything, then start the import
All your contacts will then appear in the pipeline, ready to be processed.
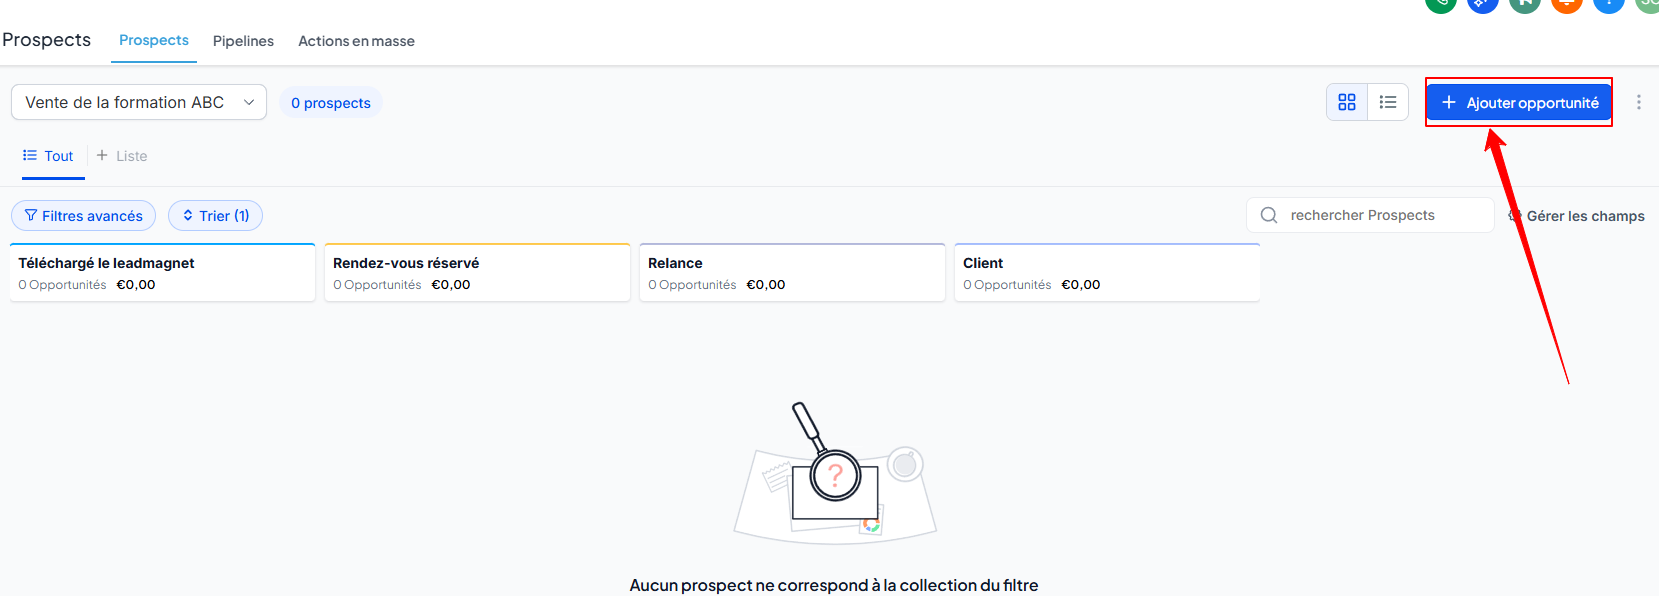
3. Add a prospect manually
Do you have a new prospect in person or on the phone? You can enter them manually:
Go to Prospects
Click Add Opportunity
Choose an existing contact
Enter the opportunity details:
Associated pipeline
Current stage
Estimated amount (optional)
Source or additional note
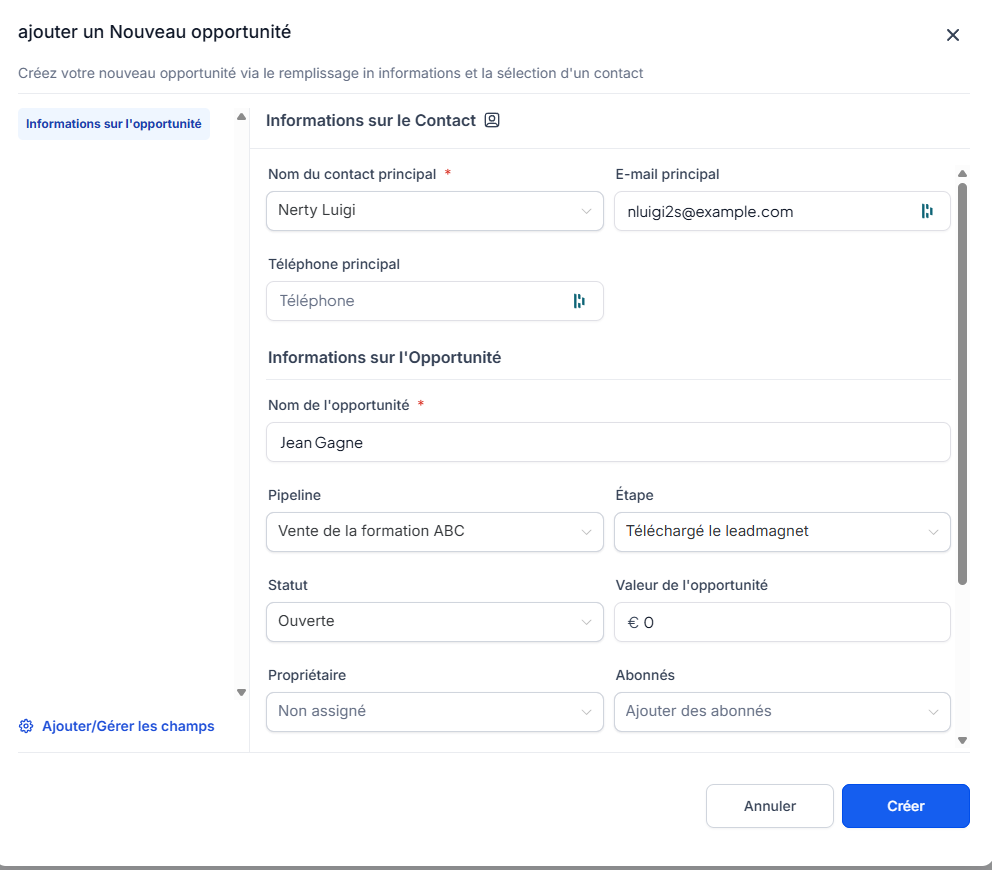
Click Create
Your contact is now tracked in the correct pipeline and stage.
Conclusion
With CrocoClick's pipelines, you can structure your sales follow-up and keep a clear view of your leads.
Create your first pipeline, add your contacts, move opportunities forward as you take action... and convert faster!