Connect a new WhatsApp number to CrocoClick
Connect WhatsApp Business to CrocoClick: integration steps, OTP verification, coexistence, conversation startup and pricing.
Written By CrocoTeam
Last updated 5 months ago
Introduction
⚠️IMPORTANT: Meta now allows "Coexistence" for all countries worldwide, except Nigeria and South Africa.
We recommend using this feature if you only want to use one WhatsApp number for your marketing campaigns.
To learn more, read our article:
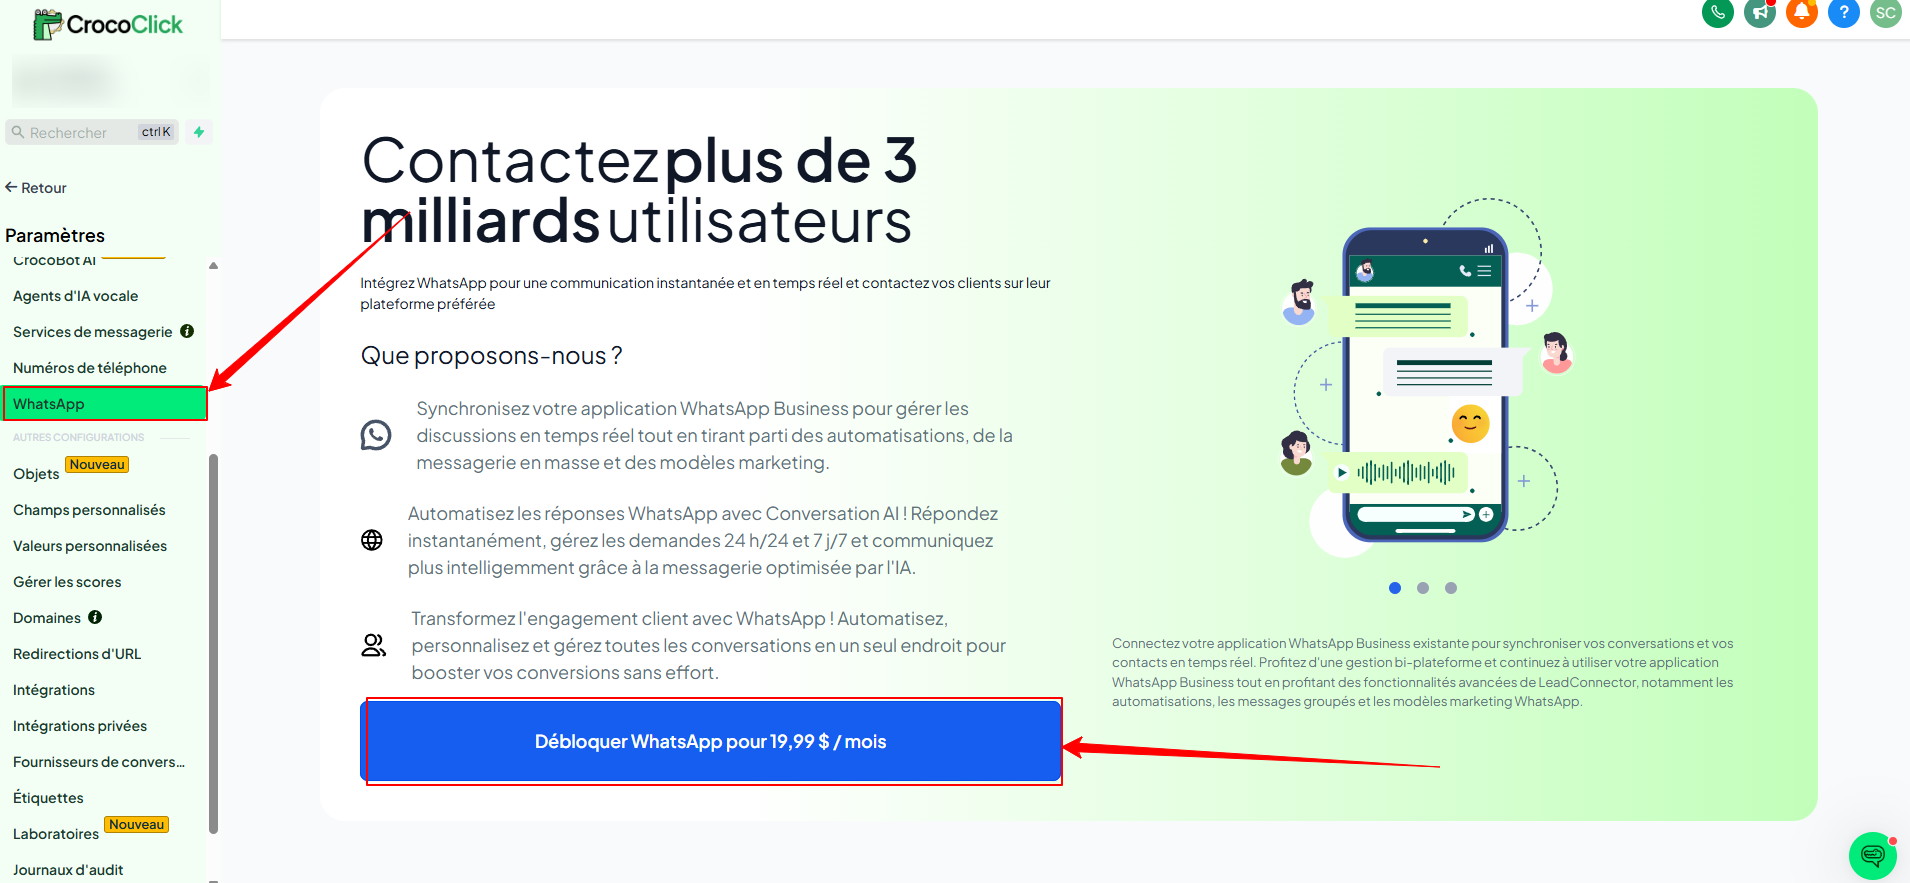
WhatsApp is no longer just a messaging tool.
Integrated with CrocoClick, it becomes an automated sales channel, connected to all your workflows, to follow up, convert, and build loyalty without friction.
In this guide, you will discover how to connect WhatsApp Business to CrocoClick using two possible methods:
Method 1 - Create an account with a new number: The simplest and most stable method. You purchase (or use) a new number, which you connect directly to the WhatsApp Business Platform.
Method 2 - Connect an existing WhatsApp Business application (coexistence mode): This method allows you to keep the classic app while taking advantage of automations via CrocoClick. But beware: it is not available in certain countries, including France, the European Union, and the United Kingdom.
By the end of this guide, your WhatsApp account will be linked to CrocoClick, ready to automate your messages and centralize your customer conversations.
More specifically, you will learn:
How to connect your number step by step
The technical requirements for each method
How to verify and validate your business
What to do (and avoid) to make the integration work the first time
💡TIP: Learn more at how WhatsApp works and how much it costs, read our dedicated article
WhatsApp setup
Method 1: Connect a new WhatsApp Business number
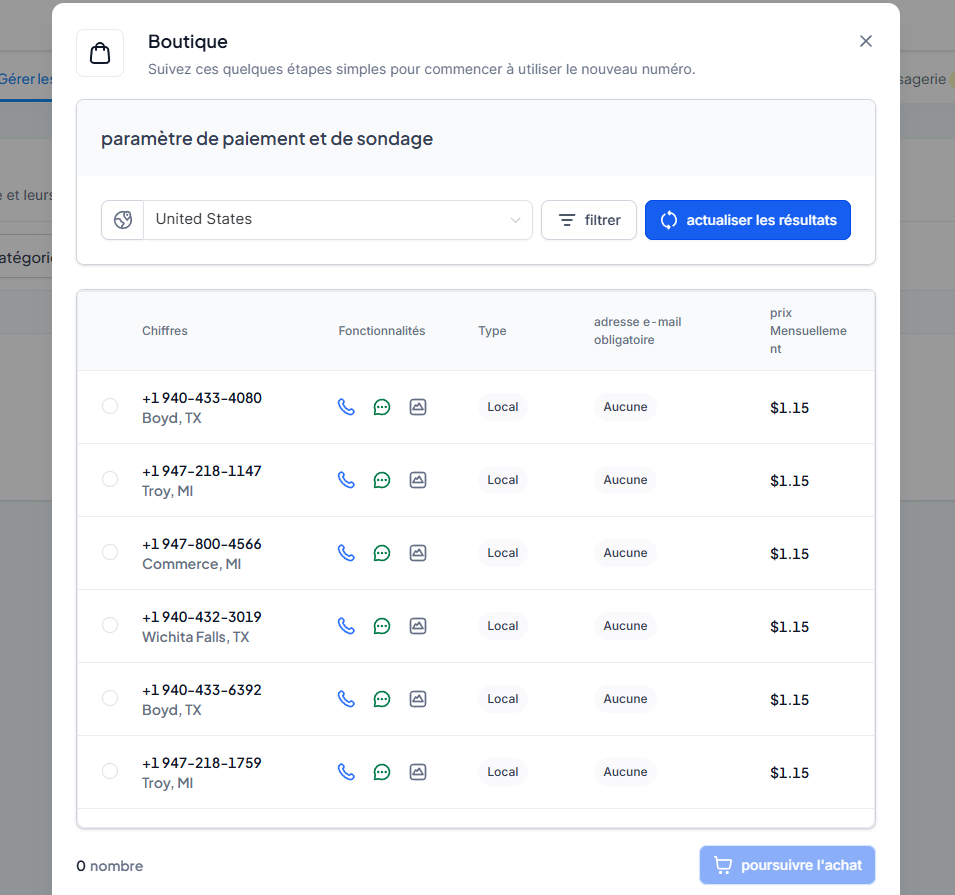
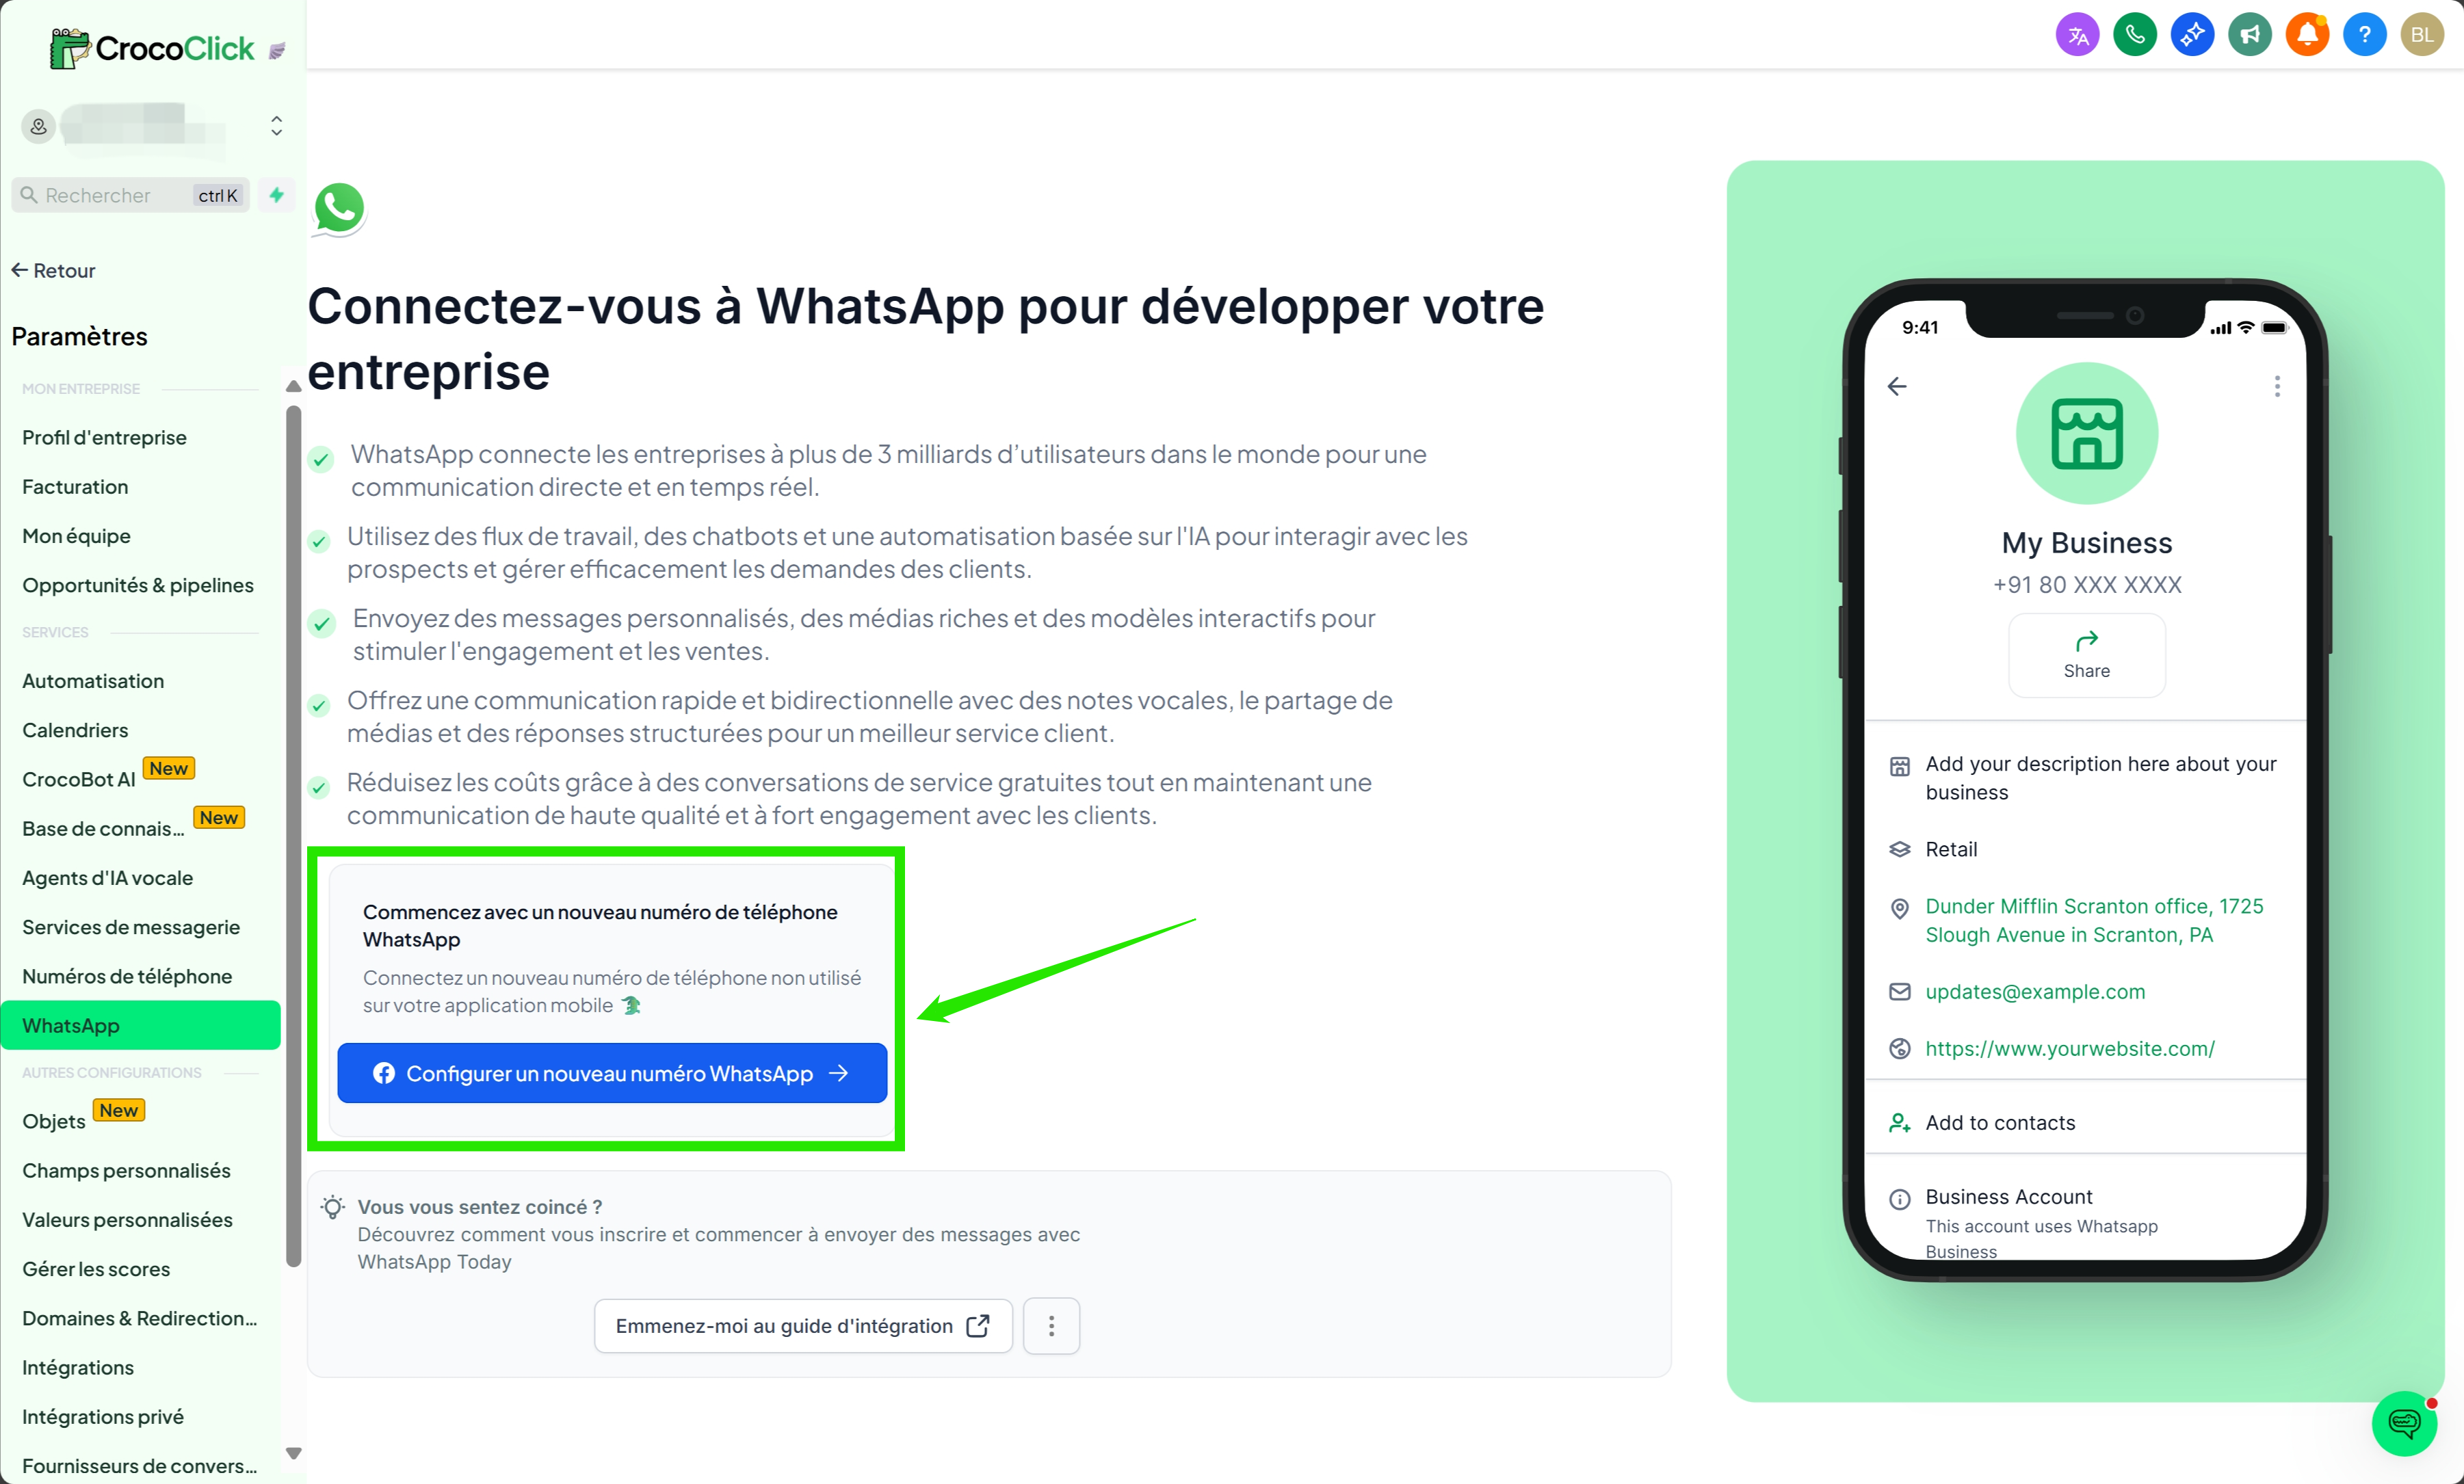
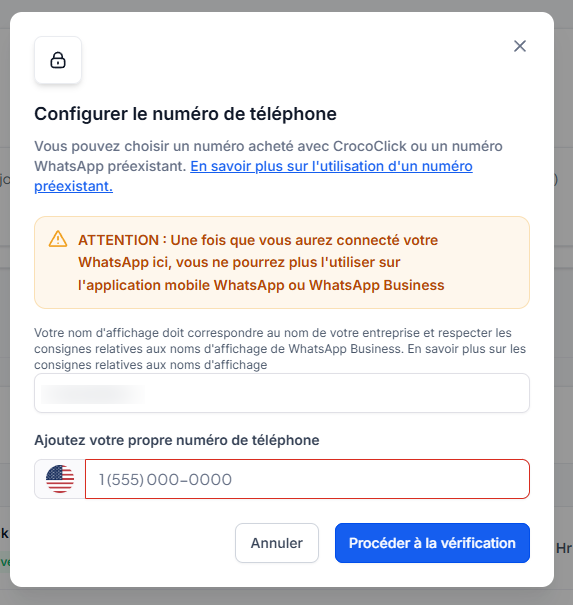
Step 1: Purchase a phone number on CrocoClick (or use an existing number)
💡TIP: We recommend purchasing a number directly from CrocoClick because you need a phone number that is not currently associated with a WhatsApp account
Purchase a phone number via CrocoClick by going to Settings > Phone Numbers > + Number
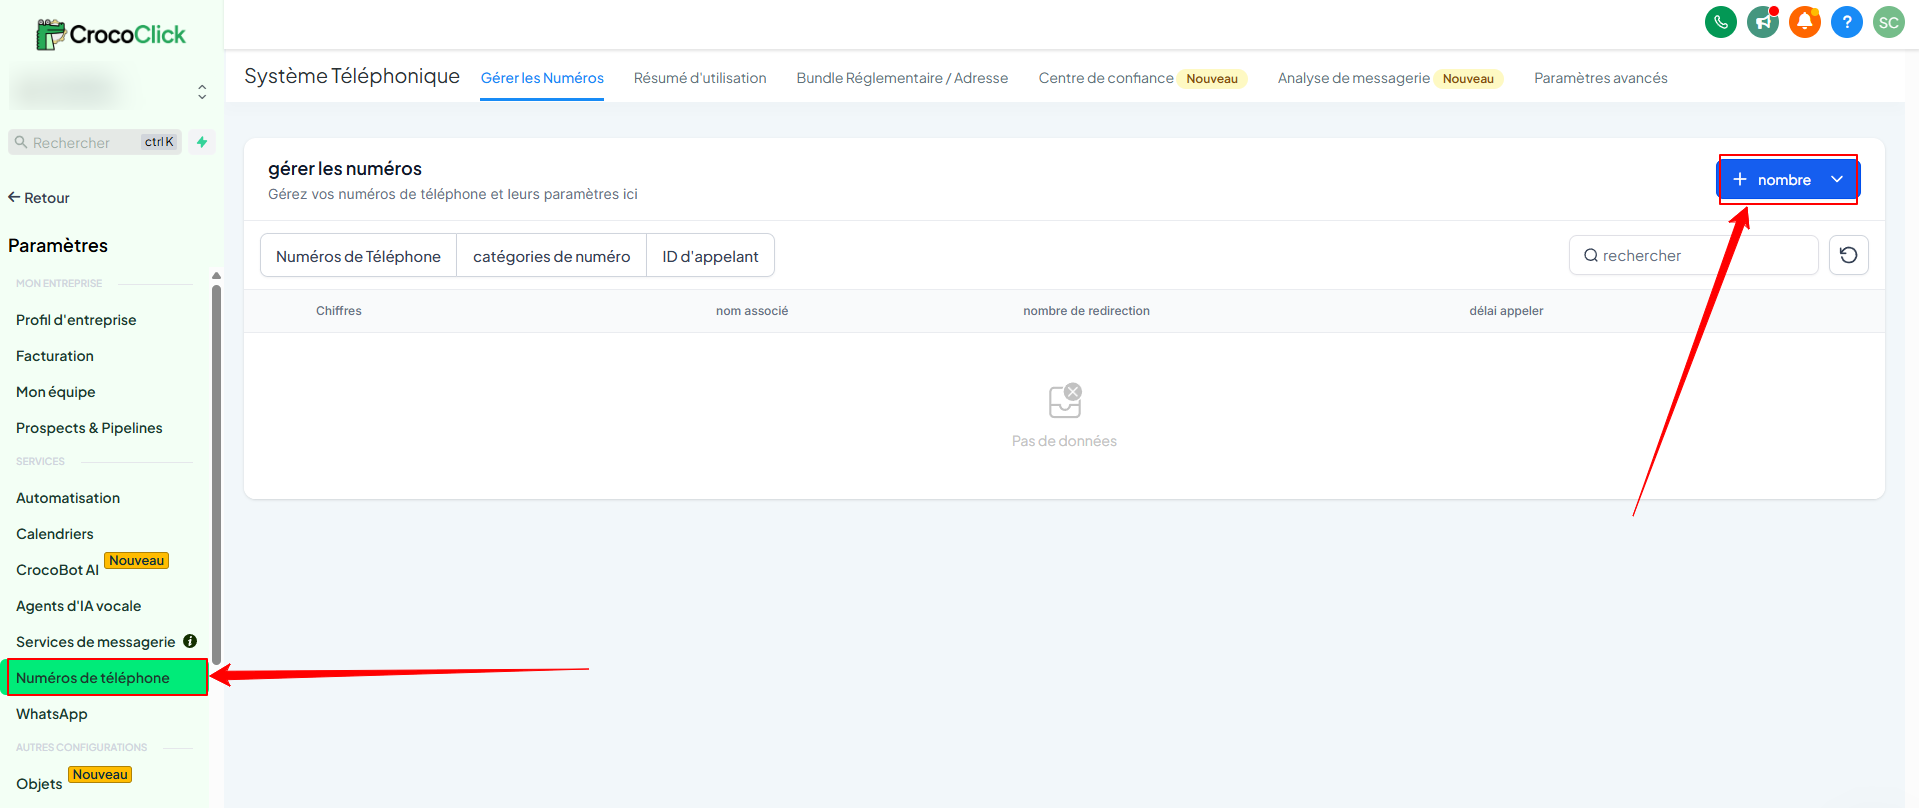
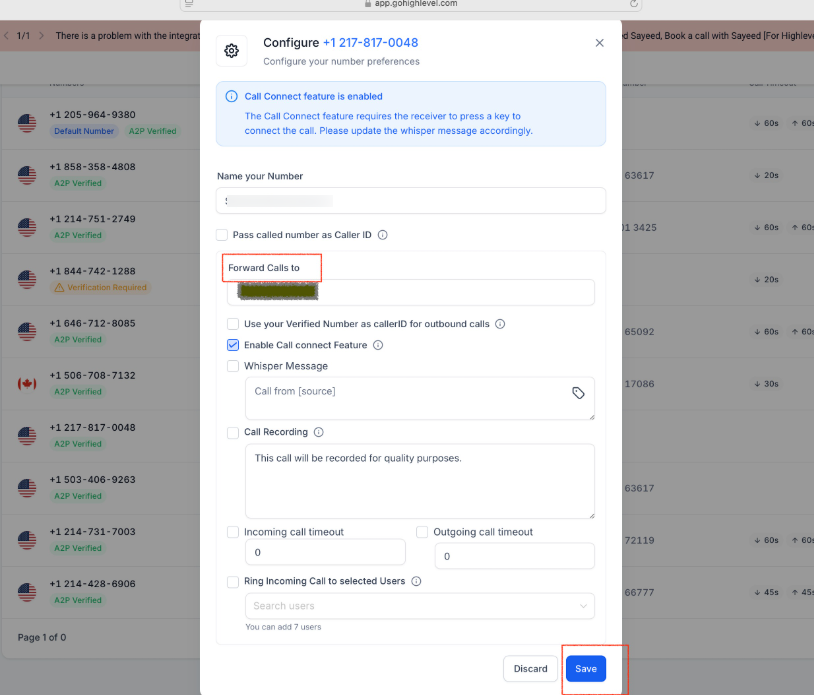
Forward calls to your main number.
Step 2: Start the registration process
Go to Settings > WhatsApp > Set up a new WhatsApp number.
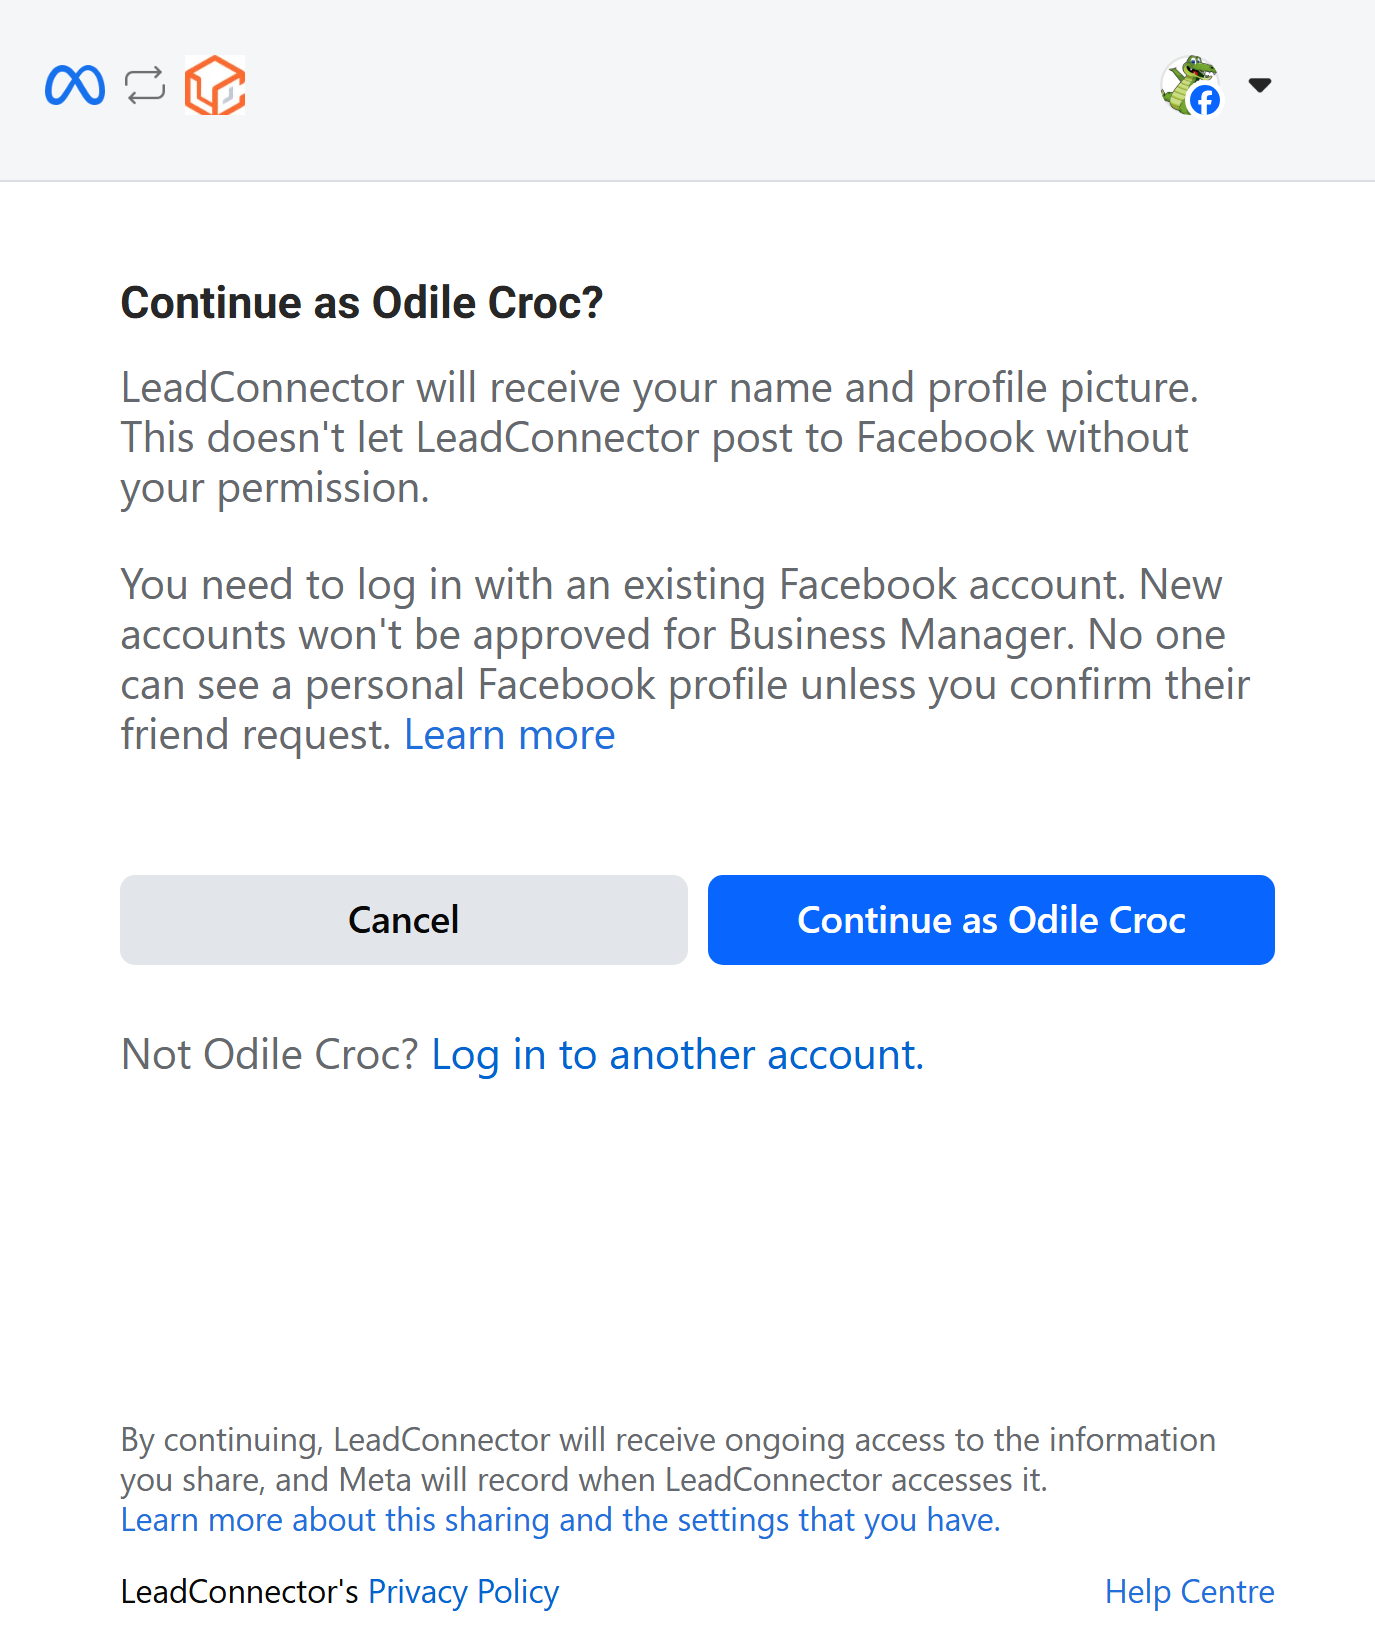
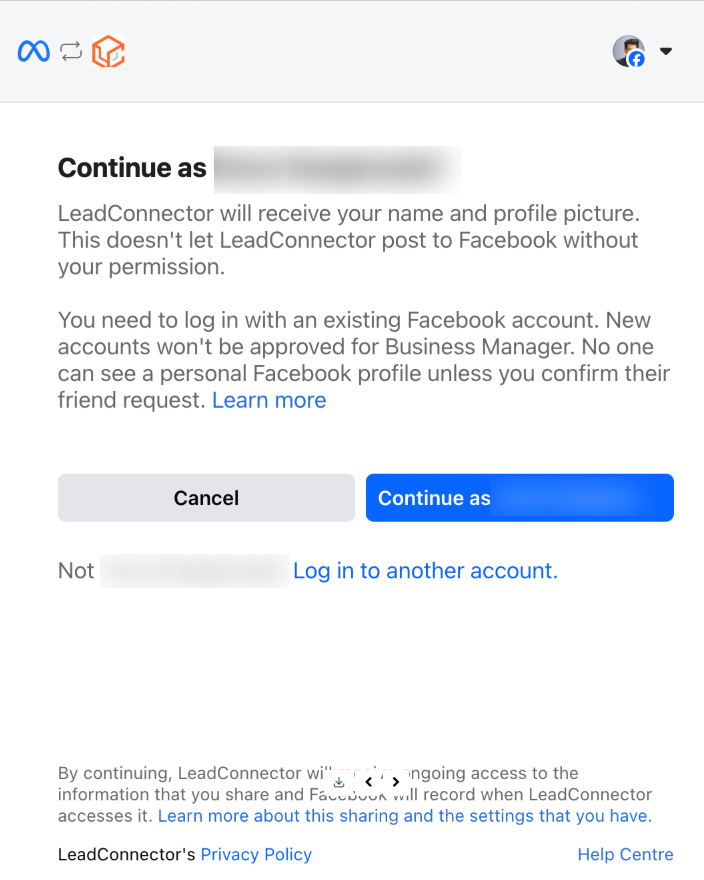
Step 3: Continue with Facebook
Click Continue with your Facebook account.
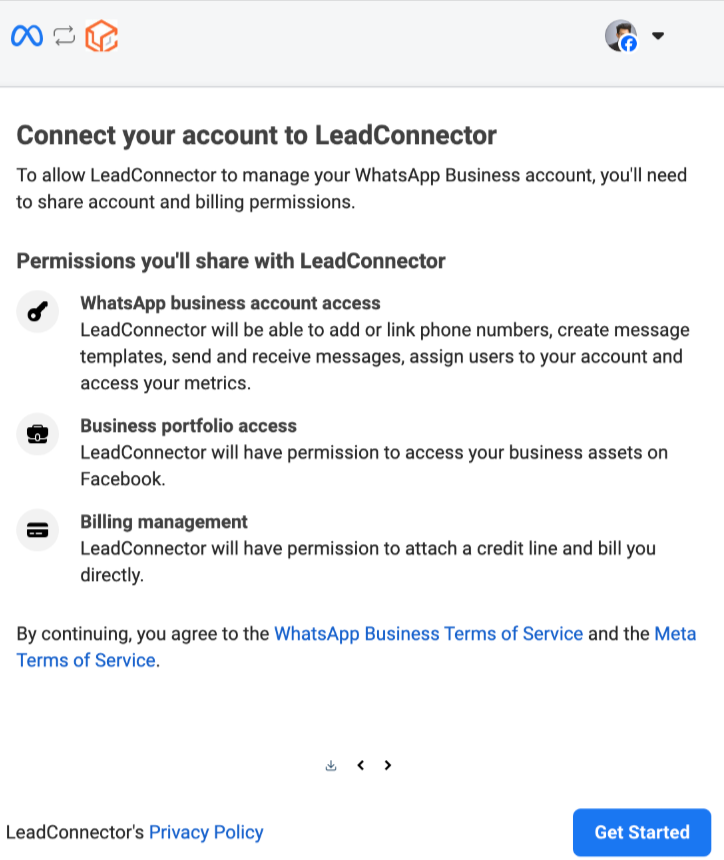
Step 4: Start setup
Tap Get Started to begin the integration.

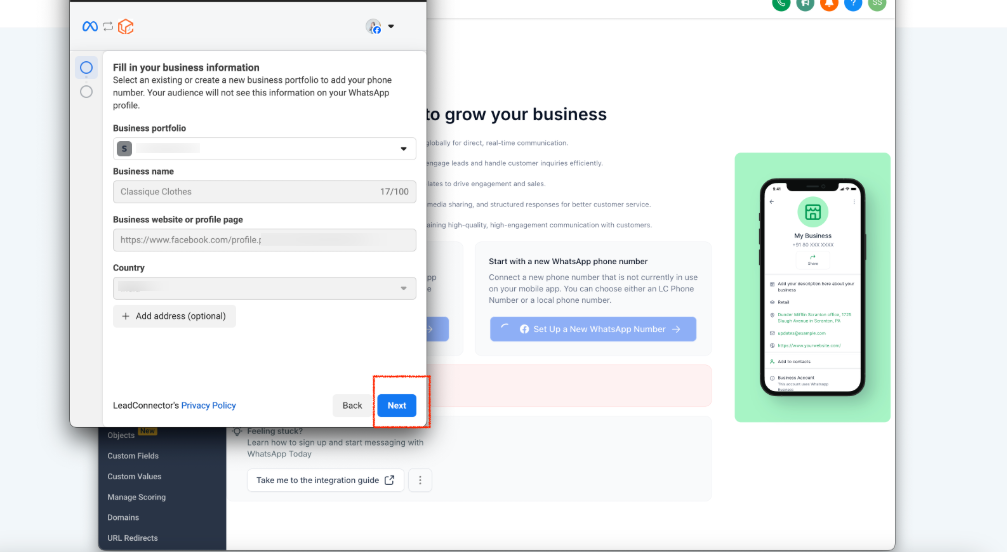
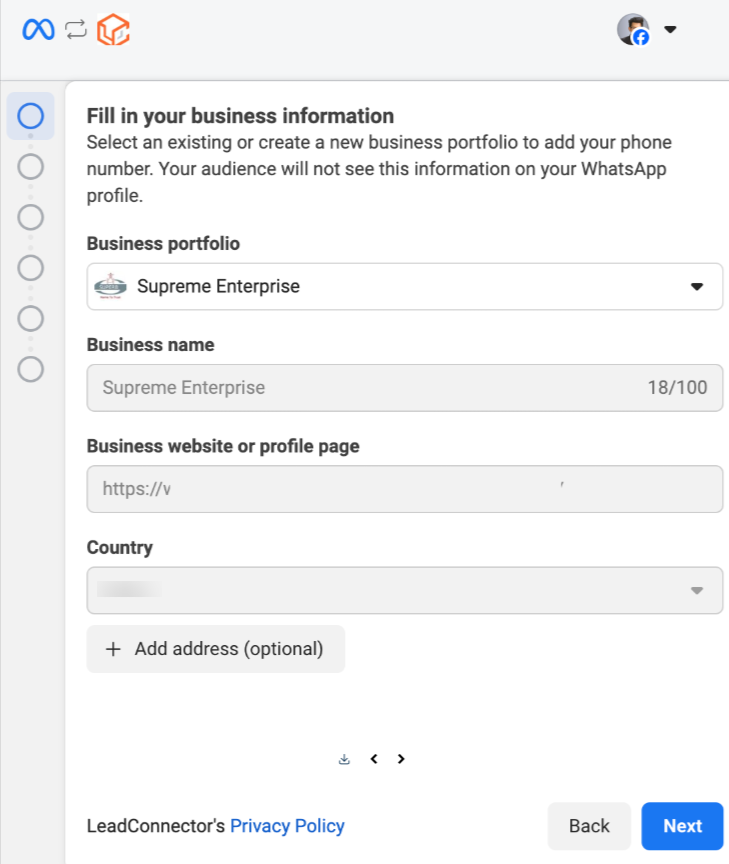
Step 5: Enter your business information
Fill in the requested information, then click Next.
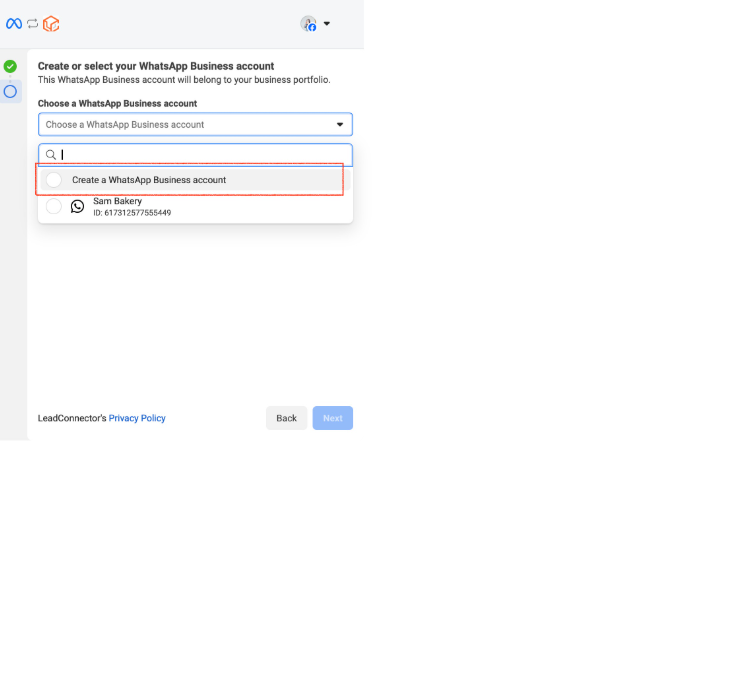
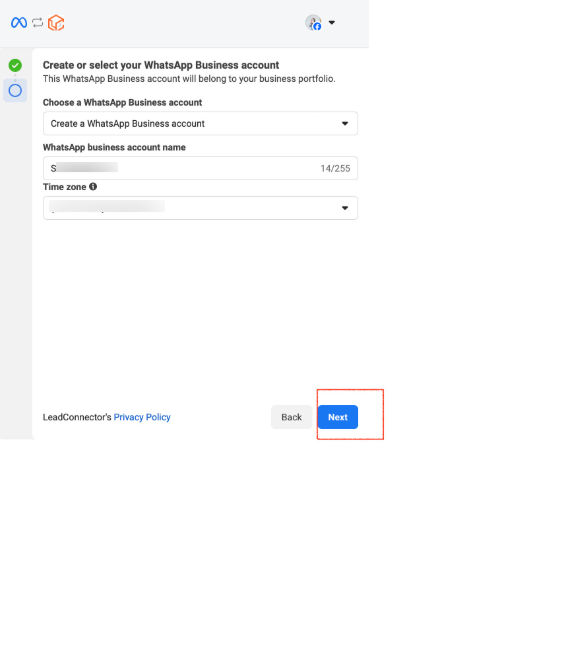
Step 6: Create a WhatsApp Business account
Select Create a WhatsApp Business account.
Step 7: Confirm your choice
Click Next.
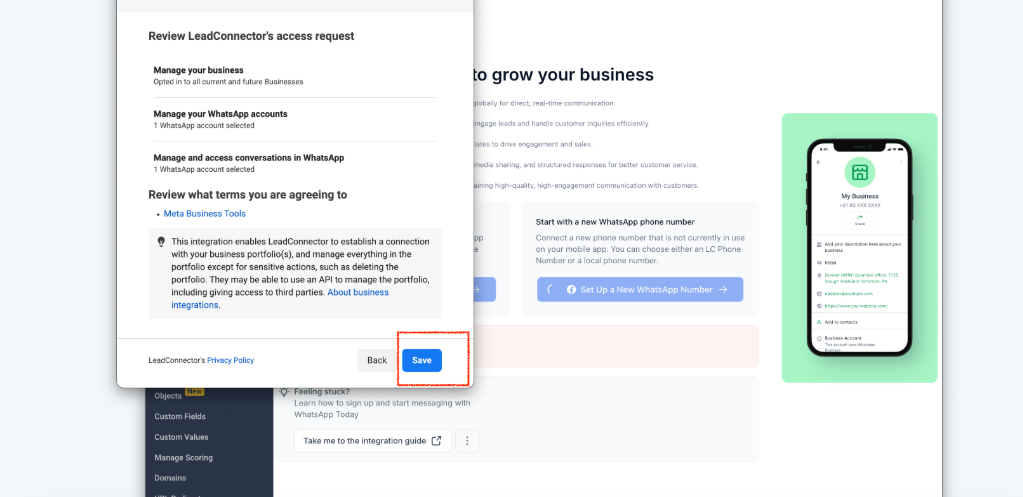
Step 8: Save and finalize the setup
Click Save.
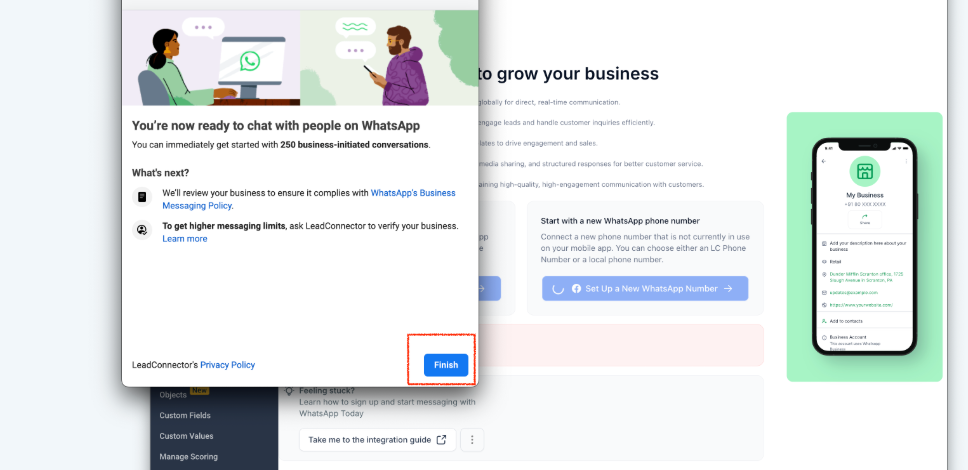
Step 9: Complete the setup
Tap Finish and your WhatsApp Business account is now connected.
Step 10: Add and verify your number
Go to Settings > WhatsApp.
Click Add Phone Number and follow the verification steps.
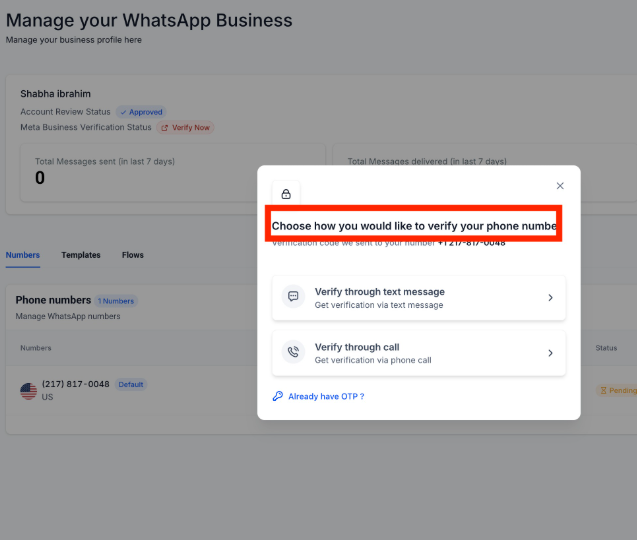
Step 11: Choose a verification method
SMS: receive an OTP code via SMS, visible in the Conversations tab.
Phone call: you will receive a call on your forwarded number.
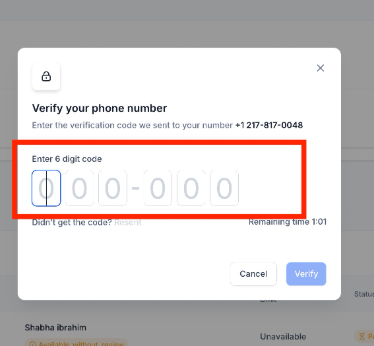
Step 12: Enter the OTP code
Enter the 6-digit code to complete the verification.
Step 13: Verification successful!
Your WhatsApp Business number is now active and verified.
💡 TIP: Once a number has been migrated to the WhatsApp Business platform, it can no longer be used on the classic WhatsApp Business app.
Restrictions to be aware of:
You must use a new number.
Numbers that are already active on WhatsApp or the WhatsApp Business app cannot be used.
Method 2: Connect an existing WhatsApp Business app (only for certain countries)
Countries not supported for coexistence functionality
WhatsApp Business numbers with area codes from these countries/regions are not compatible:
Countries:
Australia
India
Japan
Nigeria
Philippines
Russia
South Korea
South Africa
Turkey
Regions:
European Economic Area (EEA)
European Union (EU)
United Kingdom (UK)
💡 TIP: To learn more about WhatsApp coexistence, check out our article: Use WhatsApp Coexistence to benefit from advanced automation features with your current number
Link your WhatsApp Business app to a Facebook page
This allows your customers to contact you directly via your Facebook page.
Prerequisites:
A Facebook page
The WhatsApp Business app installed and up to date
Steps:
Open the WhatsApp Business app.
Android: tap More options; iPhone: tap Settings.
Go to Business Tools > Facebook & Instagram.
Tap Facebook > Continue.
Log in to your Facebook account.
Choose the page you want to link, then tap Connect WhatsApp.
Create a page if necessary.
A WhatsApp button will appear on your Facebook page.
Return to WhatsApp Business: your linked page will appear at the top of the screen.
Register via the WhatsApp Business app
Step 1: Start registration
Go to Settings > WhatsApp > Register with Facebook.
Step 2: Follow the instructions on the screen
Complete the steps provided.
Step 3: Connect to LeadConnector
Click Start to link your account to LeadConnector.
Step 4: Enter your company information
Enter the required information.
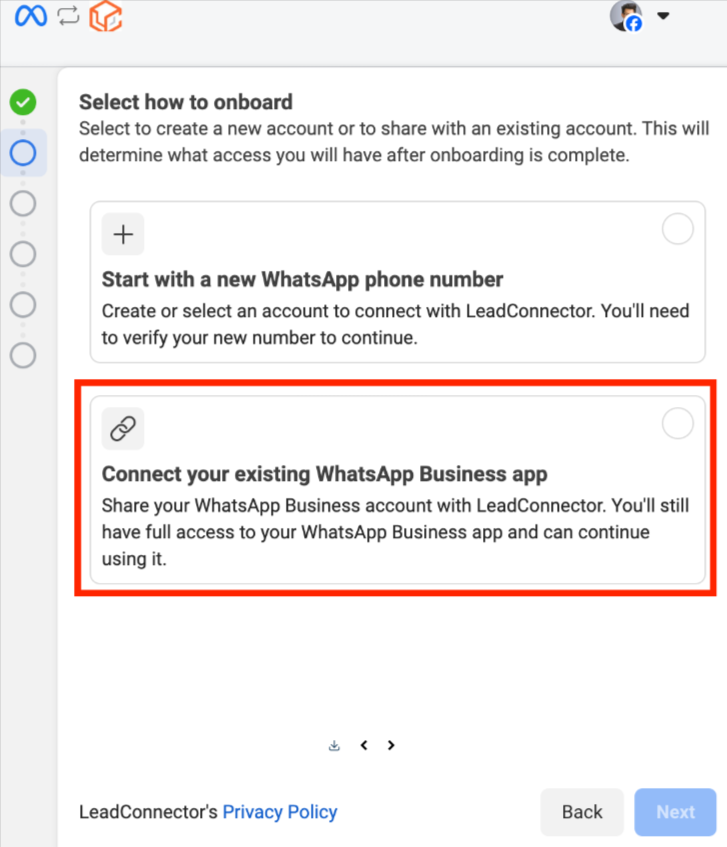
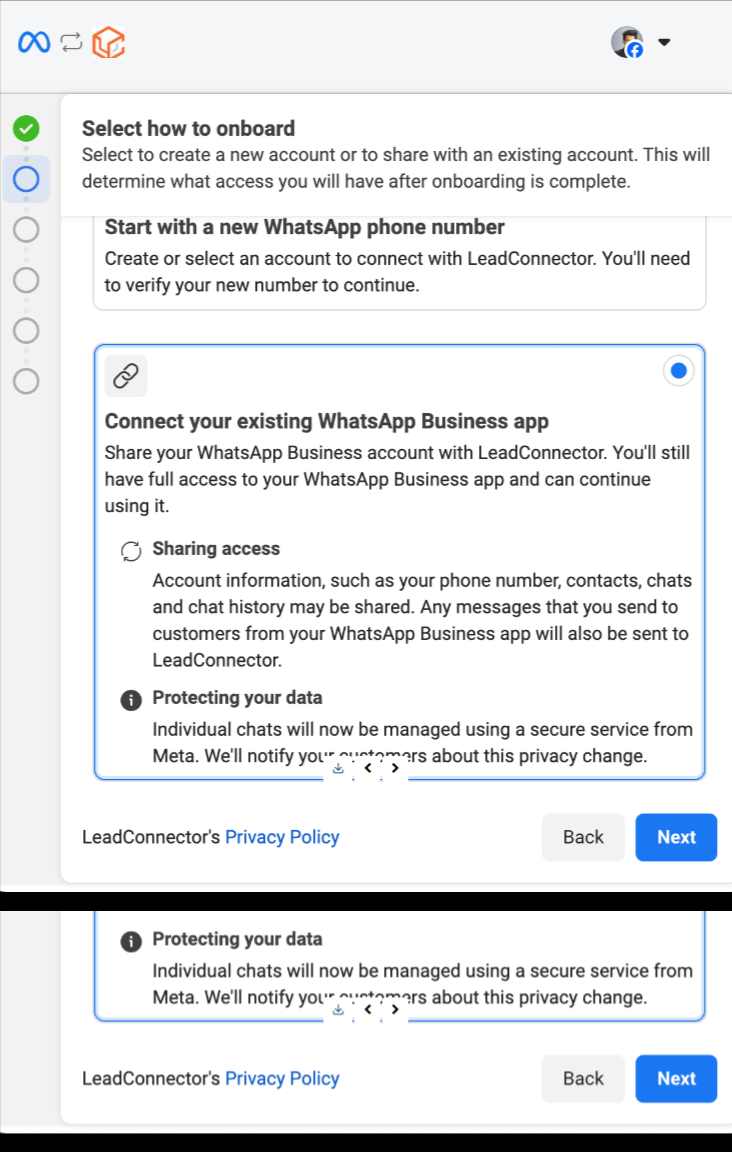
Step 5: Choose the type of integration
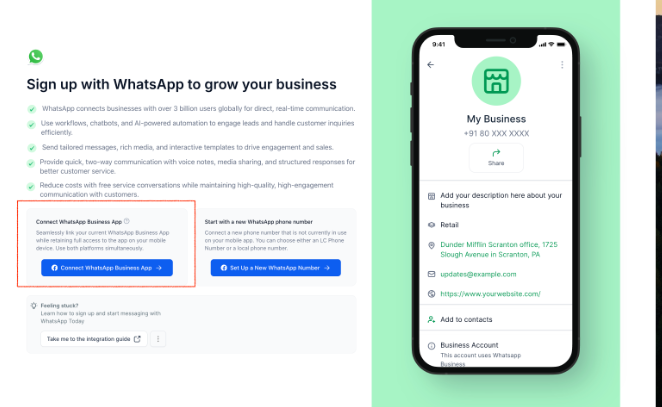
Select Connect your existing WhatsApp Business app.
Step 6: Confirm the app connection
Share your existing account with LeadConnector.
You retain full access to the WhatsApp application.

Step 7: Add a WhatsApp number
Enter the number to connect.
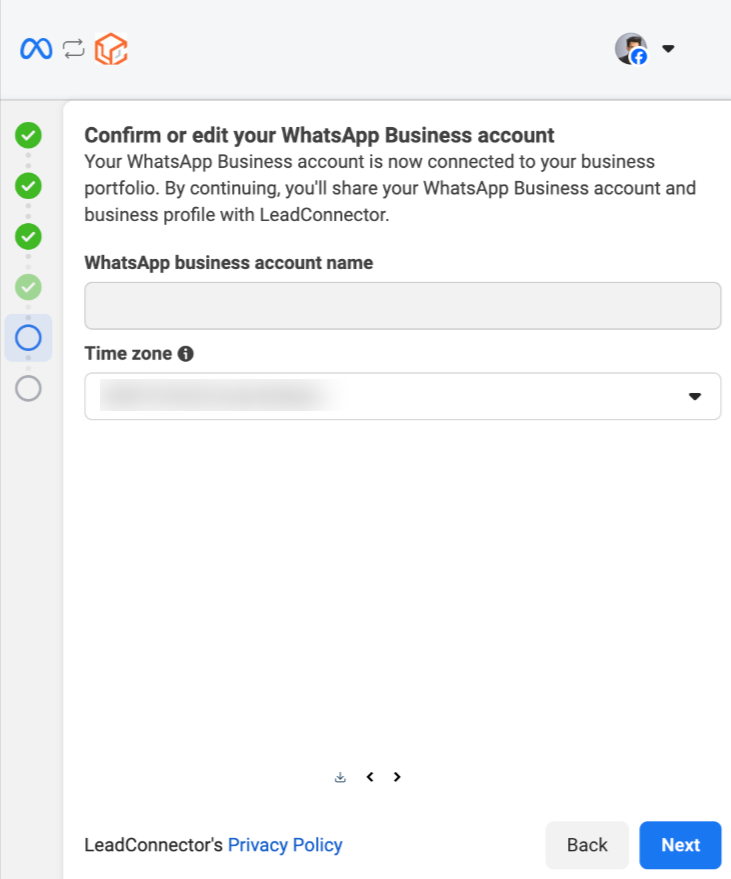
Step 8: Verify or modify the information
Verify that all the data is correct.
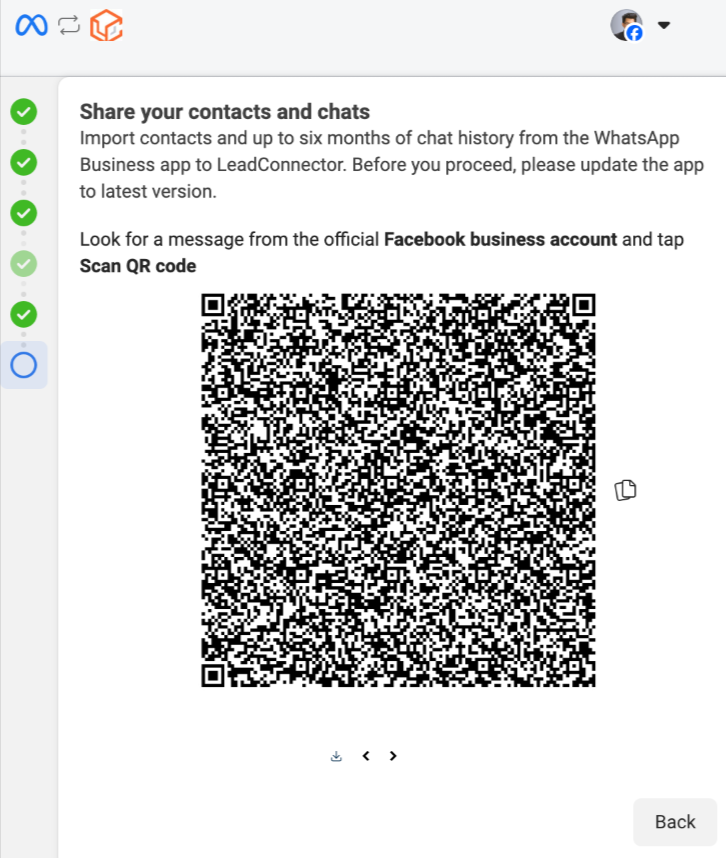
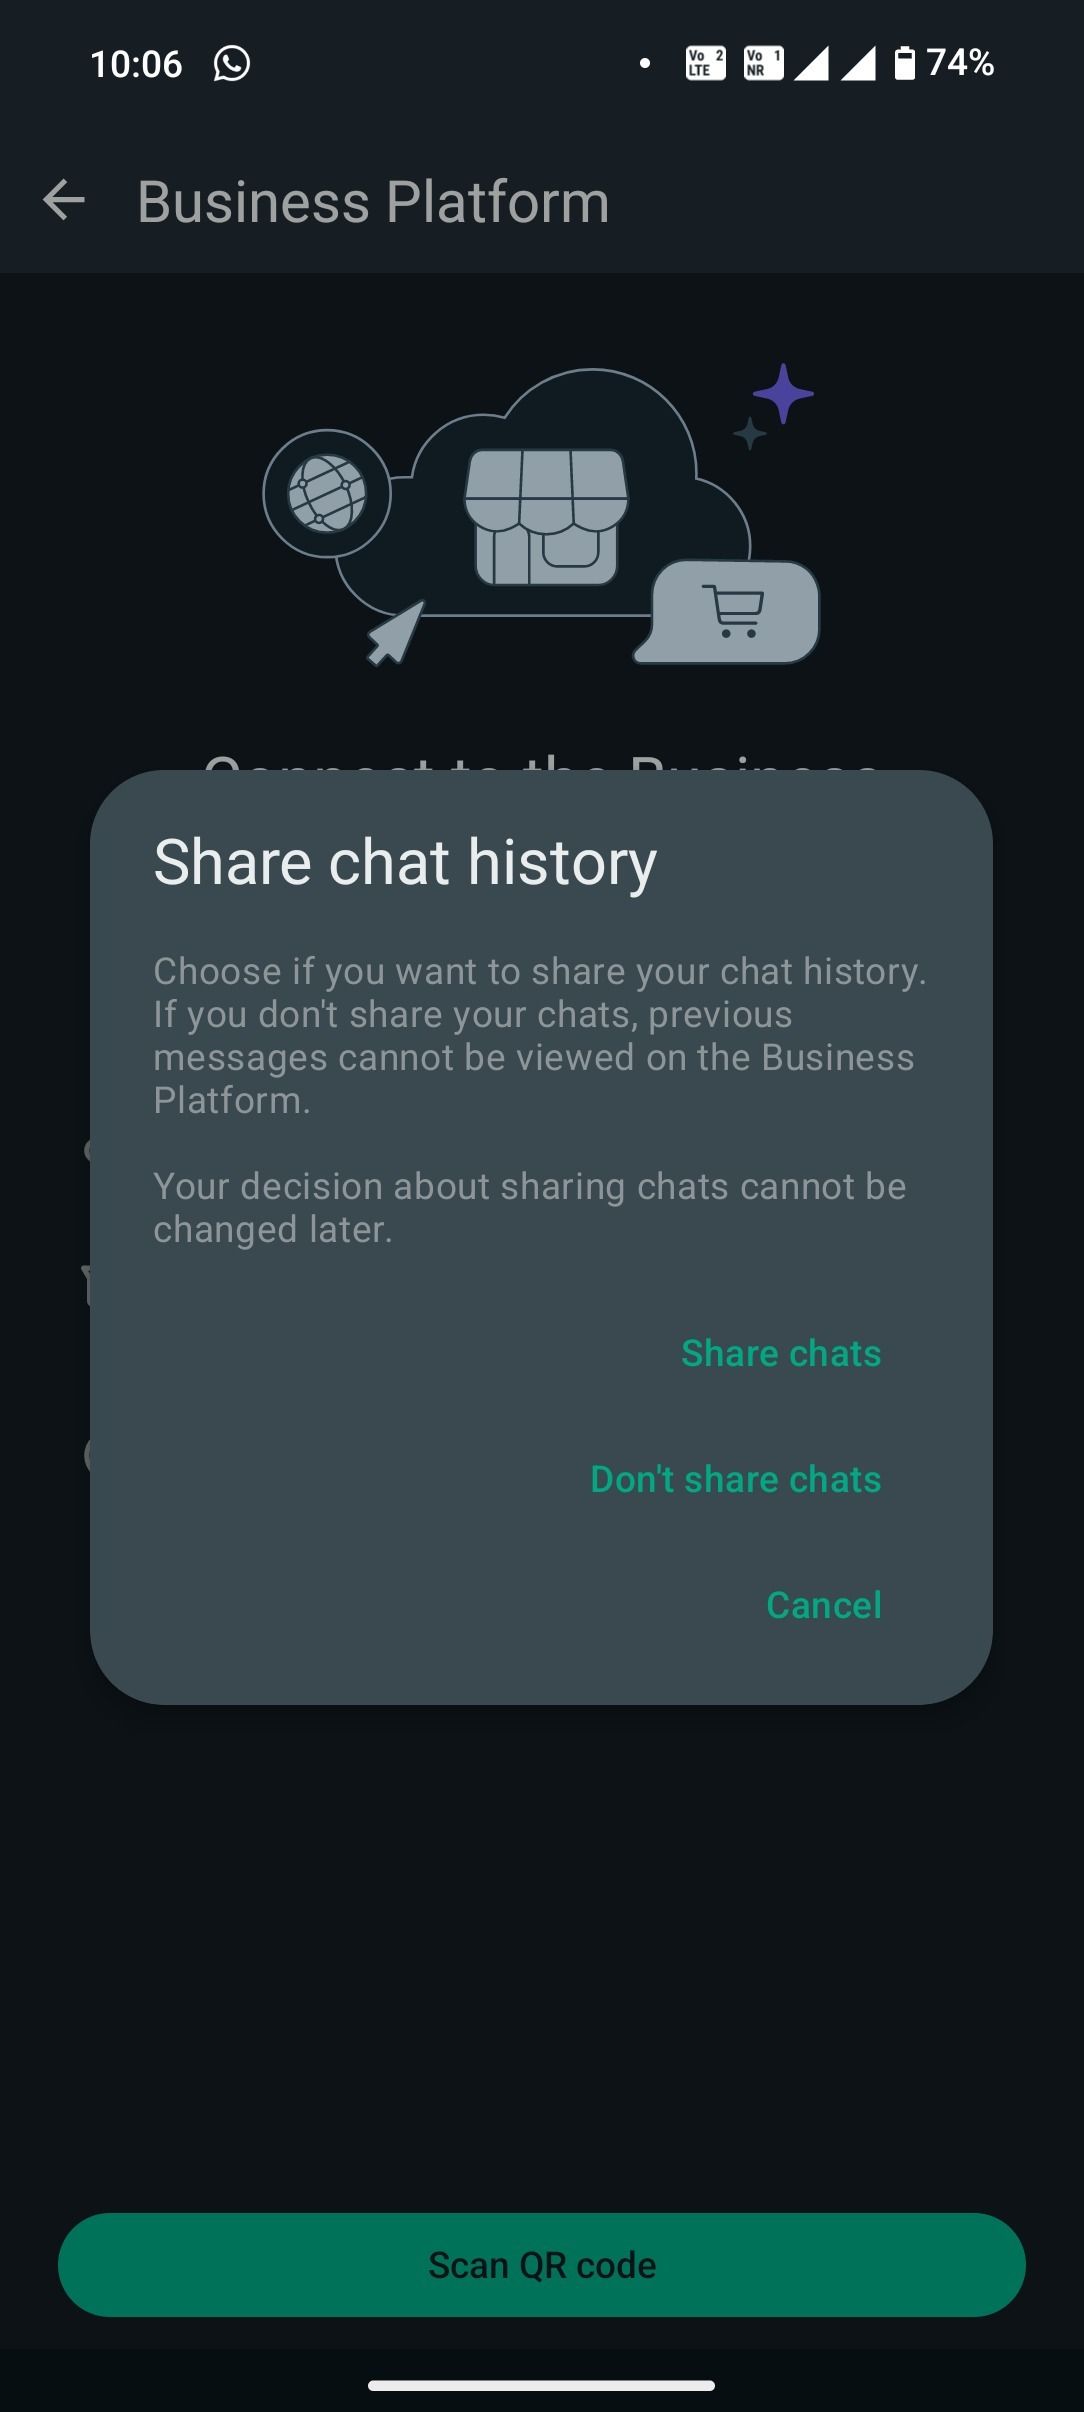
Step 9: Import your contacts and messages
Import your contacts and up to 6 months of conversation history.
Update your app if necessary.
Scan the QR code sent by the official Facebook Business account.
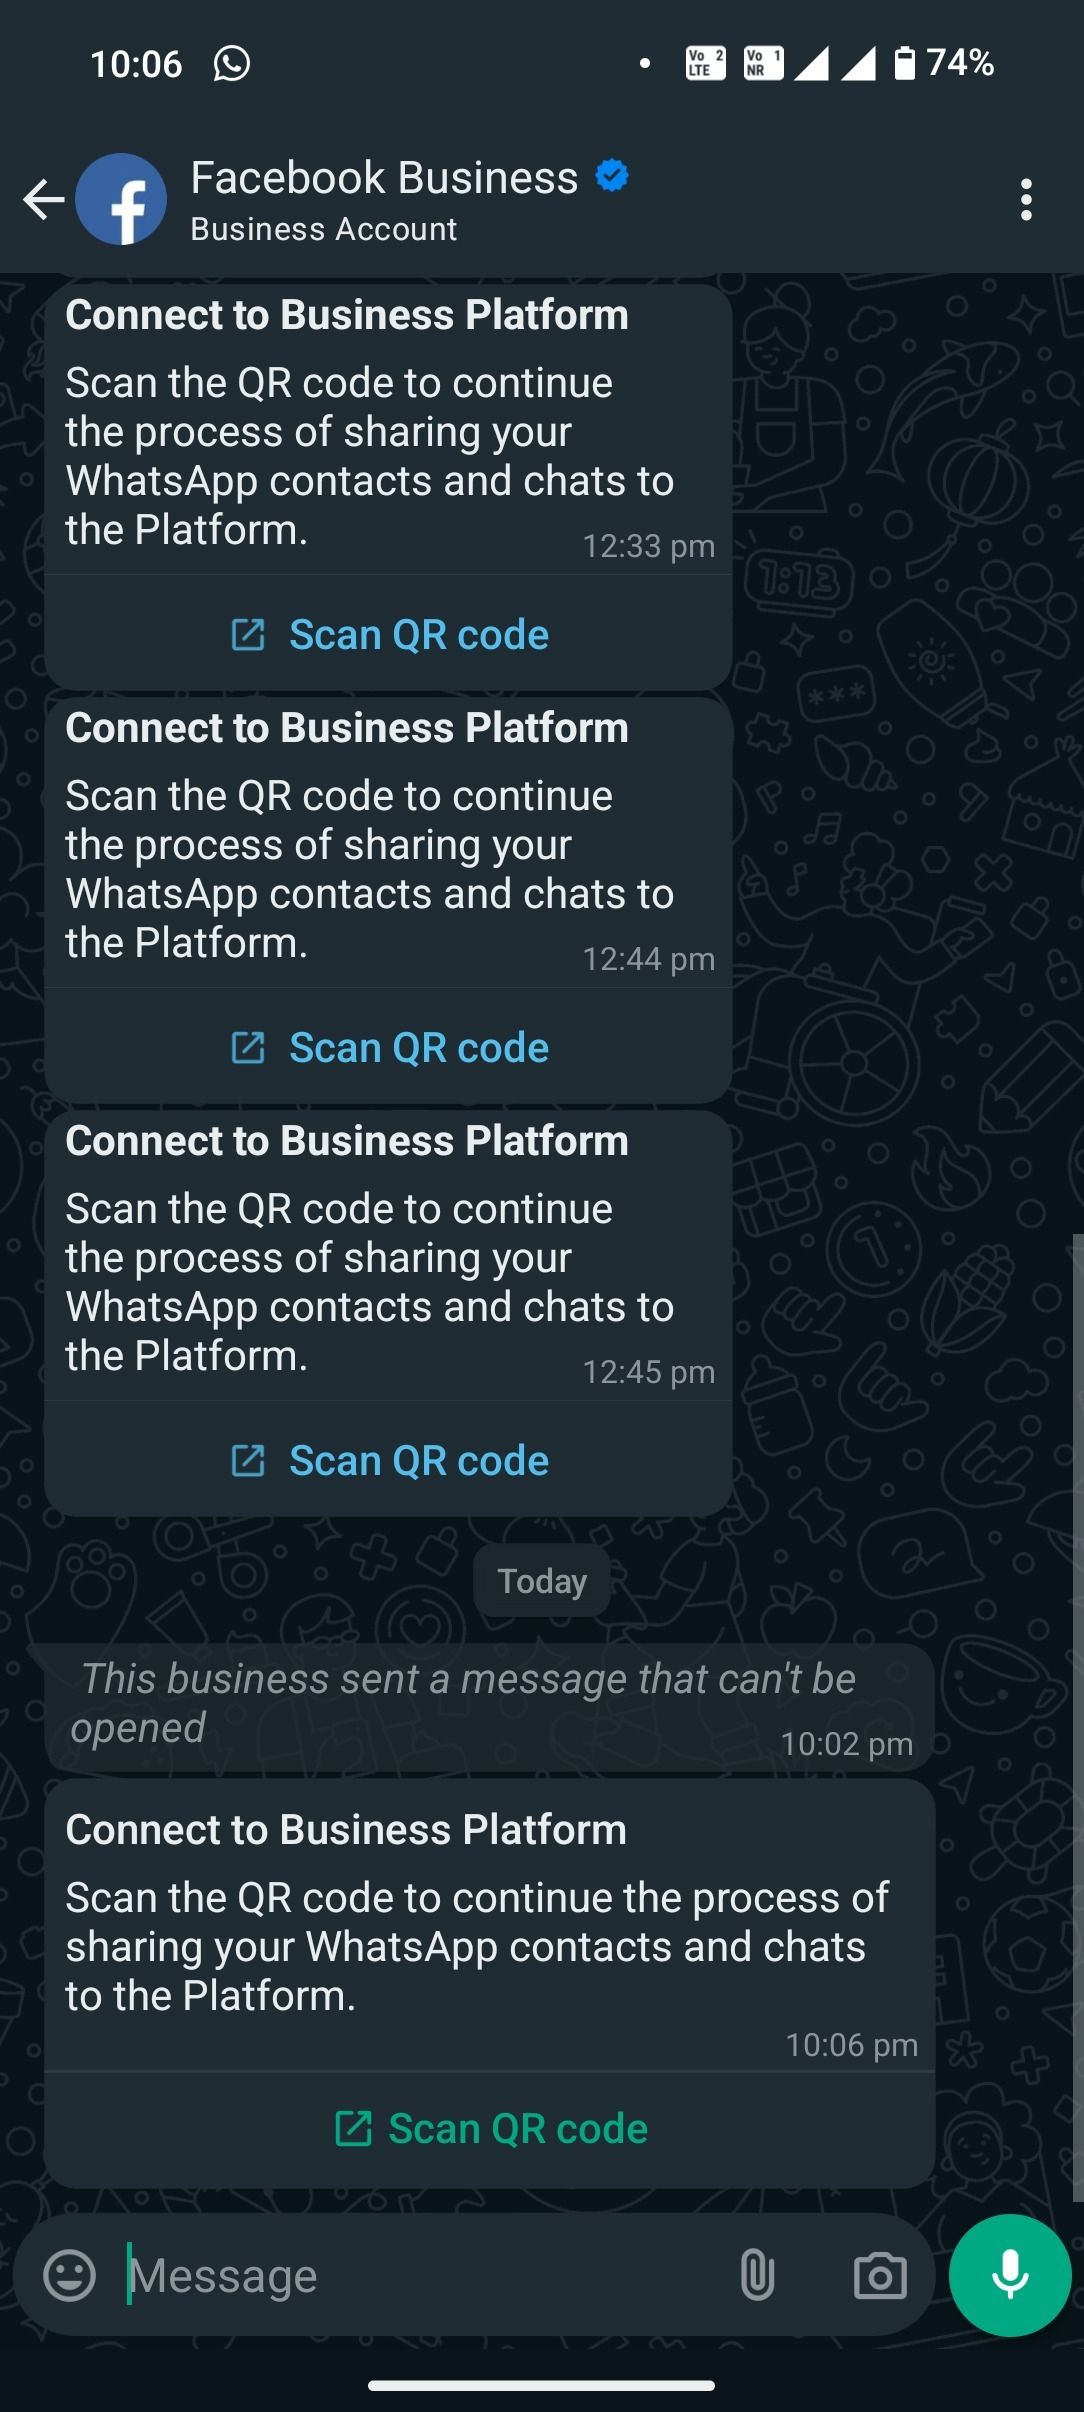
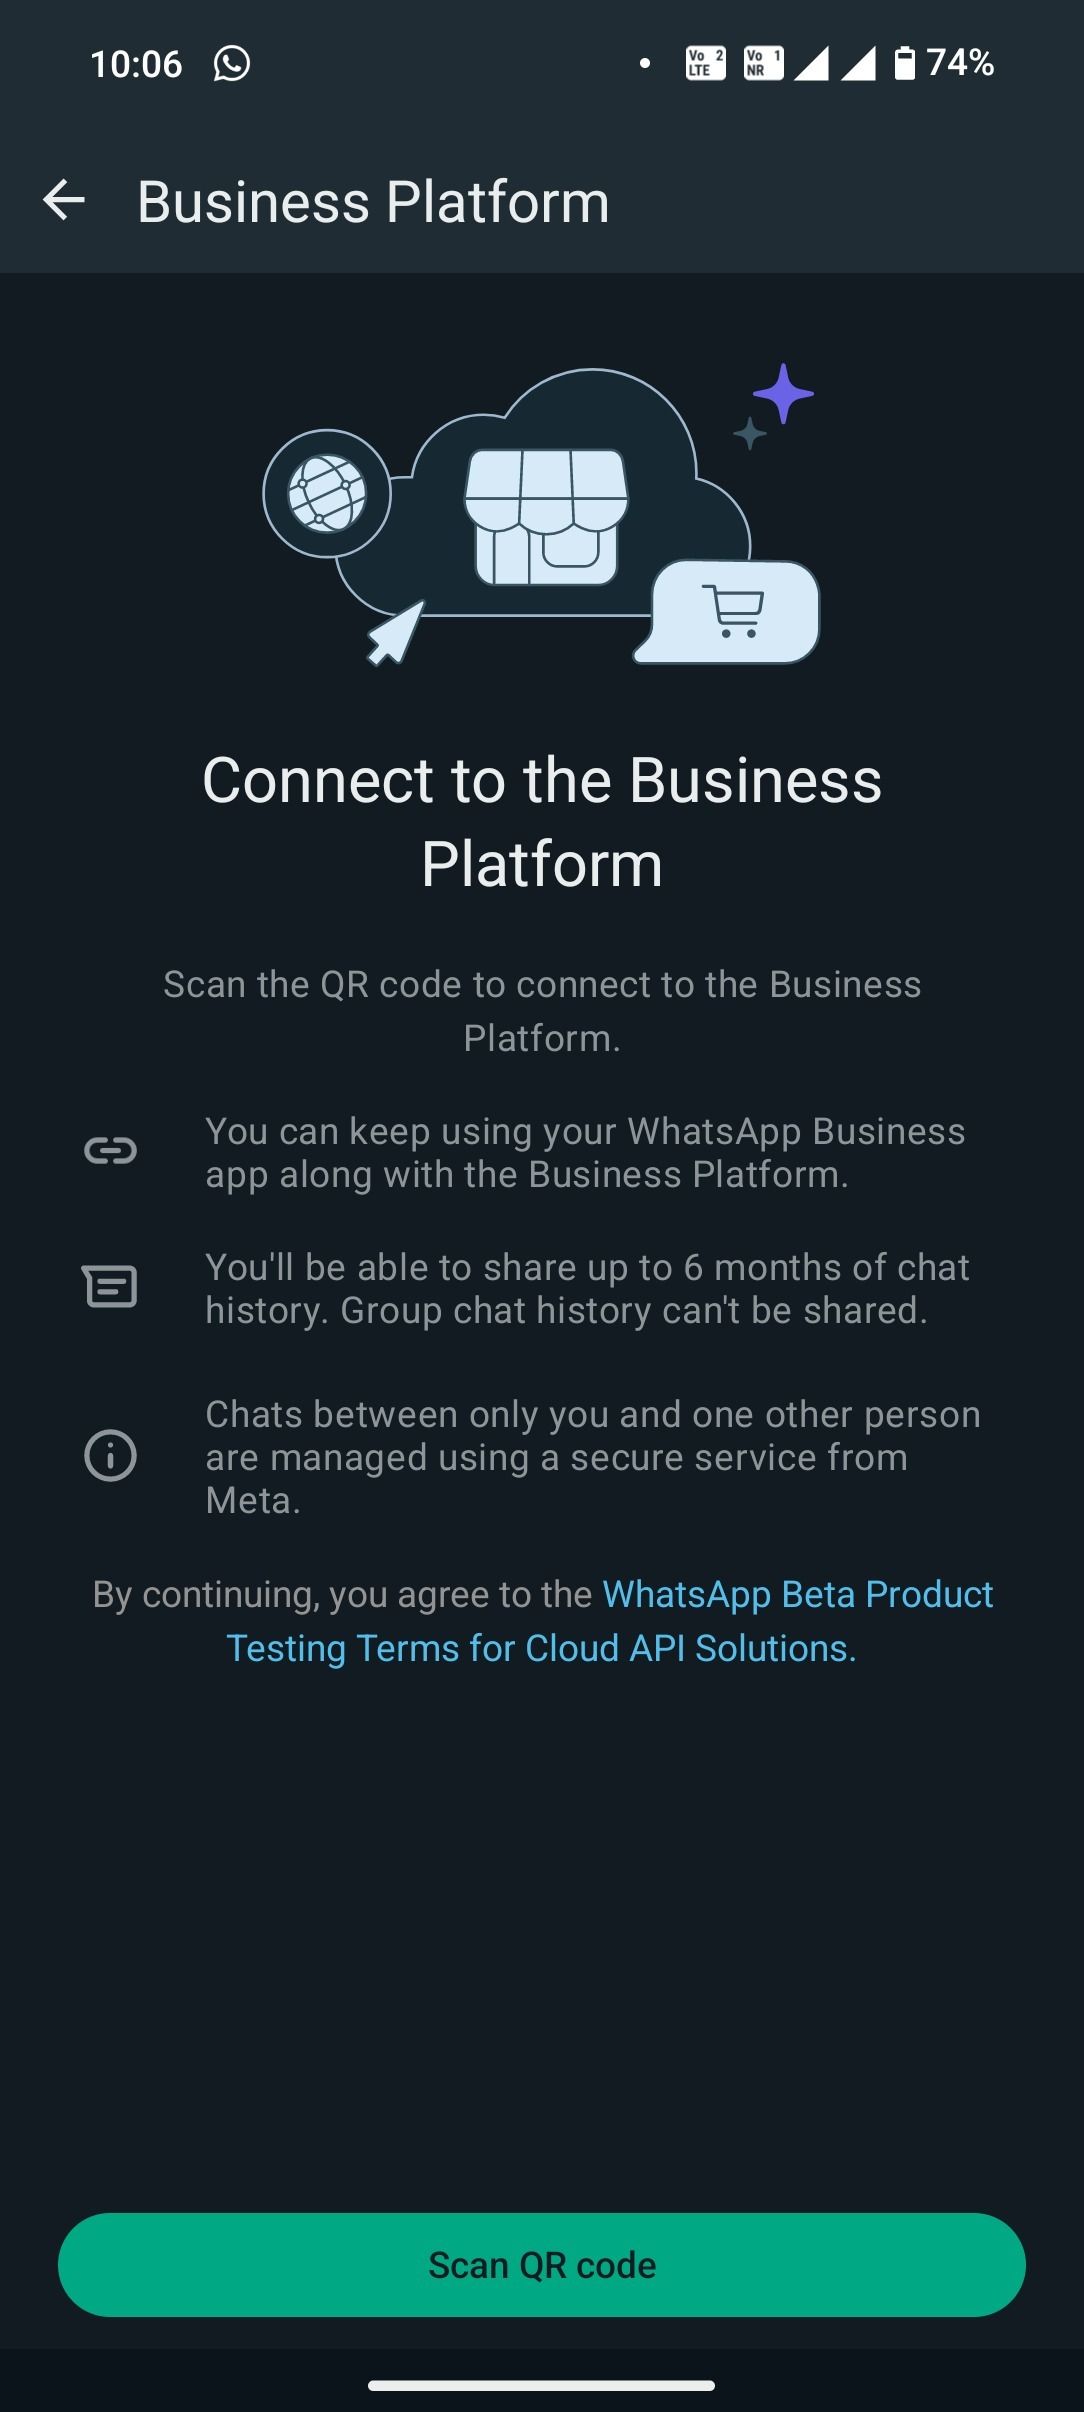
Step 10: Connect to the Business platform
Scan the QR code to finalize.
You can continue using the app.
Step 11: Synchronize contacts and history
Your conversations and contacts will be synchronized with LeadConnector.
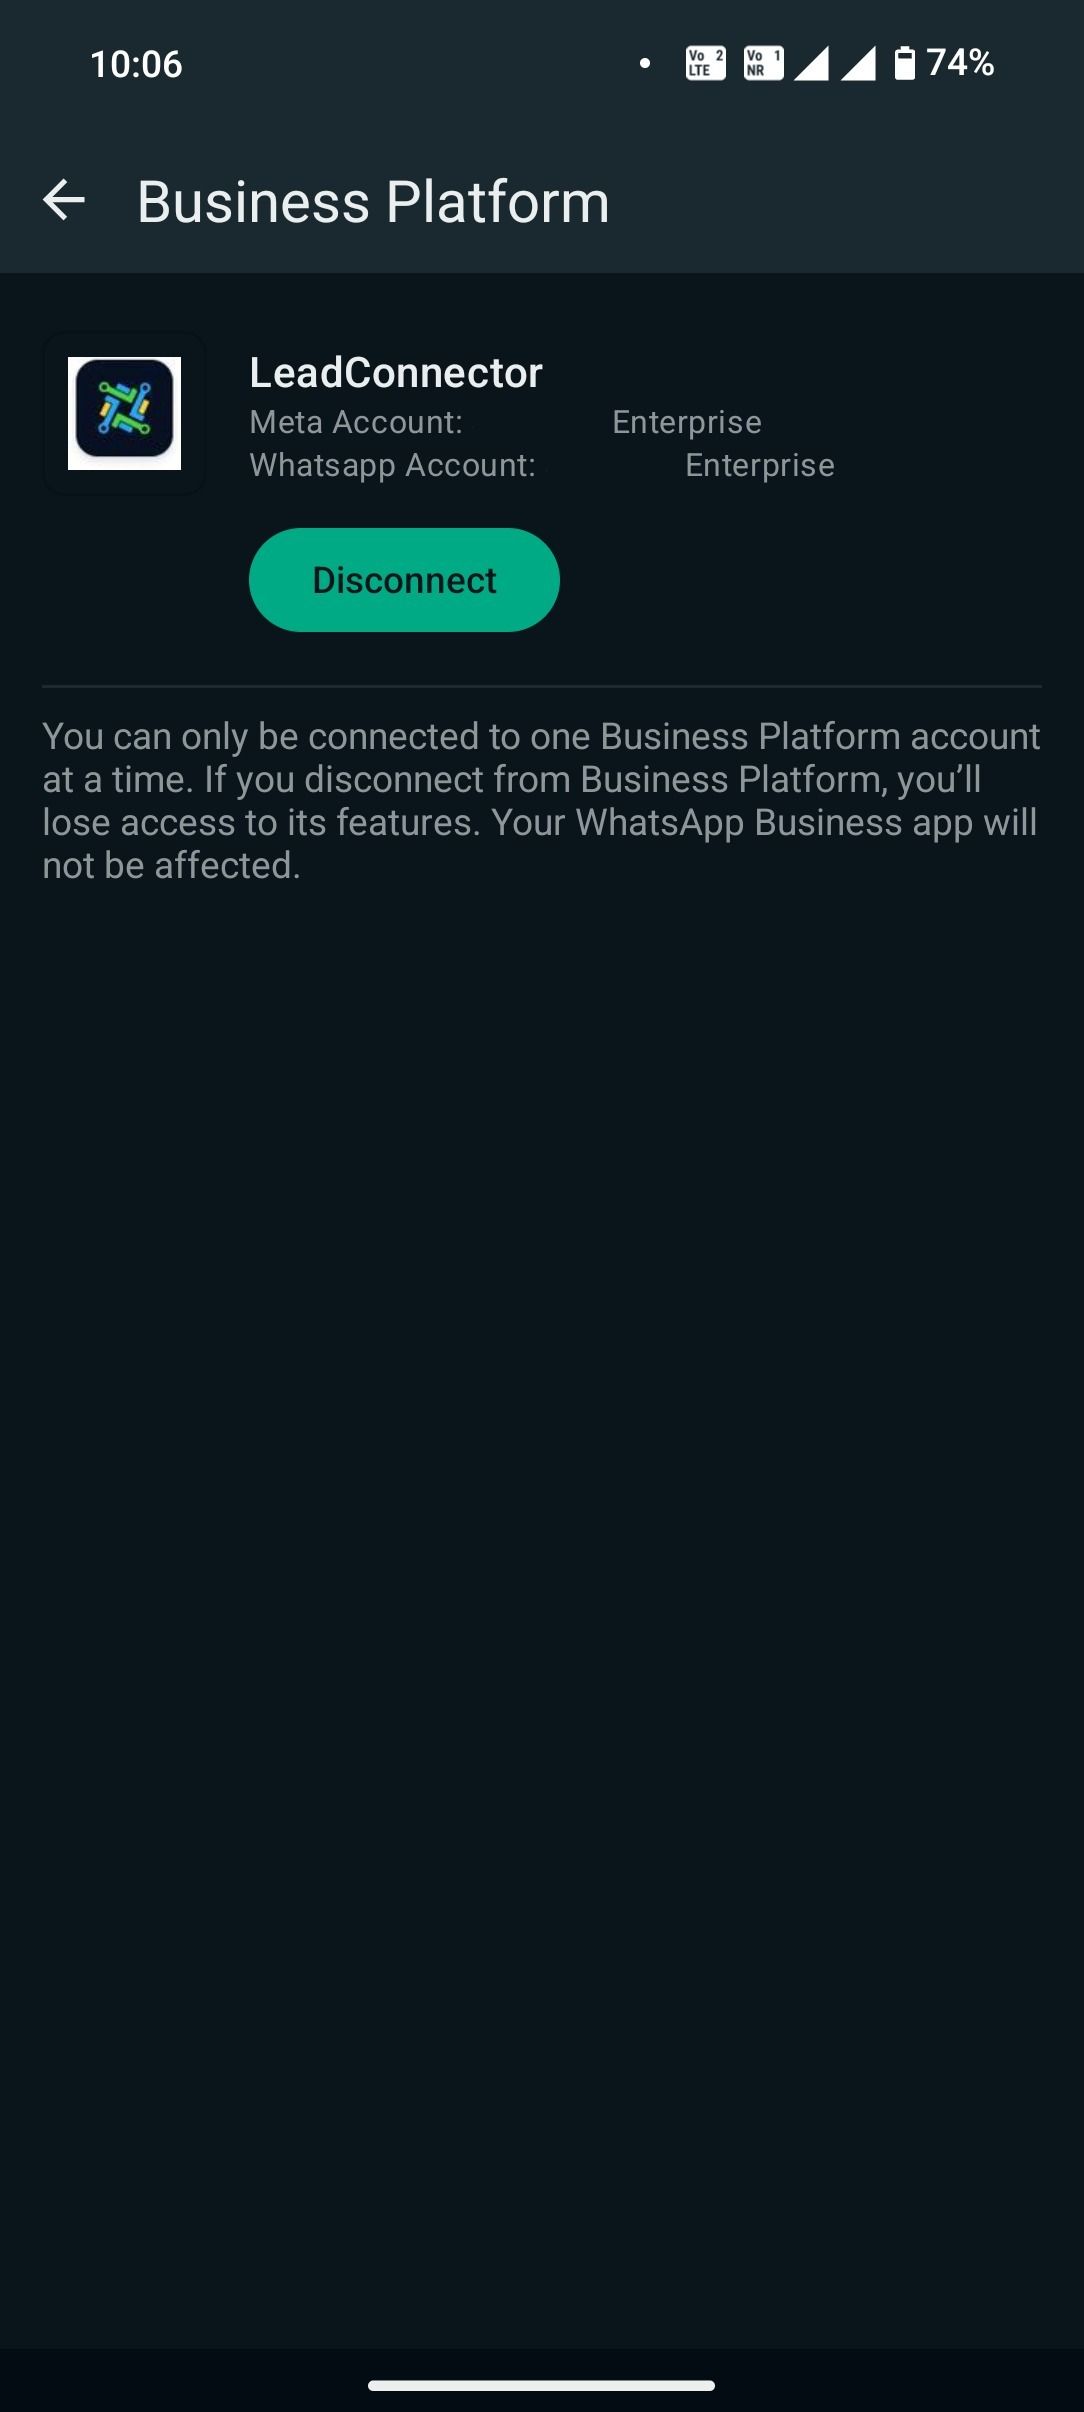
Step 12: Successful integration
Your WhatsApp Business app is now connected to LeadConnector.
⚠️ Important notes:
Template messages must be sent from the CRM, not the app.
WhatsApp profile management is only possible in the app.
Only one coexistence per number is possible.
FAQ
1. Can I use the same number on the WhatsApp Business app and on CrocoClick?
No. When a number is migrated to the WhatsApp Business Platform (the API connected to CrocoClick), it is no longer accessible in the classic app.
2. I get the error "Number already linked to a WhatsApp account." What should I do?
Delete the active WhatsApp account on your mobile: Settings > Account > Delete my account.
Or create a new WABA account and migrate your number.
3. I am not receiving the OTP verification code.
Check the international format of the number, make sure your operator is not blocking SMS/calls, then try again with the other verification method.
4. Can I change my number once it has been verified?
No. You will need to start the process again with your new number.
5. My customers can see the number but not my company name.
Validate your business in Meta Business Manager and your name will then appear in chats.
6. What is the main difference between the WhatsApp Business app and the WhatsApp Business Platform used by CrocoClick?
WhatsApp Business Platform allows automation via workflows, mass campaign sending, multi-user access, pre-approved templates, and CRM integration, while the classic app is limited to manual use on a single device.
Conclusion
WhatsApp, integrated with CrocoClick, becomes a powerful tool for automating, centralizing, and streamlining your communications.
✅ Faster than email
✅ More interactive than SMS
✅ Connected to your CRM workflows
Take advantage of its power to improve customer experience, follow up, sell, and build loyalty.