How to Enable Email Verification for Your Contacts
Enable email verification to remove invalid addresses before sending and protect your deliverability.
Written By Baptiste Lorreyte
Last updated 2 months ago
Email verification checks whether an address is valid and active before any messages are sent. By removing invalid or inactive addresses from your mailings, it protects your sender reputation and significantly improves your deliverability.
Once enabled, it runs automatically in the background—no manual action is required.
🟢 Important: Email verification is a premium service that is deducted from your CrocoClick credit ($0.0025 per verified email address).
Why enable it
An invalid address that bounces damages the reputation of your domain and your IP address. Email providers (Gmail, Outlook, Yahoo) rely on this reputation to decide whether your emails land in the inbox, in spam, or not at all. Verifying your addresses beforehand therefore:
Boost your deliverability rate by removing invalid addresses before sending
Keep your list clean and up to date
Improve your metrics (open rate, click-through rate, CTOR)
Protect your sender reputation in the long term
How to enable verification
Open your Settings
Go to Company Profile → General
Check the "Verify Email" box
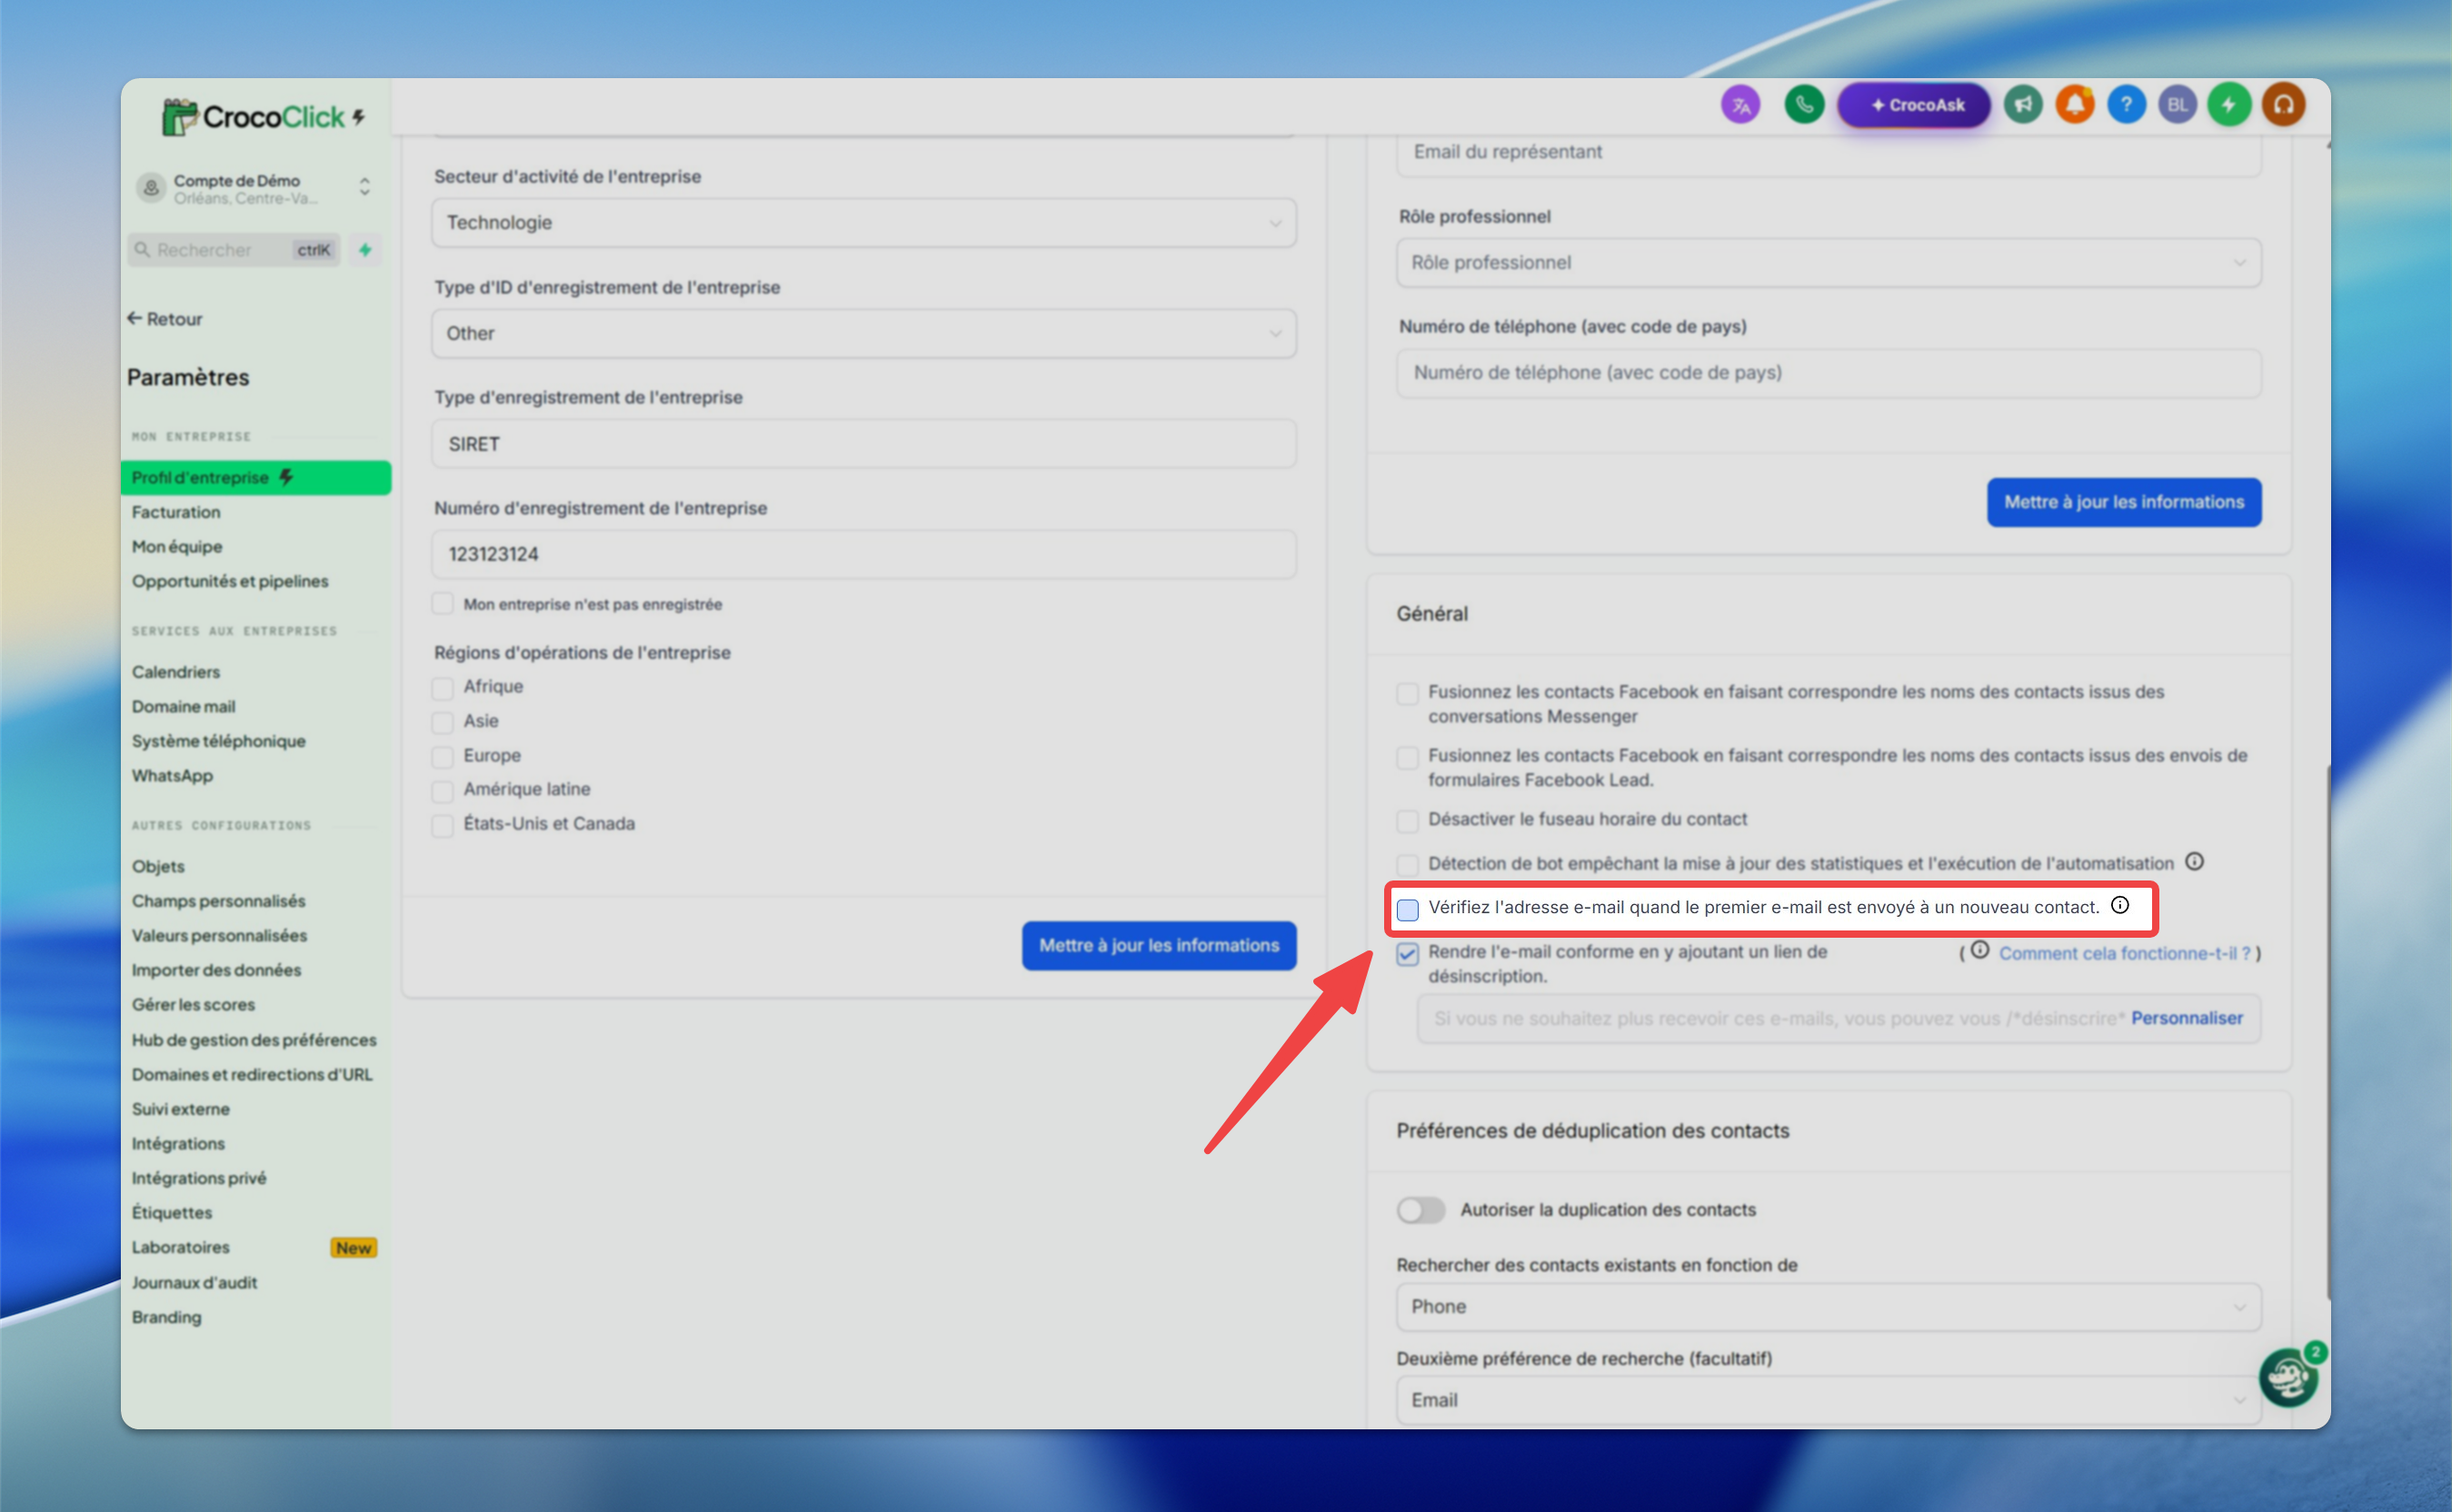
⚠️ Note: When you enable verification, a notification is automatically sent to your account administrator (subject: ATTN: Email Verification Enabled in Sub-Account). Applies to CrocoClick Email only.
💡 TIP: You can also verify an email address directly within your automations, right before the send step, using the "Verify Email" action. This is useful for filtering out emails from a specific automation.
How It Works
When verification is enabled, all email addresses are verified before the first send, if they haven’t already been verified.
The quality of an email address changes over time: an address that was valid six months ago may be inactive today. That’s why your account administrator can enable a re-verification every 90 days. After this period, the address is re-verified before the next email campaign.
Check a Contact’s Status
You can view (or initiate) the verification for any contact from their profile:
Open the Contacts section
Click on a contact to open their profile
Expand the Contact section, then locate the Email field: it displays the verification status
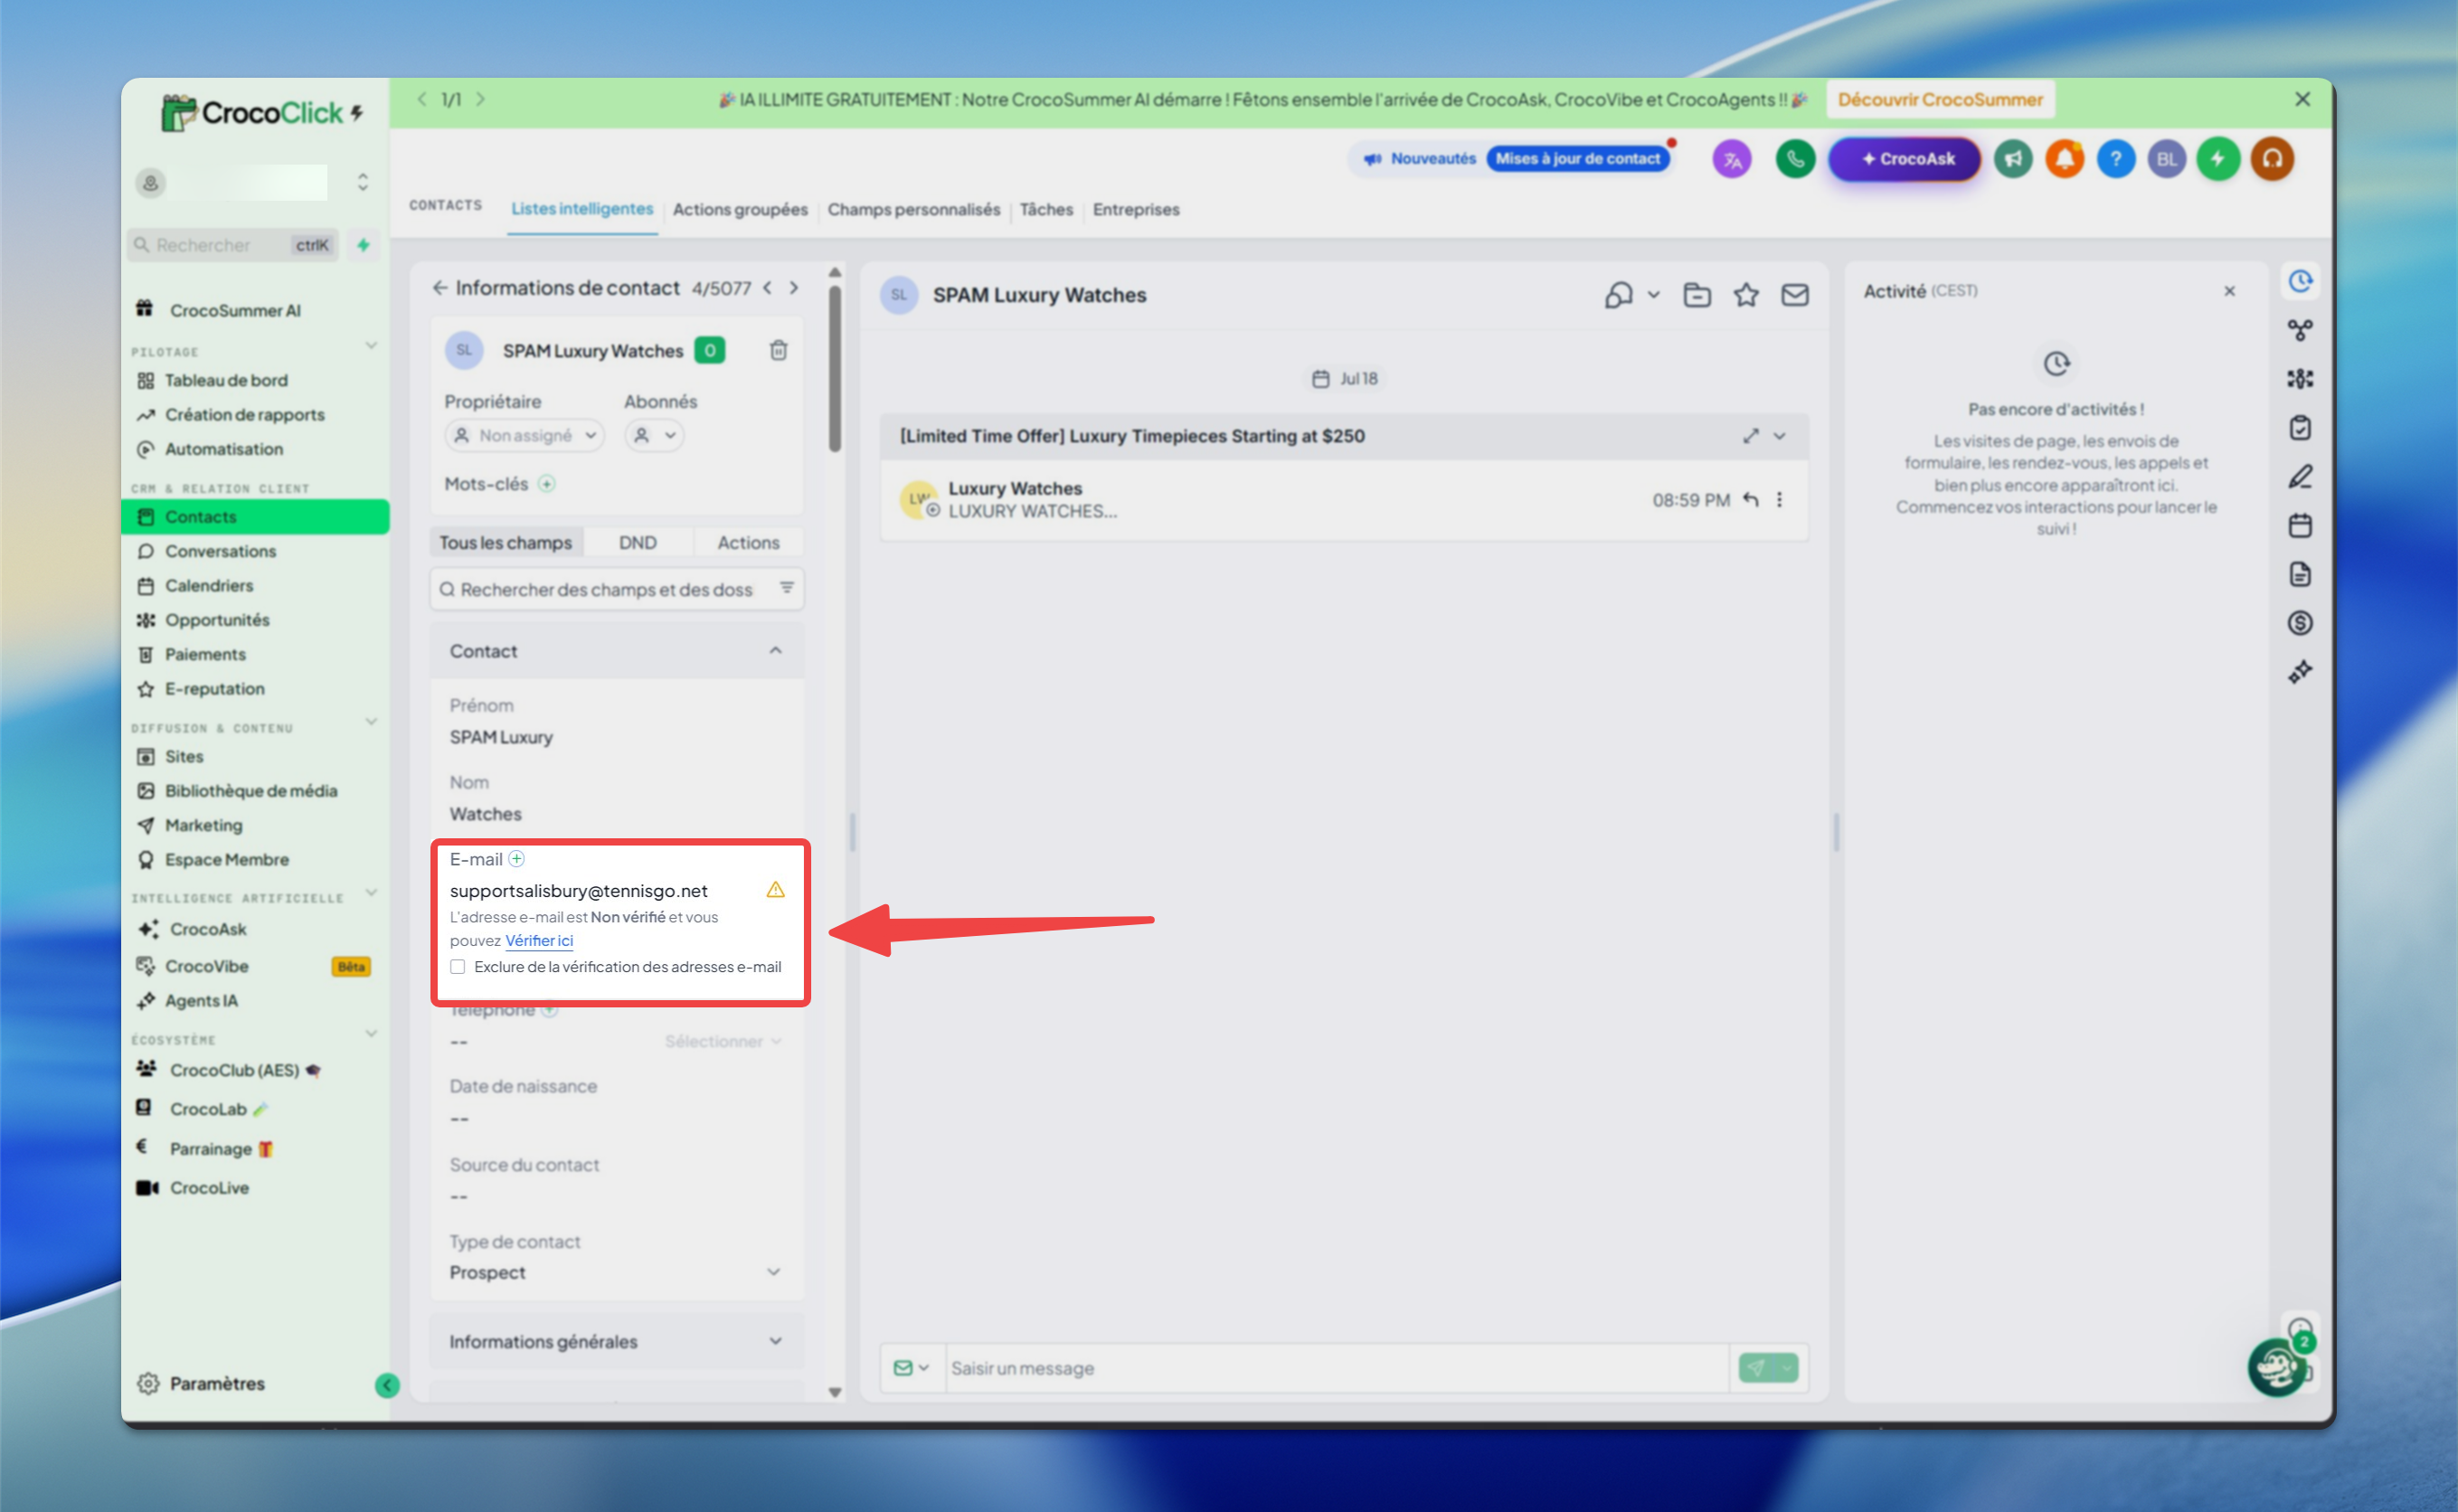
What the verification process actually checks
The service performs three technical checks:
Syntax: The address is correctly formatted (e.g., nom@domaine.com), with no obvious errors or invalid characters.
Domain / MX records: The domain (e.g., gmail.com) is properly configured to receive emails.
SMTP ping (mailbox existence): A connection to the server checks whether the mailbox exists, without sending a message. If the server responds positively, the address is marked as valid.
🟢 Important: Passing these three checks means the address appears to exist at the time of the test. This does not guarantee that your email will reach the inbox.
What the verification does NOT guarantee
The verification is a pre-send check: it does not control what happens during and after delivery. Therefore, it does not guarantee that:
the email won’t bounce (a valid address may be rejected later)
the email will land in the inbox rather than in spam
the address is still active (an email account may be deactivated after the test)
your domain or IP is not on a blacklist
the recipient’s inbox isn’t full or temporarily unavailable
💡 TIP: Think of verification as confirming that a mailing address actually exists on a map. It doesn’t guarantee that the package will be accepted at the door, nor that the person hasn’t moved since then.
Why a verified email address might still bounce
⚠️ Note: Catch-all domains are the most common cause. No verification tool can reliably distinguish a real mailbox from a catch-all, since the server intentionally accepts everything during the test.