How to personalize welcome and login e-mails (received when accessing an offer, training course, community)
Find out how to customize CrocoClick's default welcome and login emails for your members
Written By CrocoTeam
Last updated 4 months ago
In order to allow users to access the customer portal, welcome and login emails containing their login credentials are sent to users when an offer is assigned.
In this article, we will detail two ways to customize these welcome emails.
Option 1: Modify the default emails
The first method involves customizing the default emails. This method is quick and easy, but it has one disadvantage:
The default emails are the same for everyone, regardless of the offer the user has access to.
Here's how to modify these default emails:
Step 1: Go to Subscriptions > Customer Portal > Settings > Email Settings.

Step 2: Go to "Training" and click on "default template" to open the drop-down menu and choose one of your email templates.
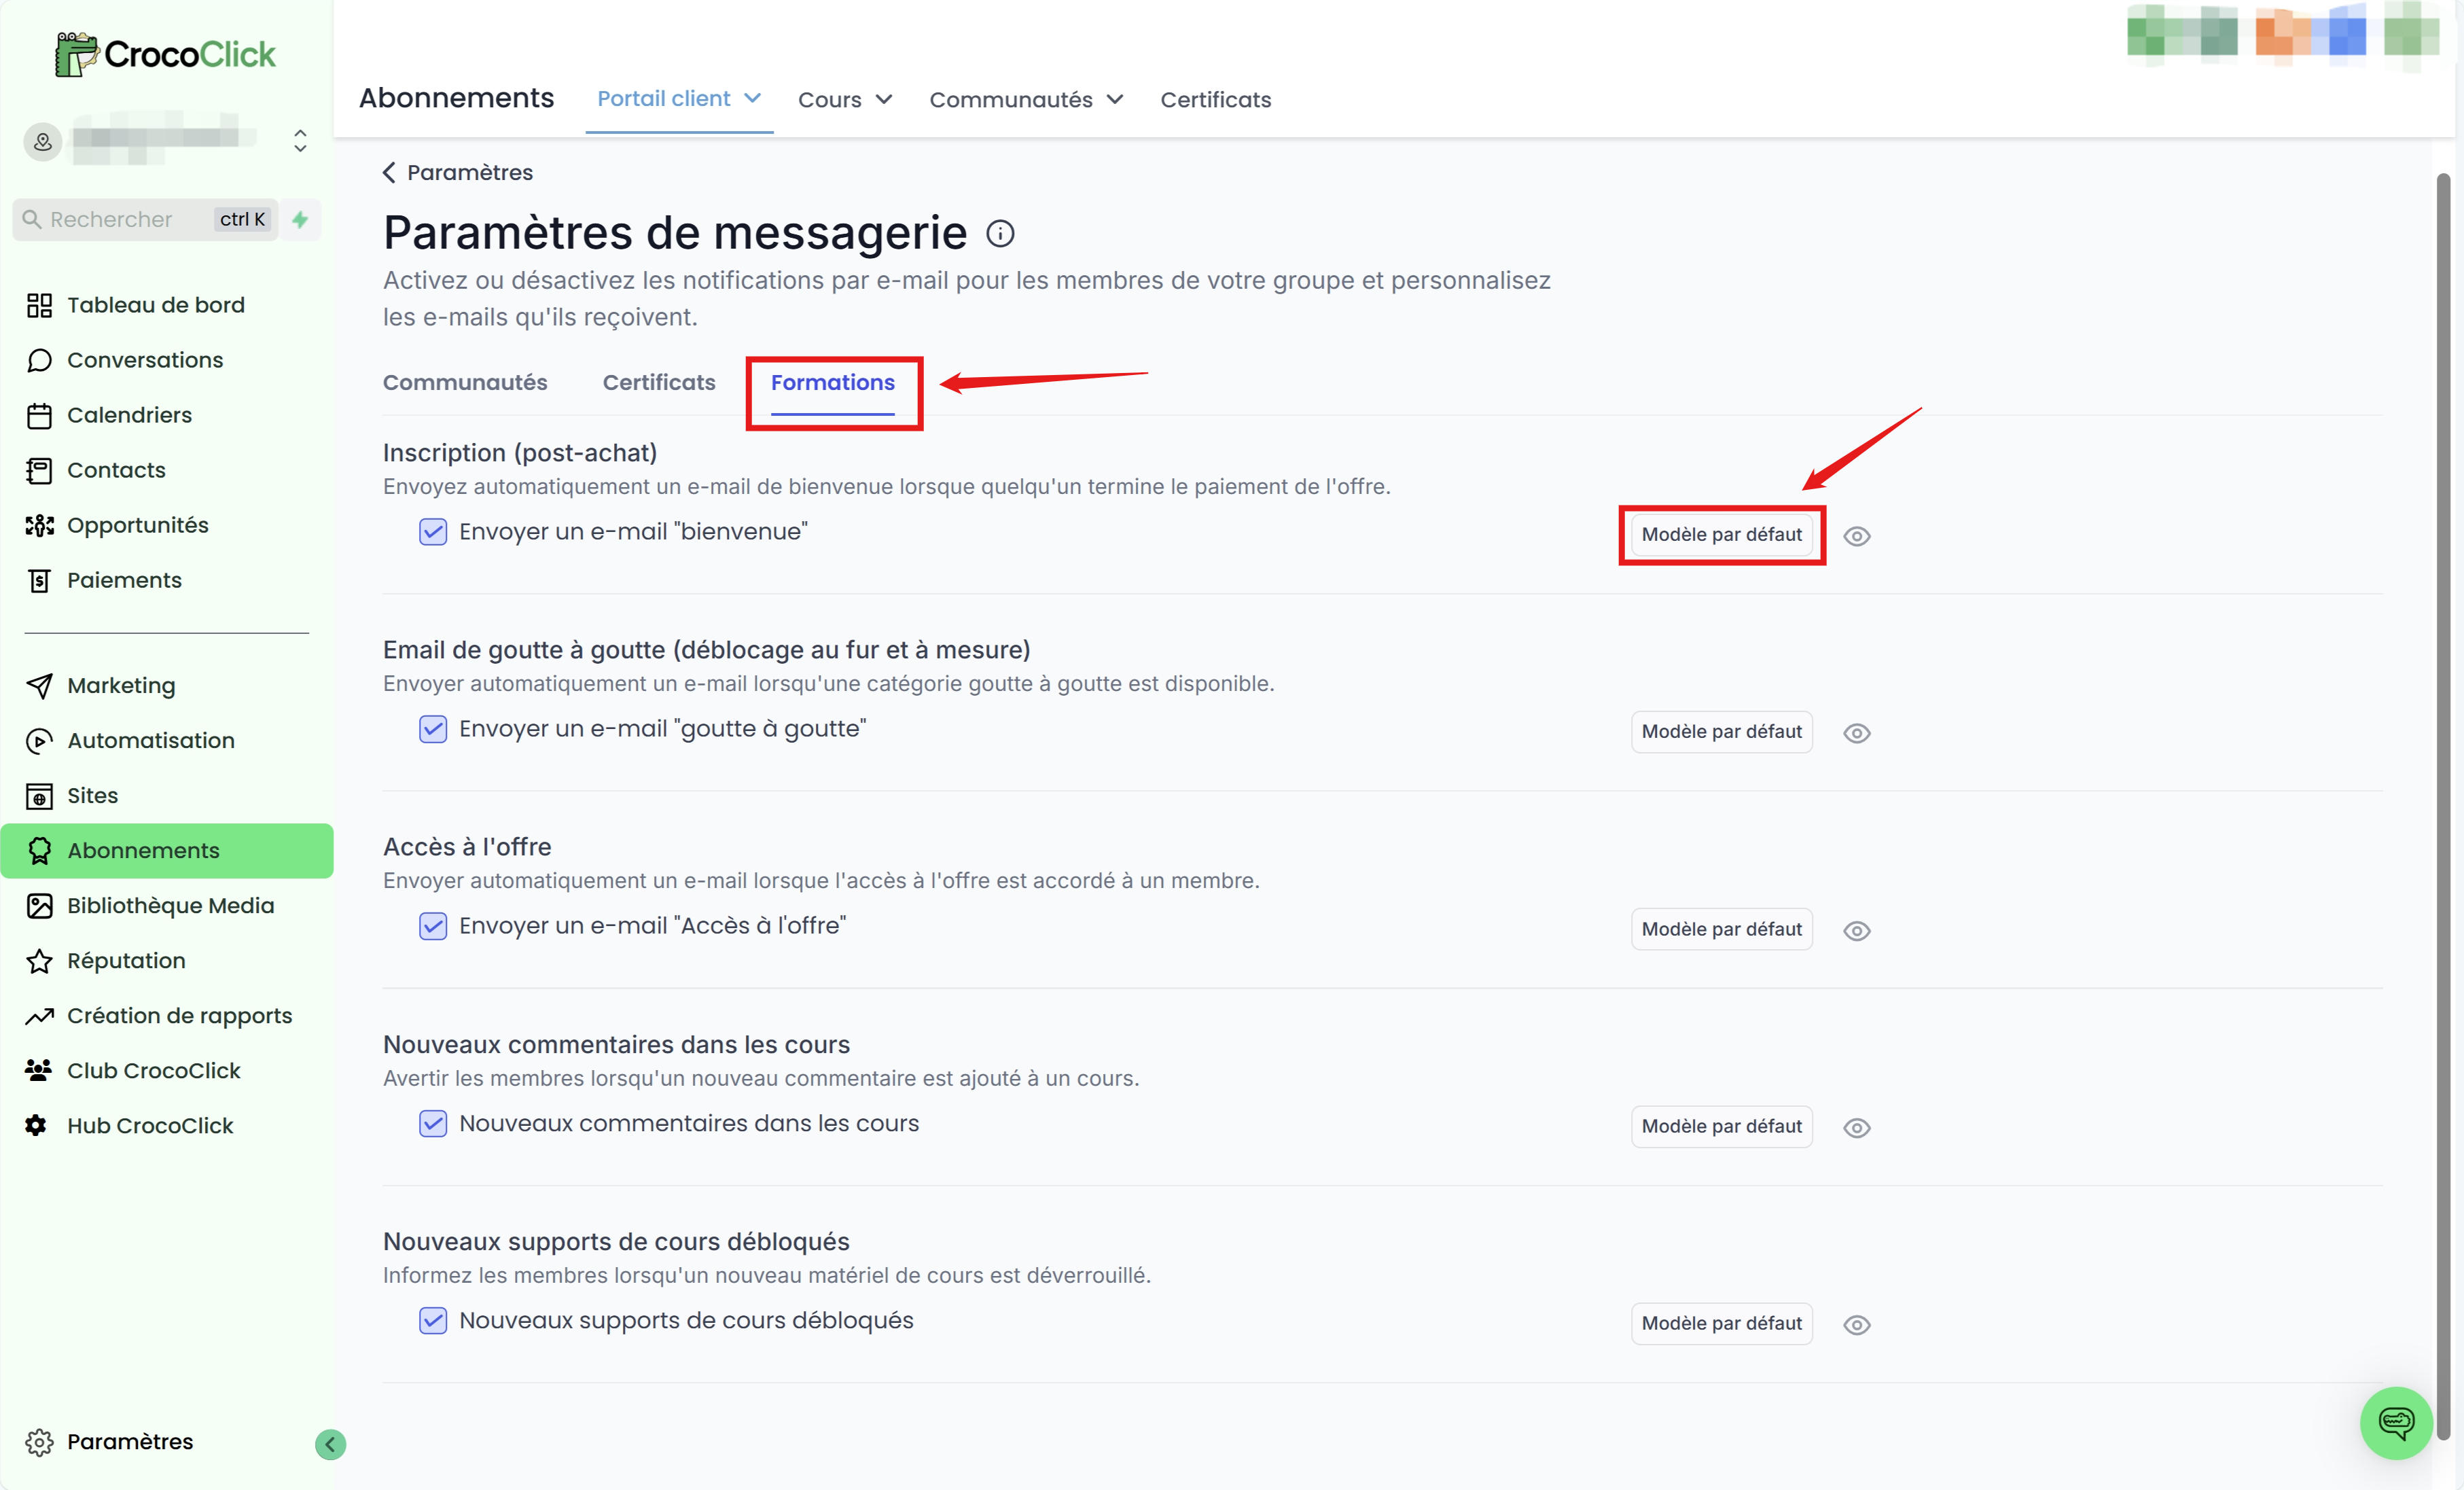
💡TIP: You must create your own template in advance to create a personalized welcome email. Alternatively, you can click on the eye icon to preview the default template.
💡TIP:
The "Registration (post-purchase)" email is sent to people who purchase a product linked to a membership offer (see section 4 of the article "understanding payment products")
.The "Access to Offer" email is sent to people who receive access to a membership offer, either manually or via automation.
Step 3: Save your changes.
Option 2: Create a workflow to send a personalized email
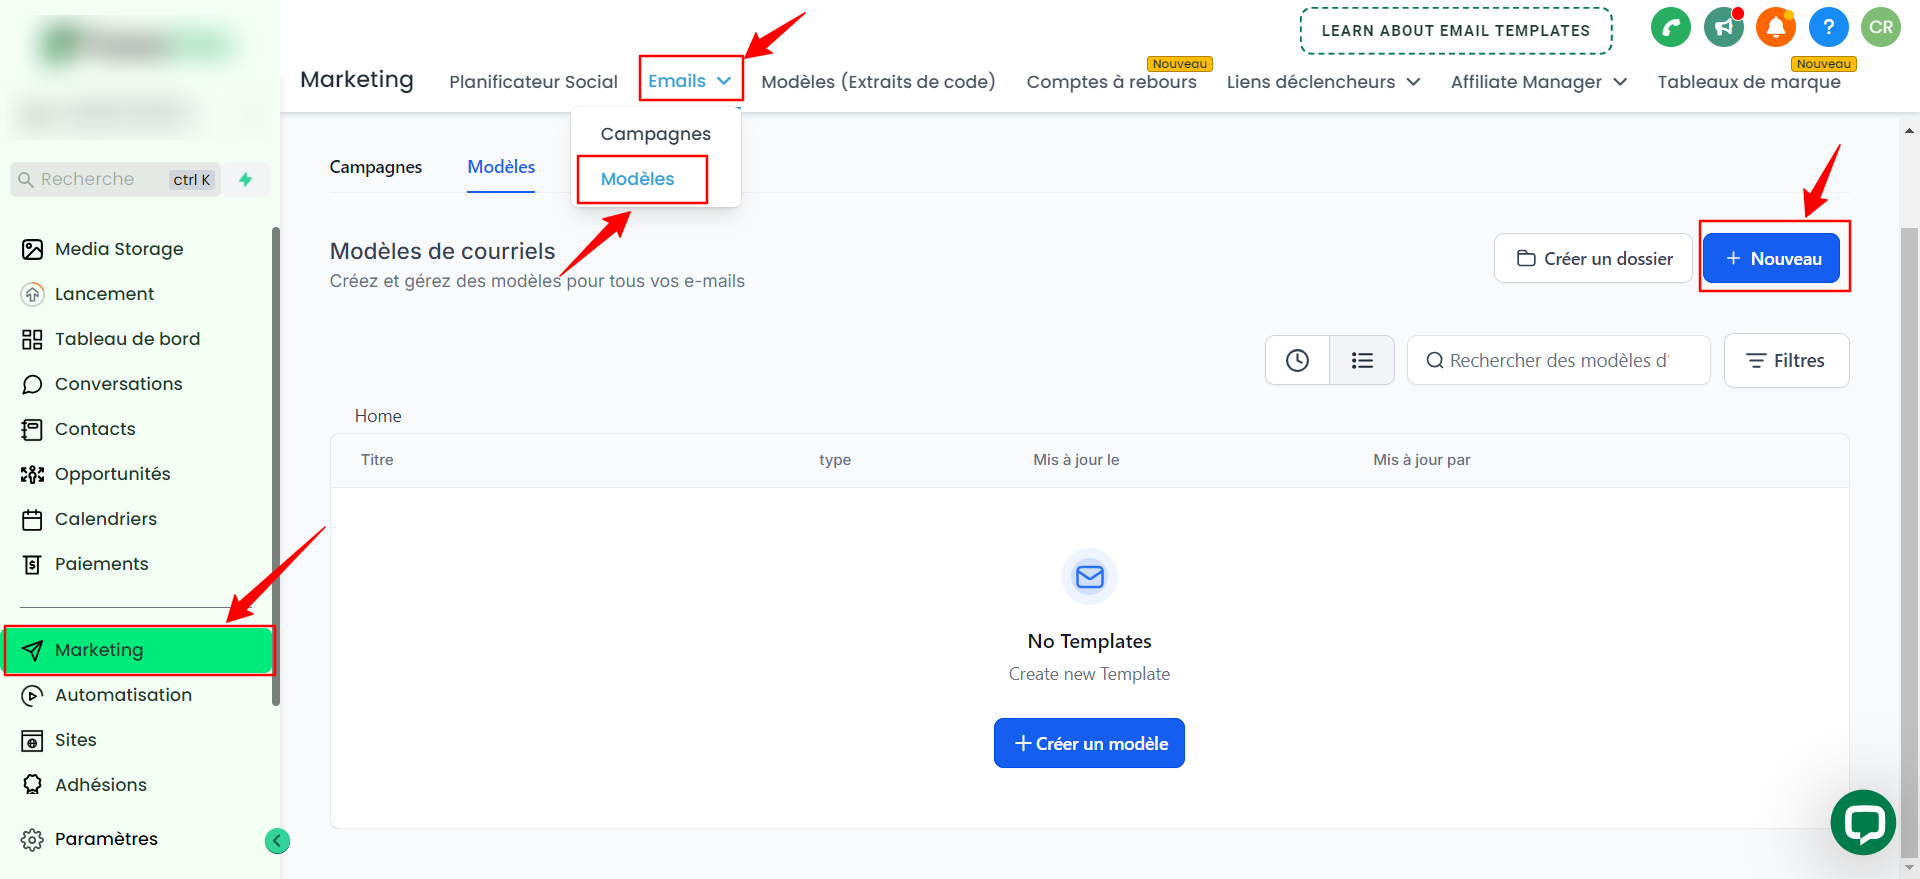
Step 1: Create an email template
Go to Marketing > Emails > Templates > Click on + New
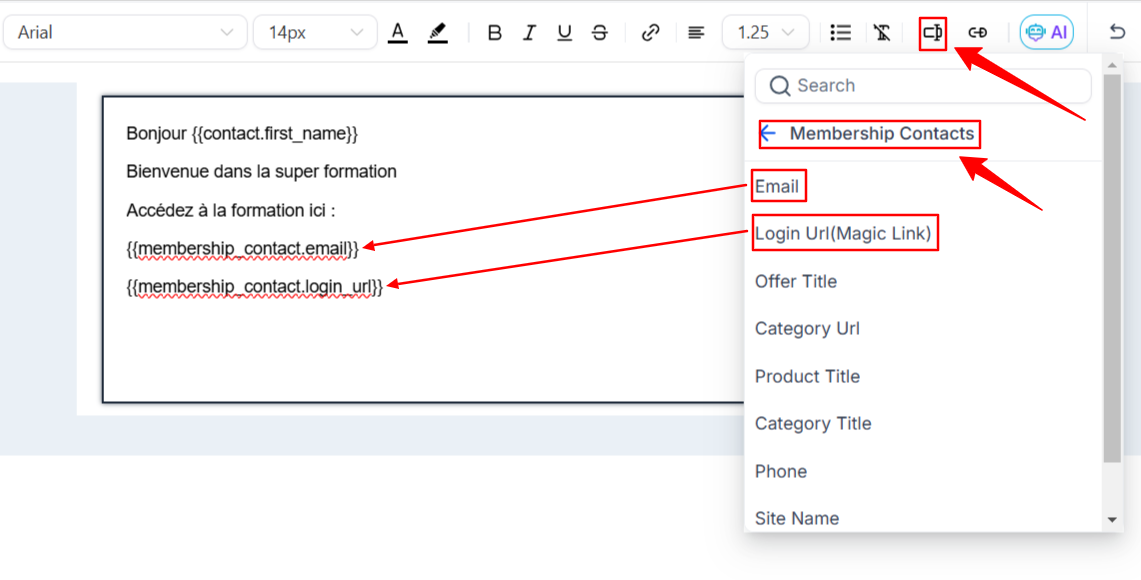
Write a template by adding the necessary "custom values" such as the login URL, email address, and password to ensure that the login credentials are sent correctly.
Custom values are in the Membership Contacts section.
Login URL: Login URL (Magic Link)
Email: email
💡 Tip 1: A magic link is a link that automatically fills in the login information and therefore connects the user without them having to enter their credentials.
💡 Tip 2: Once logged in with a magic link, the user can manually change their password from their member area.
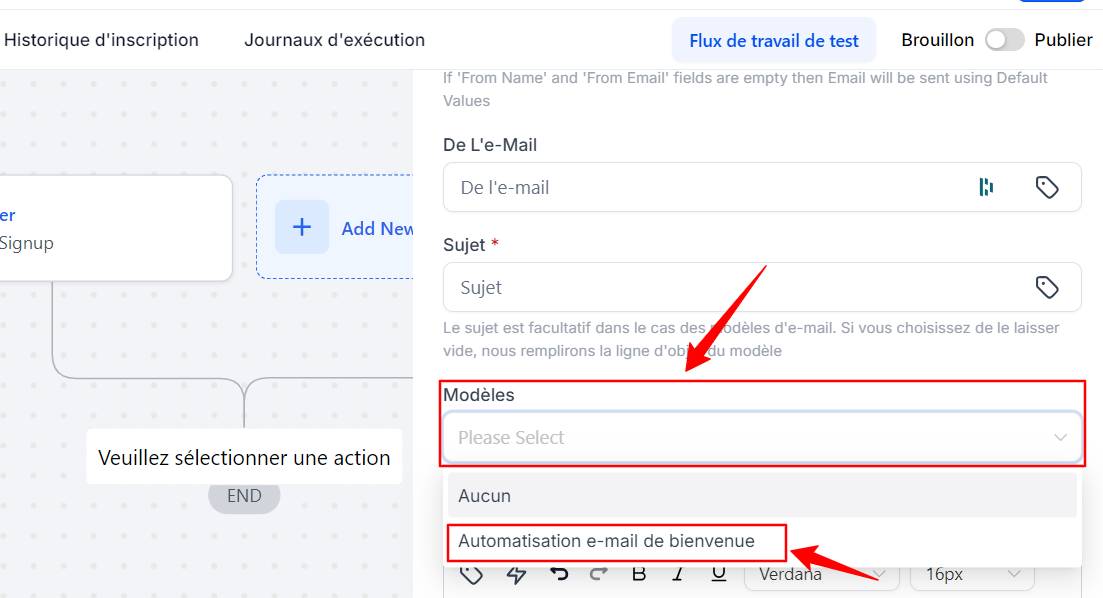
Name the template and click Save Template to confirm the changes.

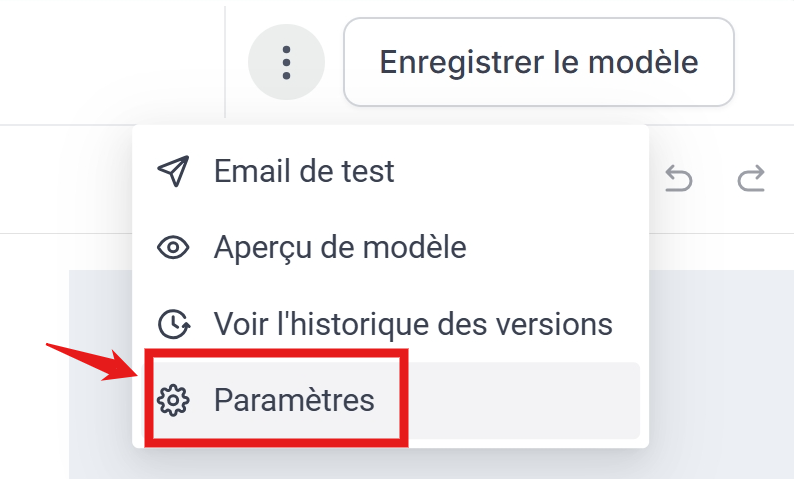
💡 Tip: Don't forget to change the subject line of your email in the settings.
Step 2: Create the automation
Go to Automation
Create or modify an existing automation
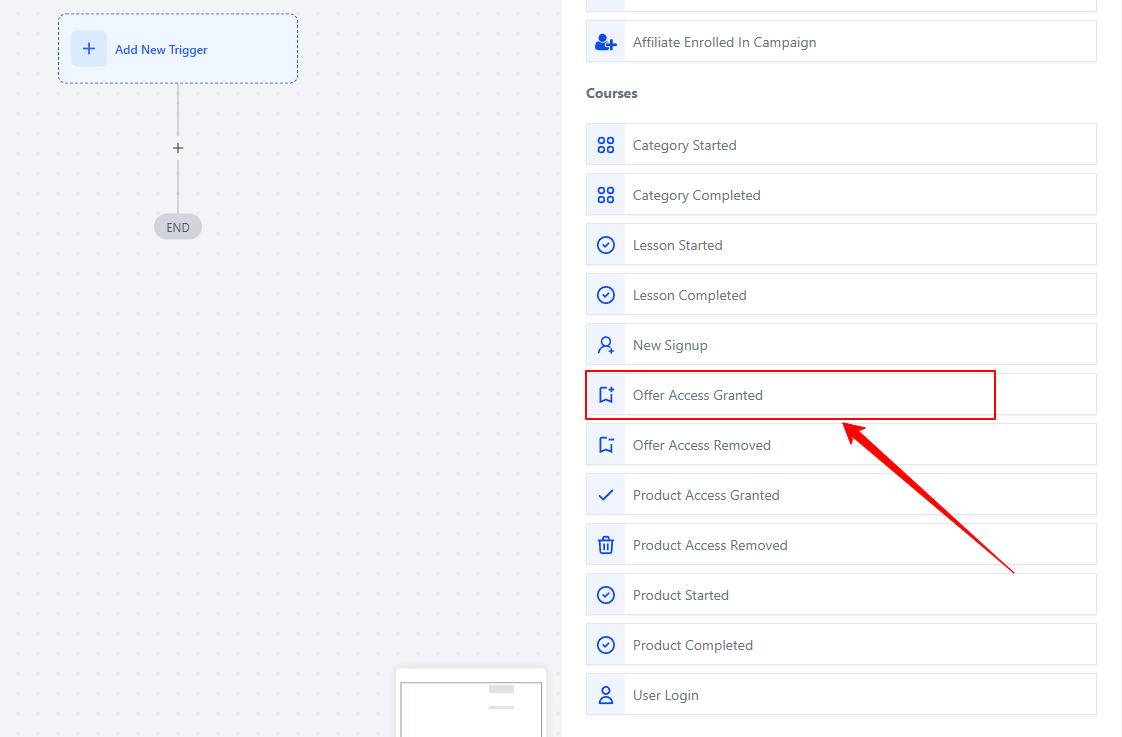
Select the automation trigger "Offer Access Granted"
In Template, choose the email template you created earlier.
💡TIP: It is important that the automation trigger is "Offer Access Granted" so that dynamic variables such as the customer portal link are automatically filled in
💡TIP: If you use this option (option 2), be sure to disable the system-generated email (option 1). Otherwise, both the system-generated template option AND the automation emails will be sent.
FAQ
1. What are custom membership values and how do I use them?
Custom membership values are specific values linked to the member's account, such as their email address and password. These values are located at the bottom of the custom values list and can be placed in the email content to automatically insert the member's login information.
2. Why do I need to disable the system-generated email if I am using a custom workflow email?
You must disable the system-generated email to avoid sending two emails to the new member. If both options are enabled, the member will receive both the system-generated email and the custom workflow email, which could be confusing.
3. Can I use both the system-generated email and a custom workflow email?
Although this is technically possible, it is not recommended as it may result in the member receiving duplicate emails. It is best to choose one method to ensure clarity and a simplified user experience.
4. How can I ensure that custom values such as email and password are correctly included in the workflow email?
When setting up your workflow email, use the custom values from the membership contacts (located at the bottom of the custom values list) to insert the email and login URL.
This ensures that the credentials are correctly filled in the email sent to the new member.
In addition, if you are using the automation method (option 2), make sure that the trigger is "Offer Access Granted."
5. What happens if I don't create a custom template and leave the system on the default template?
If you do not create a custom template and leave the system on the default template, the welcome email generated by the system will be sent to the new member using the default template. However, this template is not visible or editable without testing, so it may not fully meet your customization needs. In addition, this template is in English by default.